S1: Step-by-step-guide using image J in the work flow.

Paul Kalke, Conrad Helm

Published: 2022-04-28 DOI: 10.17504/protocols.io.b2x9qfr6

Abstract

How to use ImageJ in our 3D-workflow from data manipulation, import, segmentation and export as OBJ-file.

Steps

1.

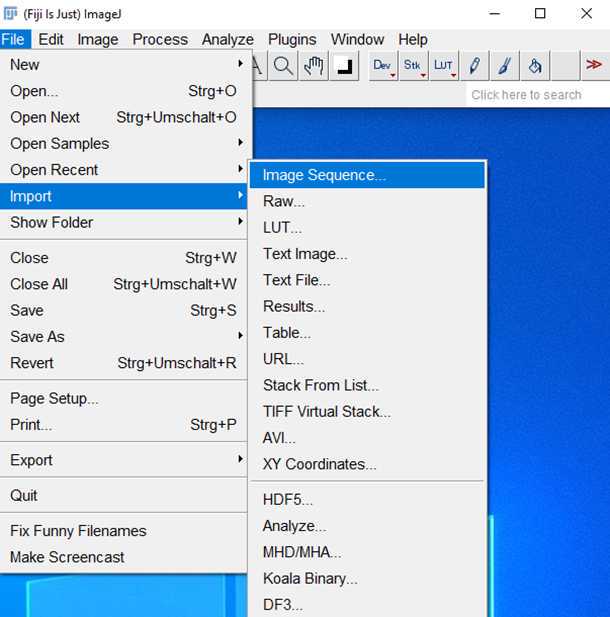
•Open Image J and import your Image Sequence

•It is possible in Image J to transform stacks into Images Sequences and vice versa

2.

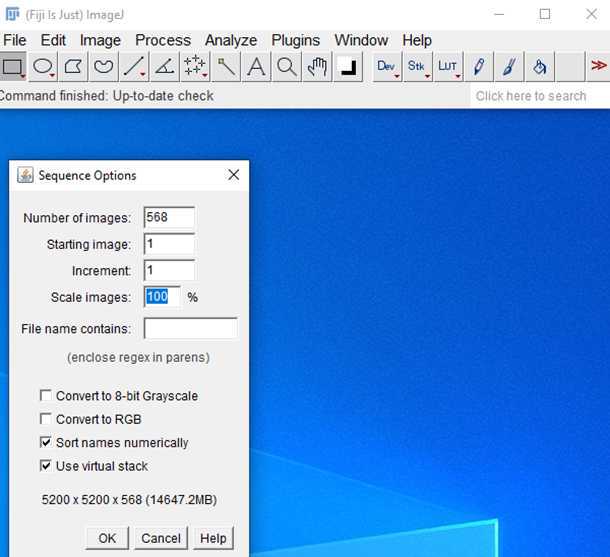
•Make sure your Image Sequenc e starts with 1 and choose Use virtual stack to save RAM

•You can scale your data set down too

3.

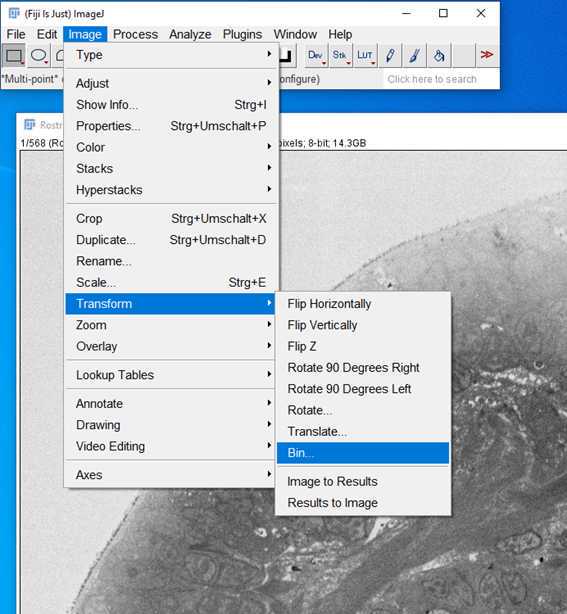
•Make sure your data set is processablefor your computer

•Binning is easy and suitable for reducing data size, here bin2 from 14.3 to 3.4 GB

•Only bin x and y not z

•Save binned data set

4.

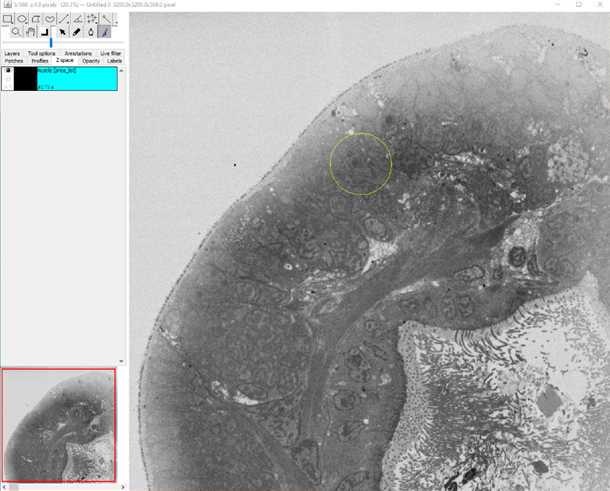
•For segmentation, use TrakEM2

•Open blank

5.

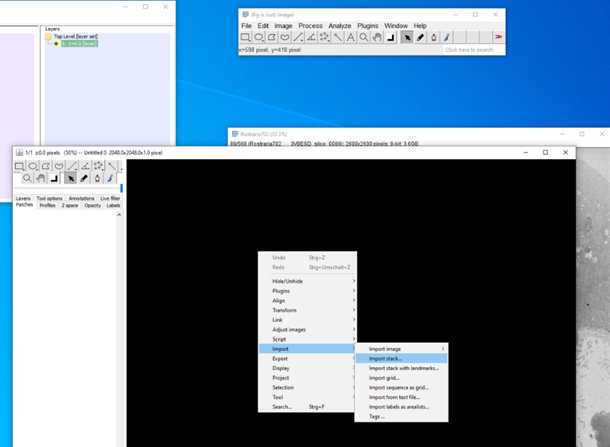
•Import your binned data set by right click in blank (black window) and select folder of binned data set

6.

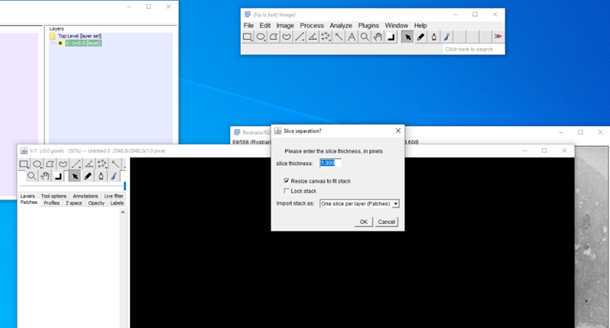
•Choose slice thickness depending on your data set, adjustments are possible in all programs

7.

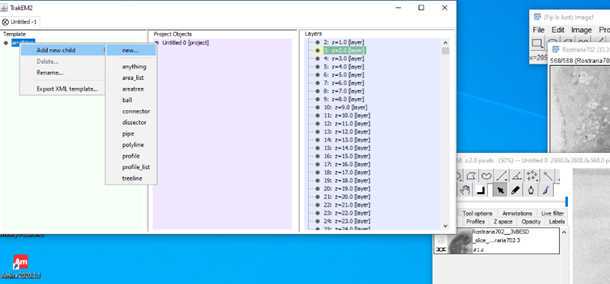
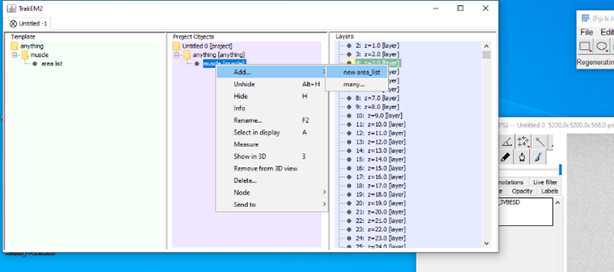
•To create different labels, each for a structure you want to reconstruct, you need a new child and give it the name of your label

8.

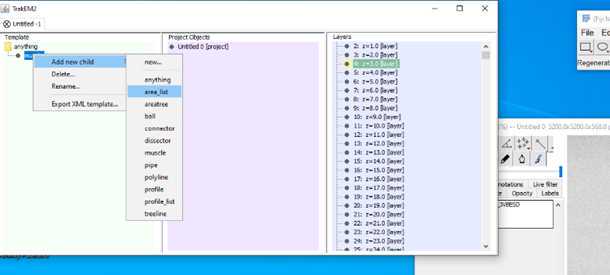
•Then right click on the new child and create an area_list

9.

•Drag ndrop the named folder (child) together with the area_list

•Right click on the area_list and add a new area_list

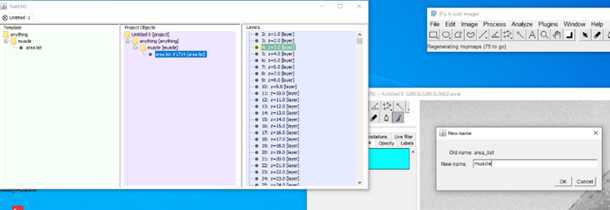
10.

•Name the new area_list like the child in the beginning

•save your Trak EM2 file by press save in main tool bar (.xml-file)

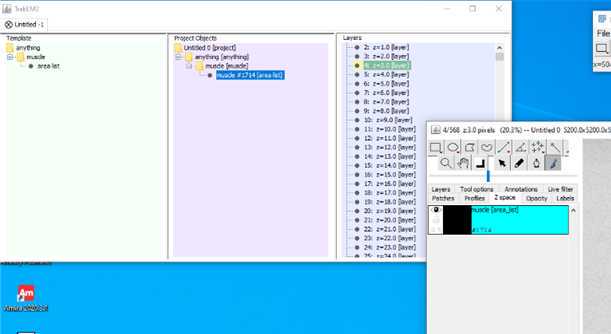
11.

•Now your named label is available forsegmentation under z space

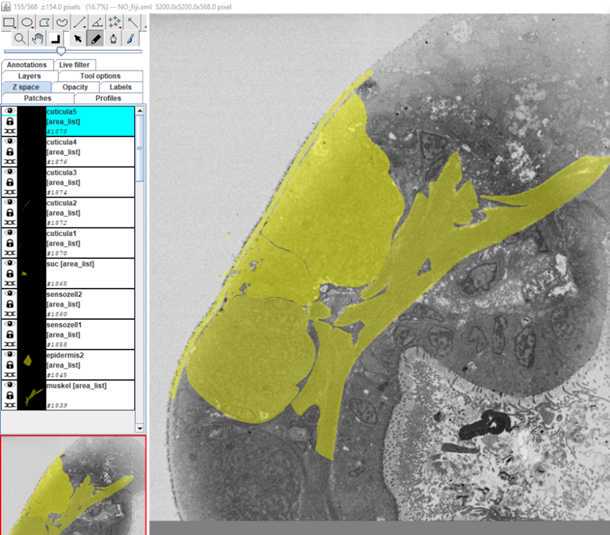
12.

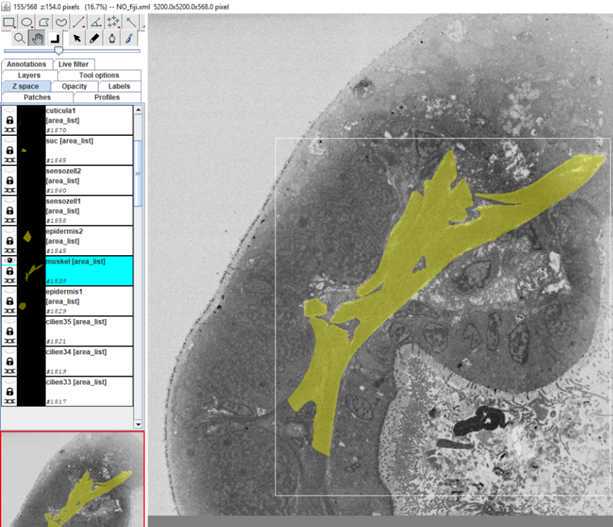
•Now start to segment your structure

•Make sure the brush tool in the main tool bar is checked

•Hot keys and how to reconstruct:

-Mouse wheel (mw); , and . : scrolling through data set

-Ctrl + mw; + and - : zoom in and out

-Shift + mw: size of pen

-Left mouse button (l mb): mark

-Shift + l mb: fill

-Alt + l mb: erase

-Alt + shift + l mb: delete all on slice

-Right mouse button (r mb) – Area: for all kind of interpolations

13.

•after finishing your segmentation it is time to export your labels

•it is possible to export different labels solely, or together, but then they work like one

•e.g. in this example it is smart to export all parts of the cuticle as one label

14.

•hide all labels you do not want to export in this turn by unchecking the eye button in the Z space

15.

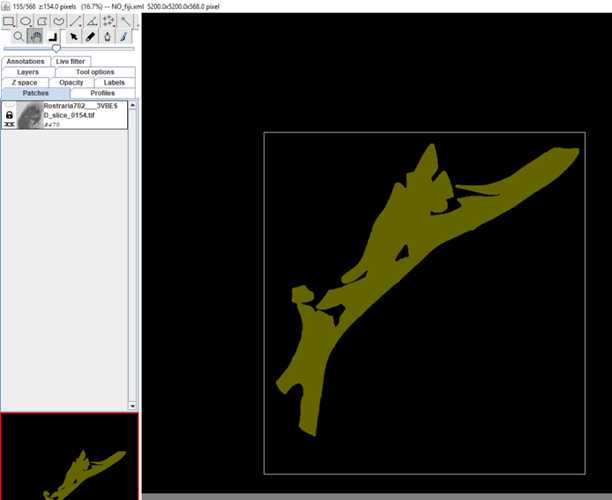
•now turn the "background" black, go to patches and push the fader on top to the left

•now you should only see your marked label, check the whole stack

16.

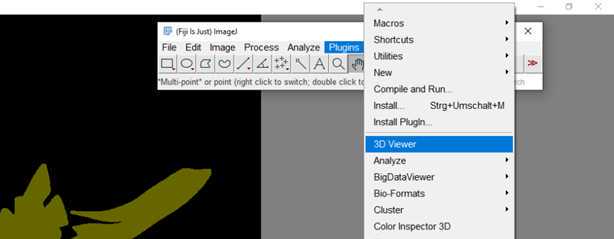
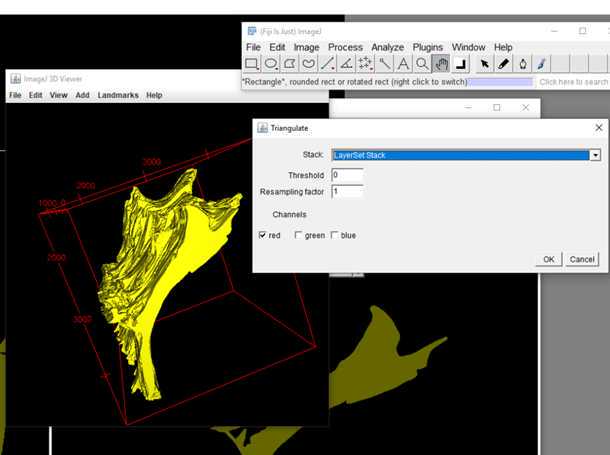
•open the 3D viewer

17.

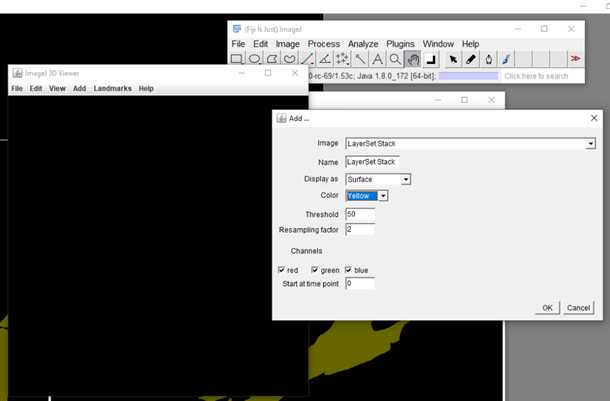
•you can choose in Display as between surface or volume

•for later work with MeshLlaband Blender it doesn´t matter

•if you are not familiar with ImageJ keep the other parameters as in the shown image

18.

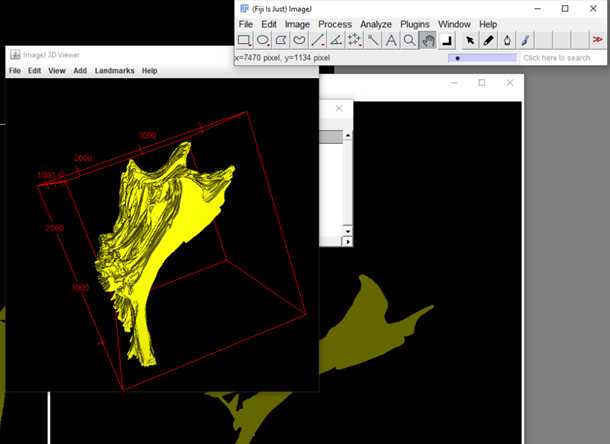
•press ok and wait for the result

•if it is stretched or clinched don´t bother, you can change later or go back to the TrakEM2 window (see last step)

•save label as wavefront -file (.OBJ)

19.

•use parameters as shown in image, press ok

20.

•wait for the little black dot in the main tool bar before you export other labels

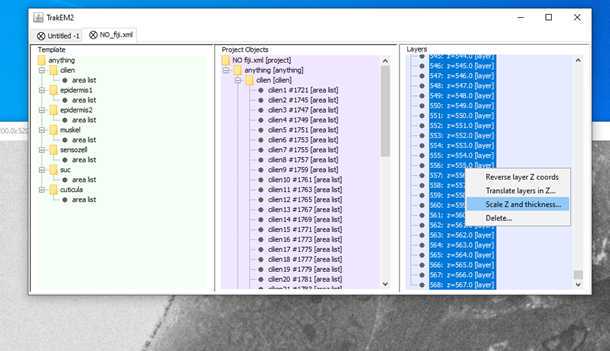
21.

•if you want to change the slice thickness go to Layers of the TrackEM2 window, select all slices and right click

•Choose a factor for all slices

推荐阅读

Nature Protocols
Protocols IO
Current Protocols
扫码咨询