Incell Scanning Protocol
Jason Waligorski
Abstract
Incell Scanning Protocol
Steps
Live Cell Chamber Set Up (if applicable)
If your experiment, start set up 15-30 minutes prior to scanning.
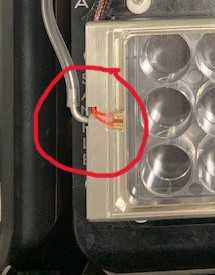
Attach live cell chamber plate cover and CO2 line to Incell plate area.
Open CO2 and compressed valves.
Open live cell chamber software (thermometer icon) and turn on CO2, temperature, O2, Humidity Heater.

After 15 minute stabilization period, verify CO2 and temperature ranges are in spec (TEMP=37C, CO2= 5%).
Basic Prescanning Checklist
Open Incell Software by double clicking the Incell 6500 icon.

Open the appropriate scanning protocol. File→ open → select the desired scanning protocol.
Click the red eject button at the top center margin to open the Incell instrument door on the left hand side of the instrument.

Load the plate in the position labeled sample. A1 position corresponding to A1 position of the physical plate. Verify the plate is seated flush in the sample position. Place live cell chamber lid on plate if applicable. Click the green Load button at the top center margin to close the Incell instrument door on the left hand side of the instrument.


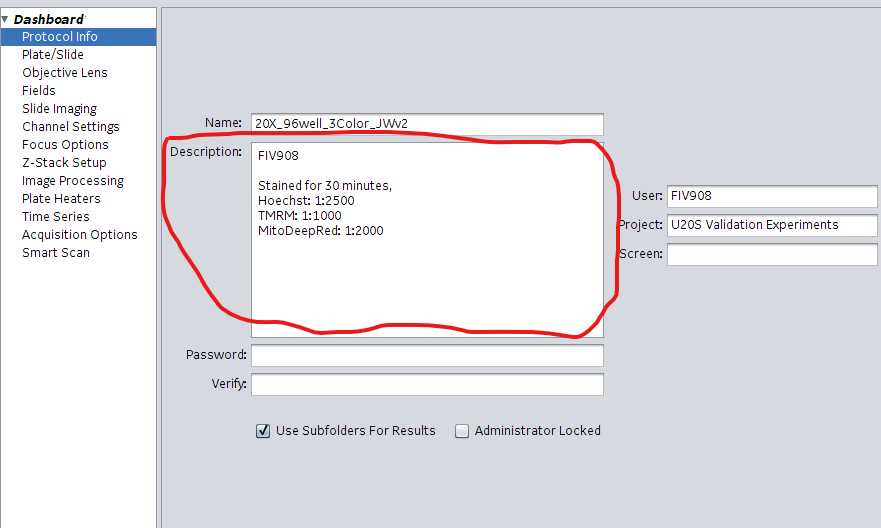
Select Protocol Info in the left-hand margin. Enter pertinent experiment information.
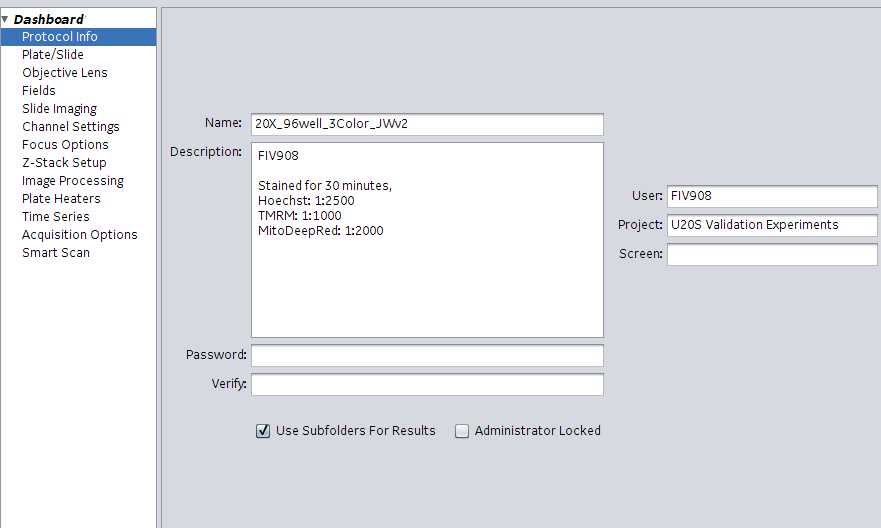
- Name : Name of the protocol
- User : Username or FIV experiment number
- Screen : optional
- Under Description enter various metadata associated with the experiment. Data entered here will be captured in the .xdce file for the scan. Example information to capture: Stains used, stain concentrations and staining times. Experiment ID (FIV###), plating conditions, lot #s etc. Enter the following information in this exact order:
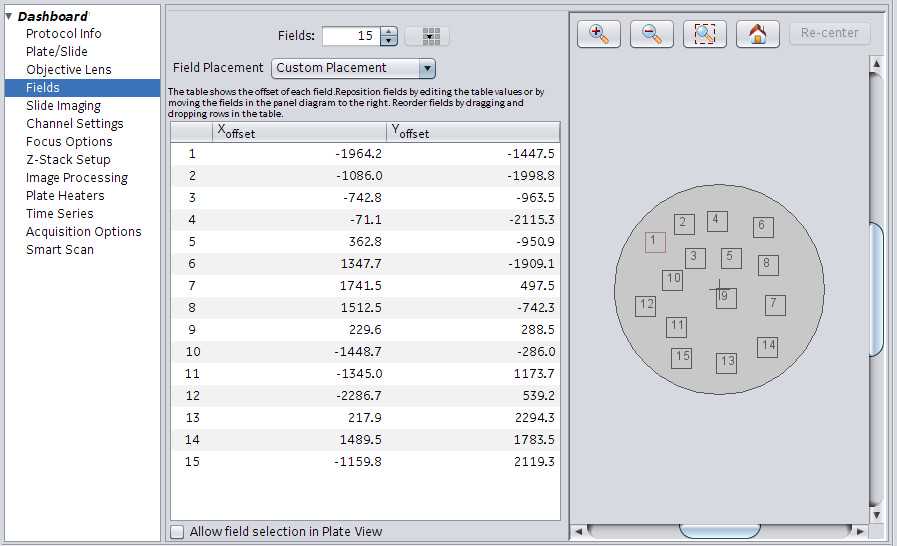
Fields : Adjust the number of fields for a given experiment. After deciding upon a number, you can select the field placement (fixed spacing, Randomized placement, Custom Placement).
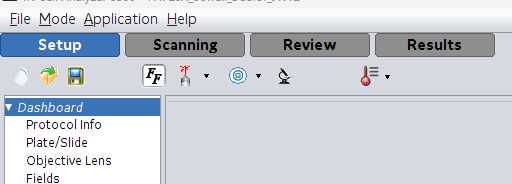
Dashboard . The bulk of the scanning information is set up here.
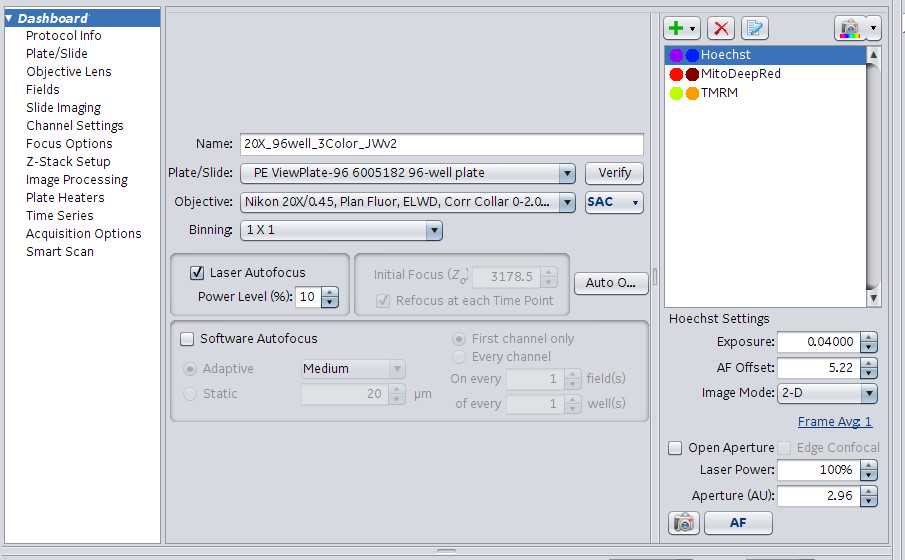
- Name : name of the protocol selected under #1.
- Plate/Slide : Drop down list of existing plate types available to choose from. Select the corresponding plate for the experiment. There is an option to add customized plates if needed. A verify button to the right of this field allows.
- Objective : Dropdown list of the objectives available in the instrument. Please select the desired objective for you experiment.
- Add/Remove scanning channels by clicking the green + or red X to the right of the Name, Plate/Slide/Objective fields. Rename each channel (originally labeled with color(blue, green, red, far red, orange) to the corresponding stain (Hoechst, Mitotracker Deep Red or Green, Tubulin Tracker Deep Red, Cell mask orange/green, etc). Make sure channels correspond to the correct laser. Examples include: Hoechst=405, Cell Mask Orange=561, Mitotracker Green=488, Tubulin Tracker Deep Red=642. Edit each scanning channel (right click, select edit) to reflect the correct target type. For example, the blue channel name will be changed to hoechst. Then edit the channel to adjust the target type to Nuclei. Target type options: Nuclei, Cells, Organelles, Other.

Add Screening Channel

Adjust the following settings for each channel:
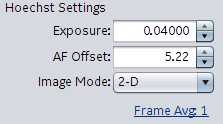
Exposure : lowest exposure is 0.4000. Obviously, the higher the exposure the longer the scan time. Signal should be checked in a few fields for each channel. Click the peak button (Example icon)
AF offset : autofocus offset. Sets the general focal plain when the instrument is performing its offsets.
Image Mode : 2-D, 3-D, Max Intensity Projection (takes a small Z stack)
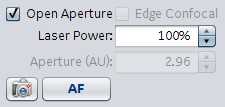
Open Aperture : If the button is unchecked, it almost fully reduces the confocality. Laser Power and Aperture settings can be adjusted under this setting as well.
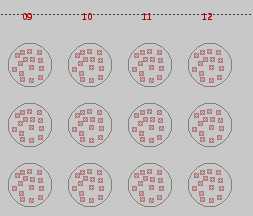
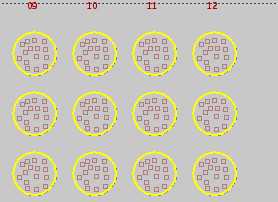
Bottom left hand corner illustrates the plate layout/wells for the plate type selected earlier. It also shows the number of fields chosen earlier in the protocol. Adjust fields for scanning by using the following:
-
Shift + left click turns off fields for scanning
-
Ctrl + left click turns on fields for scanning.
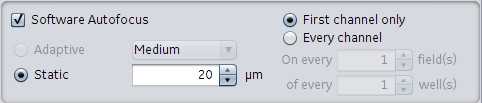
Decide between Laser Autofocus and Software autofocus scanning.
Laser autofocus: Used for more consistent plates where Z plane is uniform/consistent. Most often used for 96, 24, 12, 6 well formats. Use after setting the exposures, offsets for each scanning channel. Often, auto-offset is ran and the user goes with the settings that the instrument arrives at. Shorter scan times.

Software autofocus: Used for plates with less consistent plates where Z is varied. Drop down options of small, medium, or large under this setting. These refer to the range the instrument sweeps when attempting to find the focal plane. This can be further customized by selecting which channel to perform the software autofocus. Options. First channel only or every channel. Ultra customization can be achieved by adjusting the number of fields (on every) and wells (on every) for the First channel or Every channel setting.
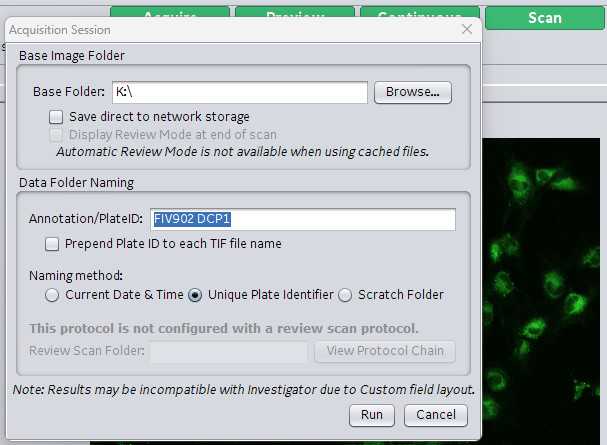
User is ready to scan once all of the prescanning checklist items are reviewed/adjusted. Press the Scan button at the upper right hand side of the screen.

A guide will pop up asking you to name the scan. Use the decided upon nomenclature in your lab to name the scan. Buchser Lab Nomenclature. FIV####Array or Plate. Example array: FIV911A2 = experiment FIV911 scanning array 2. FIV908P7 = experiment FIV908 scanning plate 7. Finally specify the location/pathway where you want the data saved. Click Ok and the scan will begin.