EPMotion - DNA Extraction
Oksana Polesskaya, Abraham Palmer, Khai-Minh H Nguyen, Katarina A Cohen
Abstract
This protocol is designed for Agencourt's DNAdvance Extraction kit on the EPmotion 5075. Samples are extracted in a 96 well plate. This is a continuation of the "Sample Cutting/Processing" Protocol
Before start
This protocol assumes that you have the EPmotion set up and epBlue software downloaded. Complete the "Sample Cutting/Processing Protocol" before you start on this protocol.
Steps
Agencourt DNAdvance Reagent Preparation
Download the DNAdvance Handbook from Beckman Coulter Genomics. Google this - (PN B66866AC) or request from Beckman Coulter Group.
Prepare Proteinase K Solution following instructions on page 9 of the Handbook.
- Create
785µLaliquots of proteinase K solution in 1.5mL tubes. - Store Proteinase K solution at
-20°C - Note: 1 Aliquot will provide enough reagent for 1 plate.
Create 565µL aliquots of
- Store DTT at
-20°C - Note: Note: 1 Aliquot will provide enough reagent for 1 plate.
Aliquot
- Ensure you fully vortex and shake the beads (there should be no beads collected at the bottom of the bottle)
Lysis Master Mix
Note: The following amounts will make a master mix for 96 samples.
Add 15.18mL of
Add 770µL of Proteinase K to previous 50mL falcon tube
Add 550µL of DTT to previous 50mL falcon tube
Shake vigorously and vortex for 0h 0m 30s
- Place
On icefor0h 3m 0sto allow bubbles to settle
Overnight Lysis
Spin down Deepwell plate with processed samples from the Sample Cutting/Processing Protocol.
- Defrost Deepwell plate with processed samples if stored in
-80°Con ice. - Spin at 2500rpm for 5 sec
Pour Master Mix into a reagent reservoir and Pipette 150µL of Master Mix into each well of the deepwell plate.
- Use Multichannel pipette for efficiency
Seal deepwell plate with a Square sealing mat (Cat. AB0675) and quickly spin down on centrifuge
- Ensure all wells are tightly covered.
- Spin at 2500rpm for 5 sec
Place deepwell plate on Thermomixer C and incubate overnight at 900rpm
- Use plates attachment and lid
- Incubate between 12-20 hours
Setting up the EPmotion
Next Day,
Equilibrate 0h 30m 0s
- Ensure there is at least
25mLof beads in the 50mL falcon tube that you had aliquoted in step 3.
Open epBlue Application.
In the epBlue Studio, open the Application Editor.
Import the epblue protocol Agencourt DNAdvanced Extraction.export7
Open the imported protocol.
- Named as "Agencourt DNAdvanced Extraction"

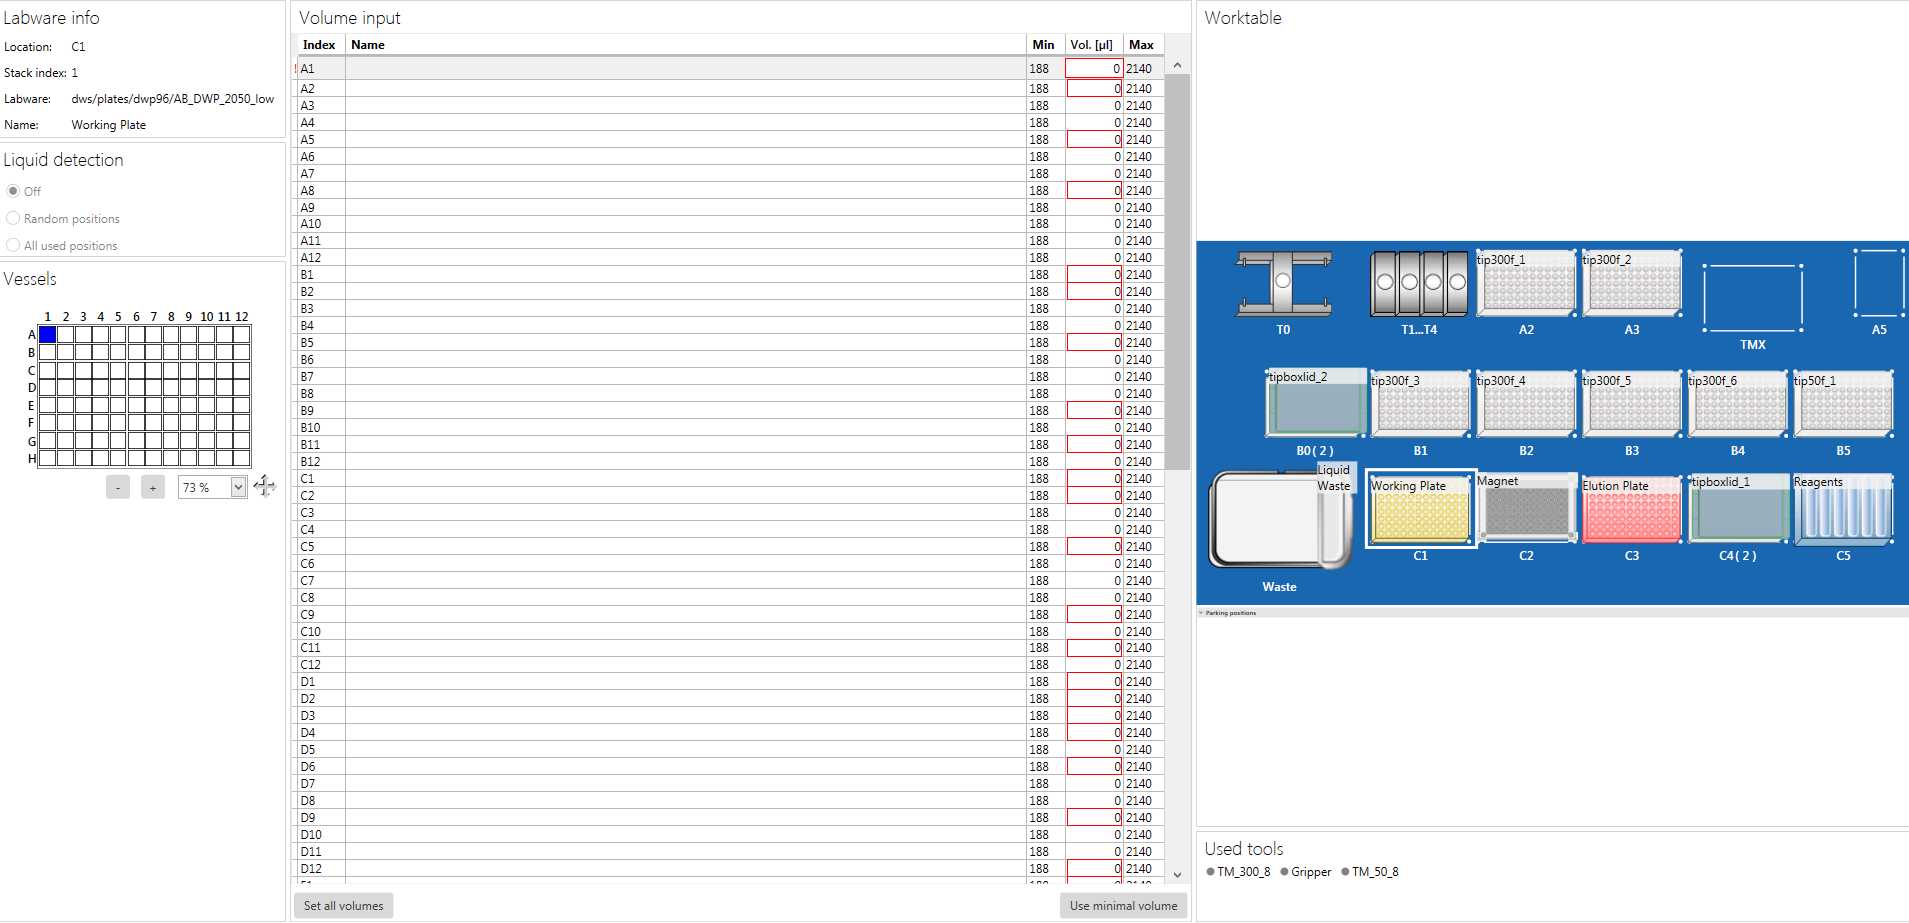
Set up EPmotion following the worktable figure above.
- Place 300ul EPmotion tip rack on positions A2, A3, B1-B4 without tip rack lid.
- Place 300ul EPmotion tip rack on positions B0 and C4 with tip rack lid.
- Place 50ul EPmotion tip rack on position B5 without tip rack lid.
- Place eppendorf Thermoadapter PCR 96 on position C3
- Place eppendorf magnum FLX magnet on position C2
- Ensure Tip waste basket is empty and liquid waste reservoir is empty.
Labelling epMotion Reservoirs
- Grab 7 epMotion 30mL Reservoir Racks
- Label 1 epMotion Reservoir as "Bind 1"
- Label 1 epMotion Reservoir as "Beads"
- Label 3 epMotion Reservoirs as "70% EtOH"
- Label 1 epMotion Reservoir as "EB"
- Label 1 epMotion Reservoir as "Empty"
Place reservoir labelled as "Empty" onto position 7 of the epMotion Reagent Reservoir Rack
Add 25mL of
- Place "Bind 1" onto position 1 of the epMotion Reagent Reservoir Rack
Add 25mL of
- Place "EB" onto position 6 of the epMotion Reagent Reservoir Rack.
Take two clean 50mL falcon tubes and make 100mL of 70% EtOH.
- Add
35mLofto each 50mL falcon tube - Add
15mLofto each 50ml falcon tube
Add 30mL of 70% EtOH made from the previous step to the 3 resevoirs labelled as "70% EtOH"
- Place the three "70% EtOH" reservoirs onto positions 3, 4, and 5 of the epMotion Reagent Reservoir Rack.
Shake and Vortex the previously aliquoted 50mL0h 5m 0s.
- Ensure there is no bead pellet collected at the bottom of the tube
Add 25mL of
- Place "Beads" onto position 2 of the epMotion Reagent Reservoir Rack
Remove all lids off reagent reservoirs (including "Empty" reservoir) and place reservoir rack onto position C5 of the epMotion worktable.
Remove deepwell plate containing all lysed samples from Thermomixer and spin down.
- Remove mat seal from deepwell plate and place on position C1 of the epMotion worktable.
- Ensure that the plate is placed in the correct orientation. Letters and Numbers should be right side up on the plate.
Take new a MicroAmp™ Optical 96-Well Reaction Plate with Barcode (Catalog No. 4306737) and label with same plate name as the deepwell plate, your initials and today's date.
- Place labelled plate on the thermoadapter on position C3
- Ensure that the plate is placed in the correct orientation. Letters and Numbers should be right side up on the plate.
Close epMotion hood when all tips/plates/reagents are in position
Running the Protocol
Press the play button
Select your EPmotion ID and press "Next"
Select the "Input volumes manually" option under the Volume Settings section and press "Next"
Press "Next" again until you see this page below.
When on the page above, select the "Set all volumes" option and enter "200".
- This will enter the volume of lysate in each well of the deepwell plate to 200ul. '
Press "Next" when all the fields are set to 200ul.
Ensure that the volumes of the reagents are set to:
- Bind 1 - 25000ul
- Bind 2 - 25000ul
- EtOH 1 - 30000ul
- EtOH 2 - 30000ul
- EtOH 3 - 30000ul
- Elution Buffer - 25000ul
Press "Run"
About halfway through the protocol, there will be a "user intervention" step. The robot will stop and ask you to spin down the deepwell plate and return to magnet.
- Take deepwell plate out and pulse-fuge. Return to magnet and Press "OK".
Once the robot is done, open the hood and remove the Elution plate from position C3.
- NOTE: There will be bead carryover to the elution plate.
- Seal elution plate with a PCR adhesive seal
- Place elution plate on DynaMag - 96 Side Magnet
- Place magnet and plate at 4C and leave
Day After Extraction
Transfer 180µL of supernatant to a new MicroAmp™ Optical 96-Well Reaction Plate with Barcode ( Catalog No. 4306737)
- Label the new plate the same as the old plate
- If magnetic beads are not separated from the supernatant, wait for a few more hours
- Try not to carry over beads to the new plate
Seal, shake and spin down the newly transferred plate.
Nanodrop the plate.
- Use the
to blank the Nanodrop. - Save the nanodrop table only values and assign the file name as the DNA plate code and date.
Database Entry
Open the Extraction Database that you created in the "Sample Cutting/Processing Protocol".
Copy and paste the nanodrop concentrations, 260/280, and 260/230 values into the google sheets Extraction Database. (Columns H-J)
Enter the date in which you performed the extraction in Column G
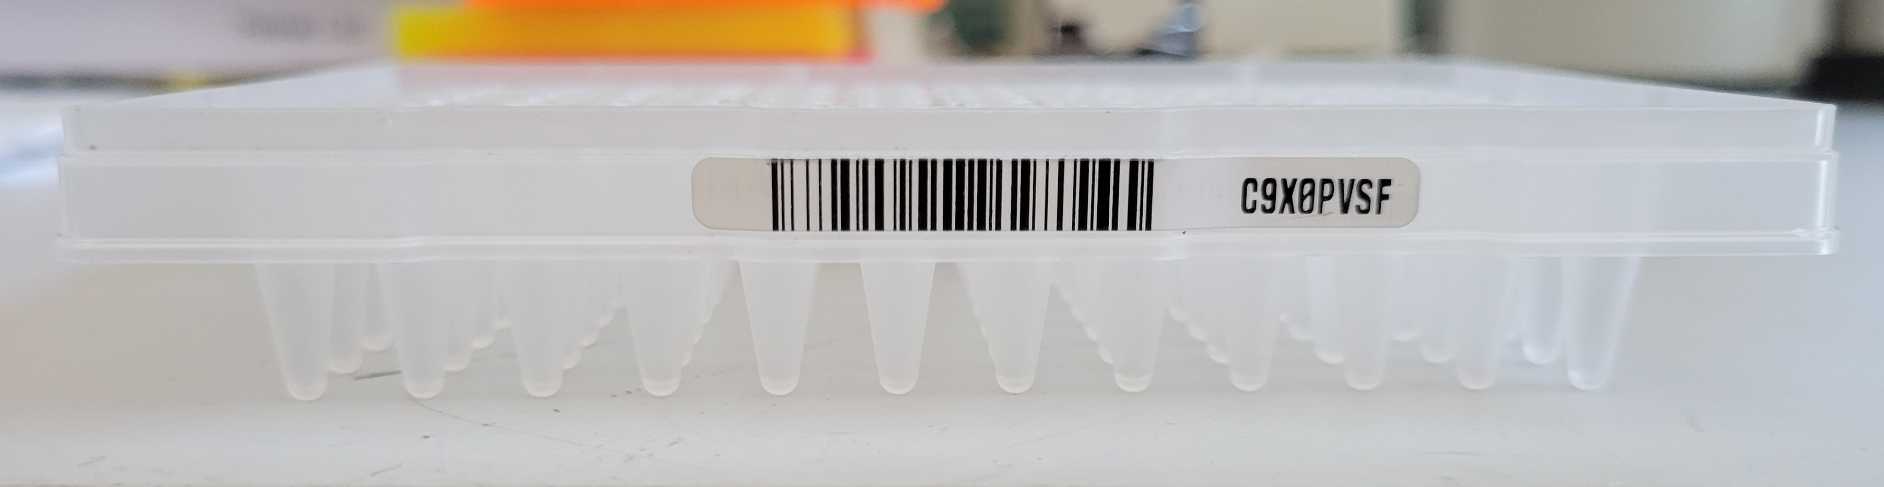
Enter the plate barcode (as shown below) into Column B of the Extraction Database.