ADE 2022 Day 2: DNA Extraction
Tom Little
Abstract
DAY 2: ADE field practical instructions for DNA extraction
Steps
You will be assigned a single SEQUENCING IDENTIFIER, a number from 01 to 96. Your tubes must be labelled with this SEQUENCING IDENTIFIER. Write down what SEQUENCING IDENTIFIER you have been assigned. Do not lose this.
The protocols set out below generally “work”: that is, the same protocol has been used successfully by others in the past. If you take care in carrying out the operations specified it should work for you. Do not go “off piste” and try doing things a little differently (adding more of this or that). Take special care in pipetting - make sure you know how to set your pipette to the correct volume, make sure you actually pipette up liquid (and not air), and don't use the pipette to blow bubbles in your samples. The pipettes are precision instruments and you should use them with respect
Check you have fine forceps, scissors, single-sided razor blades, glass dishes, marker pen, gloves, labels, a rack for tubes and an ice bucket or tray.
Wear gloves from here on - not so much for your safety, but rather to protect your samples from contamination with your DNA, as you too have a COX1 gene.
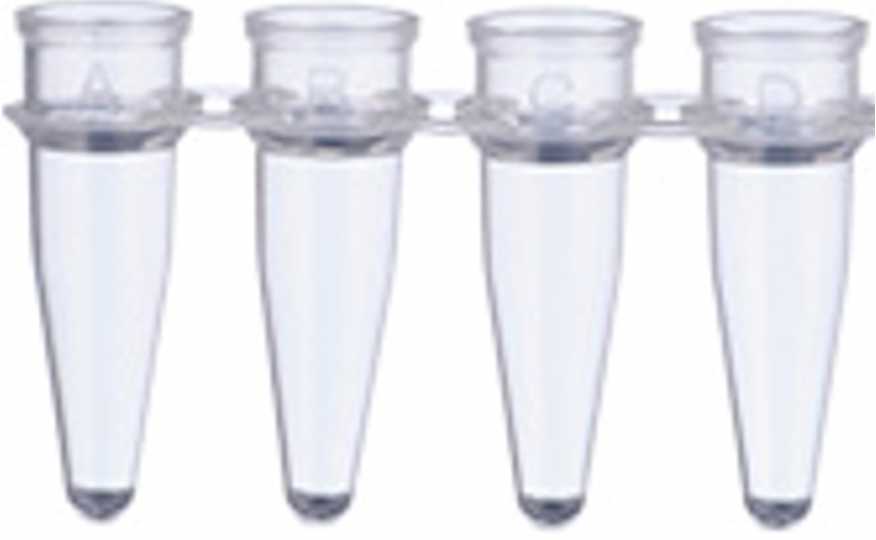
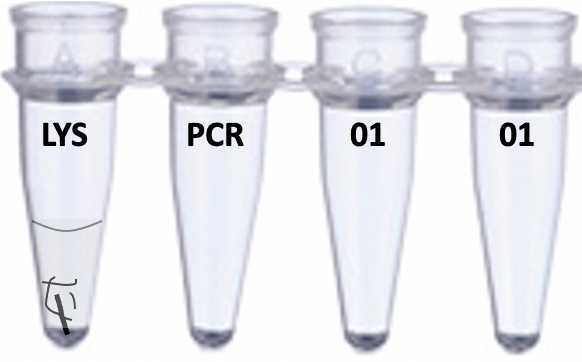
In the ice bucket or tray should be some 1.5ml eppendorf tubes containing lysis buffer (clear liquid, labelled "LYS") and PCR mix (clear liquid, labelled "PCR"). There will also be some plastic "strip tubes" (four tubes joined together), + lids for the tubes. The strip tubes look like this:
Label your tube strip tubes using permanent marker. Tube 1, you should label LYS, as this is where you will add the DNA extraction (or LYSis) buffer. Label the second tube with PCR, as this is where your PCR liquid will go. Label the other tubes with your sequencing barcode . Do this in at least a couple of places on the tube (sometimes the labels wear off):
")
Retrieve your DNA barcoding bag from the back of the lab. This contains the four specimens you will barcode. Try to work quickly towards completing step 11, as the DNA will begin to degrade upon thawing. Keep your specimens on ice whenever possible.
Open up the container holding the first of your specimens. Break the tip of one limb from your chosen specimen, or pull one limb off smaller specimens. You can use scissors to cut off a small (say, 3 mm) part. Take only a very small piece of tissue from your specimens: large masses of tissue will cause the PCR reaction to fail because of poor extraction of DNA and high concentrations of contaminants.
(Take great care when handling the scissors or razor blades)
Place the tiny piece of tissue in the first of the four tubes of your extraction strip tube, and leave on ice. Try to get the piece of tissue to the bottom of the tube - you will be adding some liquid (LYS buffer) to the tube in a moment and you want the tissue to be submerged. To aid the extraction, crush the tissue using a yellow tip . Store the extraction strip tube carefully in the rack provided in the ice bucket.
Repeat the above for each of your four chosen specimens, combining them into the same tube. To be clear, you are putting the tissue from four specimens into one tube. The other three tubes are currently empty.

Place 25ul of LYS into the tube with the tissues (legs etc). The buffer will help keep the tissue stable. Put the strip lids firmly on your extraction strip tubes.
Put your extraction strip tube into the PCR machine. Above all, ensure that your tube is labelled with your SEQUENCING IDENTIFIER. The PCR machines are also numbered - remember which machine you put your samples into.
Once everyone’s samples are in the machine the incubation will be started. The lysis is achieved by heating to 95°C and incubation at 65°C through a couple of cycles (the whole process takes about 25 mins). After this, you can move onto PCR in the next protocol (Day 2: PCR)
