The Isolation, Culture, and Cryopreservation of Human Rectus Sheath Fibroblasts
Thomas Whitehead-Clarke, Thomas Whitehead-Clarke, Alessandra Grillo, Alessandra Grillo, Vivek Mudera, Vivek Mudera, Alvena Kureshi, Alvena Kureshi
Abstract
The vast majority of pelvic and intra-abdominal surgery is undertaken through at least one incision, through either the linea alba or the rectus sheath. These connective tissue layers are formed from the aponeuroses of the rectus muscles (anterior and posterior rectus sheath) and are vital for the structural integrity of the abdominal wall. Poor healing of these connective tissues after surgery can lead to significant morbidity for patients, who can develop unsightly and painful incisional hernias.
Fibroblasts within the rectus sheath are responsible for laying down and remodeling collagen during the healing process after surgery. Despite their importance for this healing process, such cells have not been studied in vitro. In order to carry out such work, researchers must first be able to isolate these cells from human tissue and culture them successfully so they may be used for experimentation.
This article provides an extensive and detailed protocol for the isolation, culture, cryopreservation, and thawing of human rectus sheath fibroblasts (RSFs). In our hands, this protocol develops confluent cultures of primary fibroblasts within 2 weeks, and sufficient cultures ready for freezing and storage after a further 2 to 4 weeks. © 2023 The Authors. Current Protocols published by Wiley Periodicals LLC.
Basic Protocol : Collagenase digestion of human rectus sheath and isolation of RSFs
Alternate Protocol : Collagenase digestion of human rectus sheath and isolation of RSFs, digestion in flask
Support Protocol : Cryopreservation and thawing of human RSFs
INTRODUCTION
The structural integrity of the human abdominal wall is maintained, for the most part, by aponeurotic tissue around the rectus abdominus muscles at the front of the abdomen. These muscles are enveloped by an anterior and posterior layer of strong rectus sheath tissue which converges at the midline to form the linea alba. It is these layers that provide strength to the abdominal wall and are vitally important to re-approximate after surgery in order to prevent herniation.
Incisional abdominal wall hernias are associated with significant morbidity worldwide. They have several contributors, including closure technique (Deerenberg et al., 2015) as well as infection, obesity, and a number of other factors which compromise abdominal wall healing (Walming et al., 2017). Abdominal wall healing, like all tissue healing, involves several stages beginning with an inflammatory phase where immune cells are activated to release cytokines that vasodilate blood vessels and recruit other cells to the wound bed. Following this inflammation, fibroblasts are recruited to the wound bed and are responsible for wound contraction, laying down new collagen and remodeling the tissue. To better understand abdominal wall healing and how it becomes compromised at a cellular level, analysis of fibroblasts within the rectus sheath represents a potentially instrumental area of future research.
Other authors have investigated the process of rectus sheath healing in animal models (Franz et al., 2001) as well as the specific activity of murine rectus sheath fibroblasts in vitro –specifically their ability to contract a collagen matrix (Culbertson et al., 2011; Dubay et al., 2004). No work has yet, however, been done to characterize the activity of human rectus sheath fibroblasts (RSFs) in vitro. Furthermore, the authors are not aware of any work that describes successful isolation or culture of these cells. We believe that the ability to successfully isolate these cells for experimentation is the essential first step in understanding their activity in vitro. Such steps will help us to model their activity in the processes of abdominal wall healing and herniation.
In this work, we include one basic isolation protocol, alongside an alternate protocol, proven to successfully isolate fibroblasts from fresh samples of human rectus sheath. While the authors are confident that the cells isolated from samples are fibroblasts, the culture methods used in this protocol (including a rigid culture substrate and the presence of serum) may potentiate a transformation to a myofibroblast-like cell lineage (Tomasek et al., 2002). Further characterization of this cell line is therefore required going forward. The protocol will fully describe cell isolation and culture from the point of tissue harvesting until 3rd passage. Both protocols have proven to produce proliferative fibroblast cultures within weeks. The Support Protocol also presents a method for the effective freezing and thawing of these fibroblasts in cultures.
To develop this protocol, tissue samples of human rectus sheath were required. Ethical approval was acquired from the UK Health Research Authority (HRA) to gather tissue samples of posterior rectus sheath from consenting participants (IRAS 254166). Briefly, patients undergoing the formation of a stoma were invited to participate by donating a small piece of tissue (<1 cm2). During surgery, when a necessary defect was created in the posterior rectus sheath, tissue was harvested for processing and isolation of cells.
Basic Protocol: COLLAGENASE DIGESTION OF HUMAN RECTUS SHEATH AND ISOLATION OF RSFs
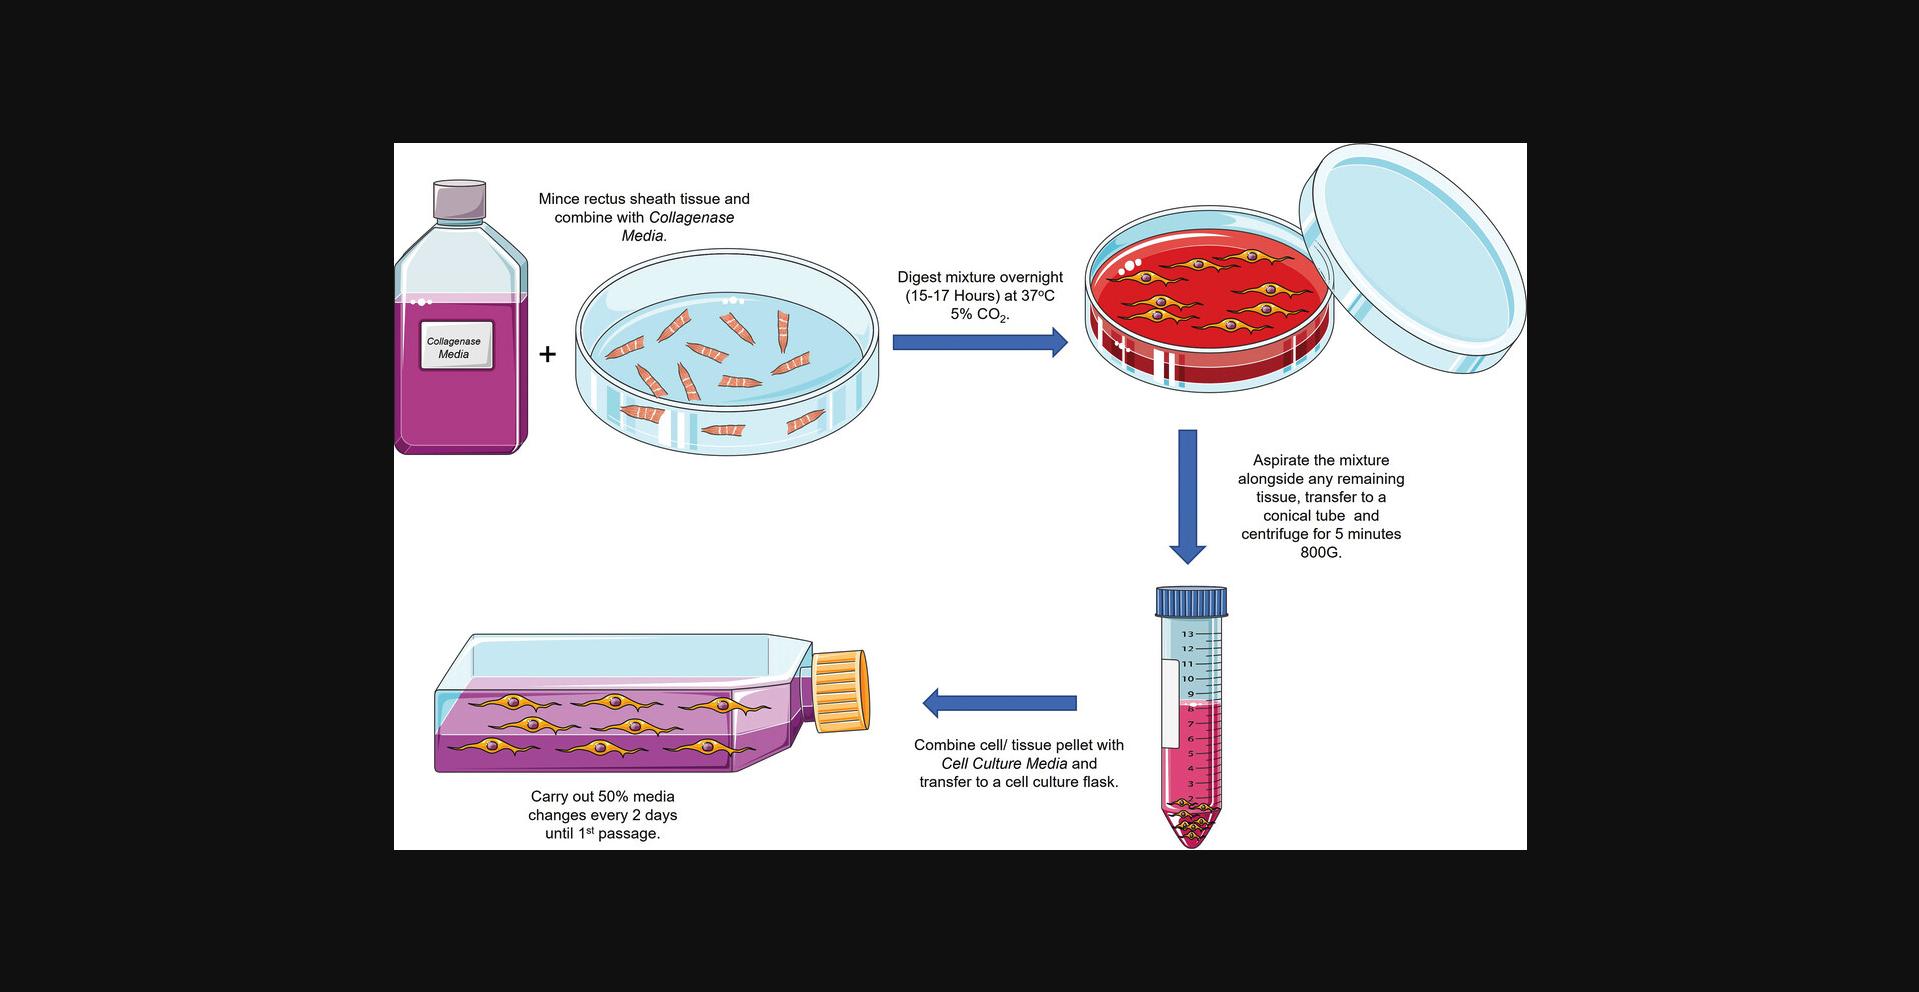
The following protocol has been established as an effective method for isolating fibroblasts from fresh samples of human rectus sheath. Aside from incubation, all steps should take place in a class II or higher sterile laminar flow hood. Once the specimen has been retrieved, it is recommended that samples are sent for digestion as soon as possible (within hours).
Initial dissection of tissue should produce a suspension of collagenous tissue within the medium, ready for digestion. After overnight digestion, the solution may or may not contain persistent tissue clumps, however these should be greatly reduced in number. Cells should be visible within cell culture flasks from around day 4 after digestion.
Materials
-
Tissue retrieval medium (see recipe)
-
Phosphate buffered saline (PBS), pH 7.4 (Thermo Fisher Scientific, cat. no. 10010023 or equivalent)
-
Collagenase medium (see recipe)
-
Cell culture medium (see recipe)
-
Trypsin-EDTA, 0.25%, phenol red (Gibco, cat. no. 25200056 or equivalent)
-
15-ml conical centrifuge tube
-
Sterile gauze swab
-
Laminar flow hood, BSC class II, or equivalent
-
10-cm diameter circular cell culture dish
-
Sterile scalpel, blade size 10
-
Sterile stainless-steel forceps
-
Digital scale
-
Weigh boats
-
Water bath, 37°C
-
Cell culture incubator (5% CO2, 37°C, and 95% humidity)
-
Pipettes (various sizes)
-
Pipette tips (various sizes)
-
Serological pipettes (various sizes)
-
Pipet controller
-
50-ml conical centrifuge tube
-
25-cm2 (T-25) cell culture flask
-
Light/brightfield microscope
-
75-cm2 (T-75) cell culture flask
Tissue retrieval
1.Prepare an aliquot of tissue retrieval medium. This is best produced as a 10 ml aliquot inside of a 15-ml conical tube, stored at 4°C.
2.Inside the surgical theatre, once the tissue sample has been harvested from the patient, tissue should immediately be wrapped inside of a sterile gauze swab. The gauze should be rolled up and placed inside the tissue retrieval medium, such that it is fully submerged/saturated.
3.Transport tissue to the laboratory as soon as possible (within hours). It is not necessary for it to be cooled or on ice.
Tissue digestion
4.Working in a laminar flow hood biosafety cabinet, place the tissue sample into a 10-cm diameter cell culture dish. Wash the tissue with PBS, using a scalpel and forceps to remove any fat, muscle, or peritoneum from the sample.
5.Move the tissue to a separate dish and weigh the sample for the purpose of making the collagenase medium.
6.Prepare the necessary volume of collagenase medium.
7.Introduce a small amount (2 to 3 ml) of collagenase medium into the dish with the tissue.
8.Mince the tissue thoroughly using a scalpel and forceps for approximately 5 min. Mince the sample until you are left with a pulp-like substance, suspended within the collagenase medium.
9.Add the remaining collagenase medium, giving the dish a gentle shake to distribute the tissue pieces evenly.
10.Place the tissue culture dish inside of an incubator set at 37°C, 5% CO2, and 95% humidity overnight (15 to 17 hr).
Cell plating and culture
11.Remove the culture dish from the incubator after overnight digestion. There should be a significant reduction (or complete absence) of solid tissue within the dish.
12.With regards to the current volume in the dish, add double the volume of warmed cell culture medium and mix gently.
13.Aspirate the dish contents and transfer them to a 50-ml centrifuge tube.
14.Centrifuge the 50-ml conical tube for 5 to 10 min at 800 × g , room temperature.
15.Aspirate almost all of the supernatant from the centrifuge tube, leaving around 1 to 2 ml of culture fluid as well as all solids/cell pellet within the tube.
16.Re-suspend the tube contents in 3 to 5 ml of cell culture medium.
17.Transfer the tube contents to a 25-cm2 (T-25) cell culture flask.
18.Label the flask (Passage 0) and place it in an incubator for 3 days at 37°C, 5% CO2, and 95% humidity.
19.Change the medium and inspect the cells every three days. For each medium change, remove half the volume of the flask and replace it with the same volume of fresh warmed cell culture medium. Regular inspection facilitates better understanding of how well the cells are multiplying and in what areas of the flask they are doing so. Leave small tissue pieces within your culture dish until the 1st passage.
20.When confluent clusters of cells have developed (usually 14 to 16 days), the cells will be ready for passaging.
21.For a T-25 flask, aspirate all culture fluid from the flask, and wash with around 5 ml of pre-warmed PBS.
22.Remove PBS from the flask and add 1 to 2 ml of trypsin.
23.Place the flask in an incubator for 2 to 3 min.
24.Remove the flask from the incubator, giving it a brief but firm rasp to dissociate cells from the flask bottom. Inspect the cells under a microscope to ensure they have dissociated.
25.If successfully dissociated, add at least 5 ml of pre-warmed cell culture medium to the flask, then transfer the solution to a larger T-75 flask while also adding an additional 5 ml of pre-warmed cell culture medium. Return the cells to the incubator.
26.To further passage cells, repeat steps 21 to 25 with appropriate volumes of medium/trypsin, depending on the flask size.
27.Once at the 2nd or 3rd passage, cells can be frozen down for future experimentation (see Support Protocol).
Alternate Protocol: COLLAGENASE DIGESTION OF HUMAN RECTUS SHEATH AND ISOLATION OF RSFs, DIGESTION IN FLASK
During development of the Basic Protocol, our group identified an alternate protocol which functioned with similar effectiveness, creating confluent groups of cells within 14 to 16 days. Details of this alternate protocol are provided below.
Materials
-
Fetal bovine serum (FBS), high quality
-
25-cm2 (T-25) cell culture flask
Tissue digestion
1.Follow steps 4 through 9 of the Basic Protocol.
2.Rather than incubating the suspension within the culture dish, aspirate the mixture and transfer to a T-25 culture flask. Place this suspension in the incubator overnight (15 to 17 hr).
3.The next day, add pre-warmed FBS to the culture flask so that the solution within the flask is supplemented with 20% FBS. For example, if 8 ml of collagenase medium was used inside the flask, add a further 2 ml of pre-warmed FBS.
Cell plating and culture
4.Plate and culture cells as per steps 18 to 27 of the Basic Protocol.
Support Protocol: CRYOPRESERVATION AND THAWING OF HUMAN RSFs
Once isolated, cell lines often need to be frozen down for later experimental use. During protocol development, our group successfully froze down vials of RSFs after their 3rd passage. These cells were stored in liquid nitrogen before being thawed and re-plated. Such steps are essential to be able to build a bank of healthy cells ready for a variety of experimental work. Below is a description of our cryopreservation and thawing protocol which utilizes a well-established 90% FBS freezing medium, as well as other standard freezing protocol details.
Materials
-
Freezing medium (see recipe)
-
Cell culture medium (see recipe)
-
Trypsin-EDTA, 0.25%, phenol red (Gibco, cat. no. 25200056 or equivalent)
-
Trypan blue solution, 0.4% (Thermo Fisher Scientific, cat. no. 15250061 or equivalent)
-
Hemocytometer or cell counter
-
2-ml cryotubes (Greiner Bio One, cat. no. 122261 or equivalent)
-
Controlled rate freezing chamber for cryotubes (Corning, cat. no. 432002 or equivalent)
-
−80°C freezer
-
Liquid nitrogen cell storage
Freezing cells
1.Cells should be cultured until they are approximately 80% confluent, after their second or third passage.
2.Prepare an aliquot of freezing medium.
3.Dissociate cells by first removing the medium from the flask, then follow a standard trypsin dissociation protocol (similar to steps 21 to 24 of Basic Protocol).
4.Once dissociated, add double the trypsin volume of cell culture medium to the flask to inactivate the trypsin.
5.Aspirate the contents and transfer to a 50-ml conical tube.
6.Centrifuge the conical tube for 5 min at 800 × g , room temperature.
7.Resuspend the cell pellet in 1 ml of cell culture medium to form a cell stock.
8.Count the cells within the stock using standard trypan blue methodology in either an automated system such as the Countess or manually with a hemocytometer. Count only live cells, aiming for over 90% live cell count.
9.Add pre-warmed freezing medium to the cell stock so that the cell concentration is at least 1 × 10⁶ cells/ml.
10.Transfer the cell stock/freezing medium solution into cryovials–each cryovial containing at least 1 ml of solution.
11.Place all cryovials into a Coolcell freezing storage vessel and immediately transport to a freezer at −80°C.
12.After around 48 hr, cell vials should be transferred to long-term storage in liquid nitrogen.
Thawing cells
13.Before beginning to thaw cells, prepare an aliquot of pre-warmed cell culture medium, enough for a T-75 flask, around 10 to 15 ml.
14.Remove frozen cryovials from liquid nitrogen and immediately thaw in a water bath.
15.After thawing, immediately aspirate the cryovial contents and transfer them to your warmed aliquot of cell culture medium.
16.Transfer the warmed medium with cells to a T-75 cell culture flask and place into an incubator at 37°C 5% CO2, and 95% humidity.
17.Change 100% of culture medium 1 day after plating cells to remove dead cells and excess DMSO.
REAGENTS AND SOLUTIONS
The above detailed protocols require 4 different composite solutions. Whilst each of these solutions is relatively rudimentary; the following section outlines each solution in detail, with storage instructions and recommended aliquots where applicable.
Cell culture medium
-
Store at 4oC and use within 2 weeks. Warm to 37oC in a water bath before use on cells.
-
40 ml Dulbecco's modified eagle's medium (DMEM), high glucose with pyruvate (Millipore Sigma, cat. no. D6429 or equivalent)
-
10 ml Fetal bovine serum (FBS), high quality
-
0.5 ml Penicillin/streptomycin, 100× (pen/strep)
Collagenase medium
-
Make this medium ‘to order’, according to the weight of the tissue sample. Weigh out the tissue sample, which will dictate the overall weight of collagenase you require. Then make a solution of collagenase in DMEM at 0.5 mg/ml. Thoroughly mix and warm to 37°C before use. Make and use fresh each time.
-
Collagenase type I powder (Gibco, cat. no. 17018029), 45 mg of collagenase per 1 g of tissue
-
Dulbecco's modified eagle's medium (DMEM), high glucose with pyruvate (Millipore Sigma, cat. no. D6429 or equivalent), volume dependent, for a 0.5 mg/ml solution
-
Antibiotic/antimycotic solution, penicillin/streptomycin/fungiezone, (A/A), containing 10,000 units of penicillin, 10,000 μg of streptomycin, and 25 μg of amphotericin B per ml (Cytiva Hyclone, cat. no. 11536481), volume dependent, 2%
-
As an example, if your specimen is 200 mg, then you will require 9 mg of collagenase. That collagenase should be dissolved at a concentration of 0.5mg/ml in DMEM (18 ml) and 200 μl A/A.
Freezing medium
-
Make immediately before use, mix thoroughly, and warm to 37°C prior to use.
-
10 ml Fetal bovine serum (FBS), high quality
-
1.2 ml Dimethyl sulfoxide (DMSO), sterile (Millipore Sigma, cat. no. D2650 or equivalent)
-
Given that around 1 ml of cell stock will be added to this solution, DMSO volumes may need to be altered. We recommend maintaining a concentration of 10% DMSO in the solution once cell stock and freezing medium have been combined.
Tissue retrieval medium
-
Produce in 10 ml aliquots within a 15-ml conical tube. Store at 4oC, ideally for no longer than 2 weeks before use.
-
8 ml Dulbecco's modified eagle's medium (DMEM), high glucose with pyruvate (Millipore Sigma, cat. no. D6429 or equivalent)
-
2 ml Fetal bovine serum (FBS), high quality
-
0.2 ml Antibiotic/antimycotic solution, penicillin/streptomycin/fungiezone, (A/A), containing 10,000 units of penicillin, 10,000 μg of streptomycin, and 25 μg of amphotericin B per ml (Cytiva Hyclone, cat. no. 11536481)
COMMENTARY
Background Information
The above detailed protocols are designed for the isolation of human RSFs. Once isolated and cultured, such cells can be used in a variety of experiments from cell characterization, to modelling tissue contraction (Dubay et al., 2004). Two groups have experience isolating murine (rather than human) RSFs, with each group favoring a different protocol. Dubay et al. favored a dispase digestion over 15 min (Dubay et al., 2004), whereas Culbertson et al. used trypsin and mechanical force to dissociate mesothelial cells before using an explant methodology (Culbertson et al., 2011).
The literature describes a number of different protocols for primary cell isolation (Richter et al., 2021), making it difficult to choose a starting point for protocol development. Our described protocol was adapted from previous work within our group using a collagenase protocol to isolate corneal cells (Mukhey et al., 2018). Mukhey et al. used a 0.5 mg/ml collagenase with DMEM overnight, successfully isolating cells ready for experimentation.
One of the advantages of our protocol is its maintenance of sterility. From the point of harvesting, the tissue is placed within sterile gauze, and then sterile solution, until it is eventually minced and digested overnight. By maintaining this sterility throughout, the tissue does not need to be aggressively washed in PBS or AA multiple times, which would increase cell loss and reduce yield.
Our protocol isolates cells through two separate mechanisms: mechanical dissociation and enzymatic digestion. By initially mincing the tissue, we both release some cells into the medium solution and also increase the surface area upon which the collagenase can work. The collagenase used (Type I) works by breaking the peptide bonds within collagen molecules. This dissociates the collagen molecules, breaking down the tissue and releasing cells into the medium. Healthy fibroblasts then settle on the bottom of the flask, where they can adhere and multiply.
Critical parameters and troubleshooting
Table 1 contains an outline of several critical areas of the protocol where our group has experienced difficulties throughout protocol development, as well as potential causes and solutions.
| Problem | Possible Cause | Solution |
|---|---|---|
| Insufficient digestion of tissue overnight | Inadequate concentration of collagenase, possibly inaccurate scales | Increase concentration of collagenase within collagenase medium. |
| Inadequate washing of sample after suspension in retrieval medium | Wash tissue sample thoroughly in PBS after being in retrieval medium, this medium contains FBS which will de-activate the collagenase | |
| Insufficient growth of cell cultures after initial plating | Cells were inadvertently removed with supernatant after centrifuge | After centrifugation, gently remove supernatant, leaving bottom 1 to 2 ml along with any cell pellet and all solids, if present |
| Tissue sample of inadequate size | Ensure an adequate size tissue sample is used | |
| Inaccurate formulation of medium | Ensure medium is made and changed as per protocol | |
| Insufficient growth of cell cultures after 1st or 2nd passage | Cells were passaged too early | Only passage cells once several highly confluent groups of cells are visible |
| Inaccurate formulation/changing of medium | Ensure medium is made and changed as per protocol |
Understanding Results
In order to appreciate whether or not the above protocols are producing anticipated results, the descriptions and figures below demonstrate expected appearances throughout each stage of the protocol. Figure 1 provides an overview of the Basic Protocol.
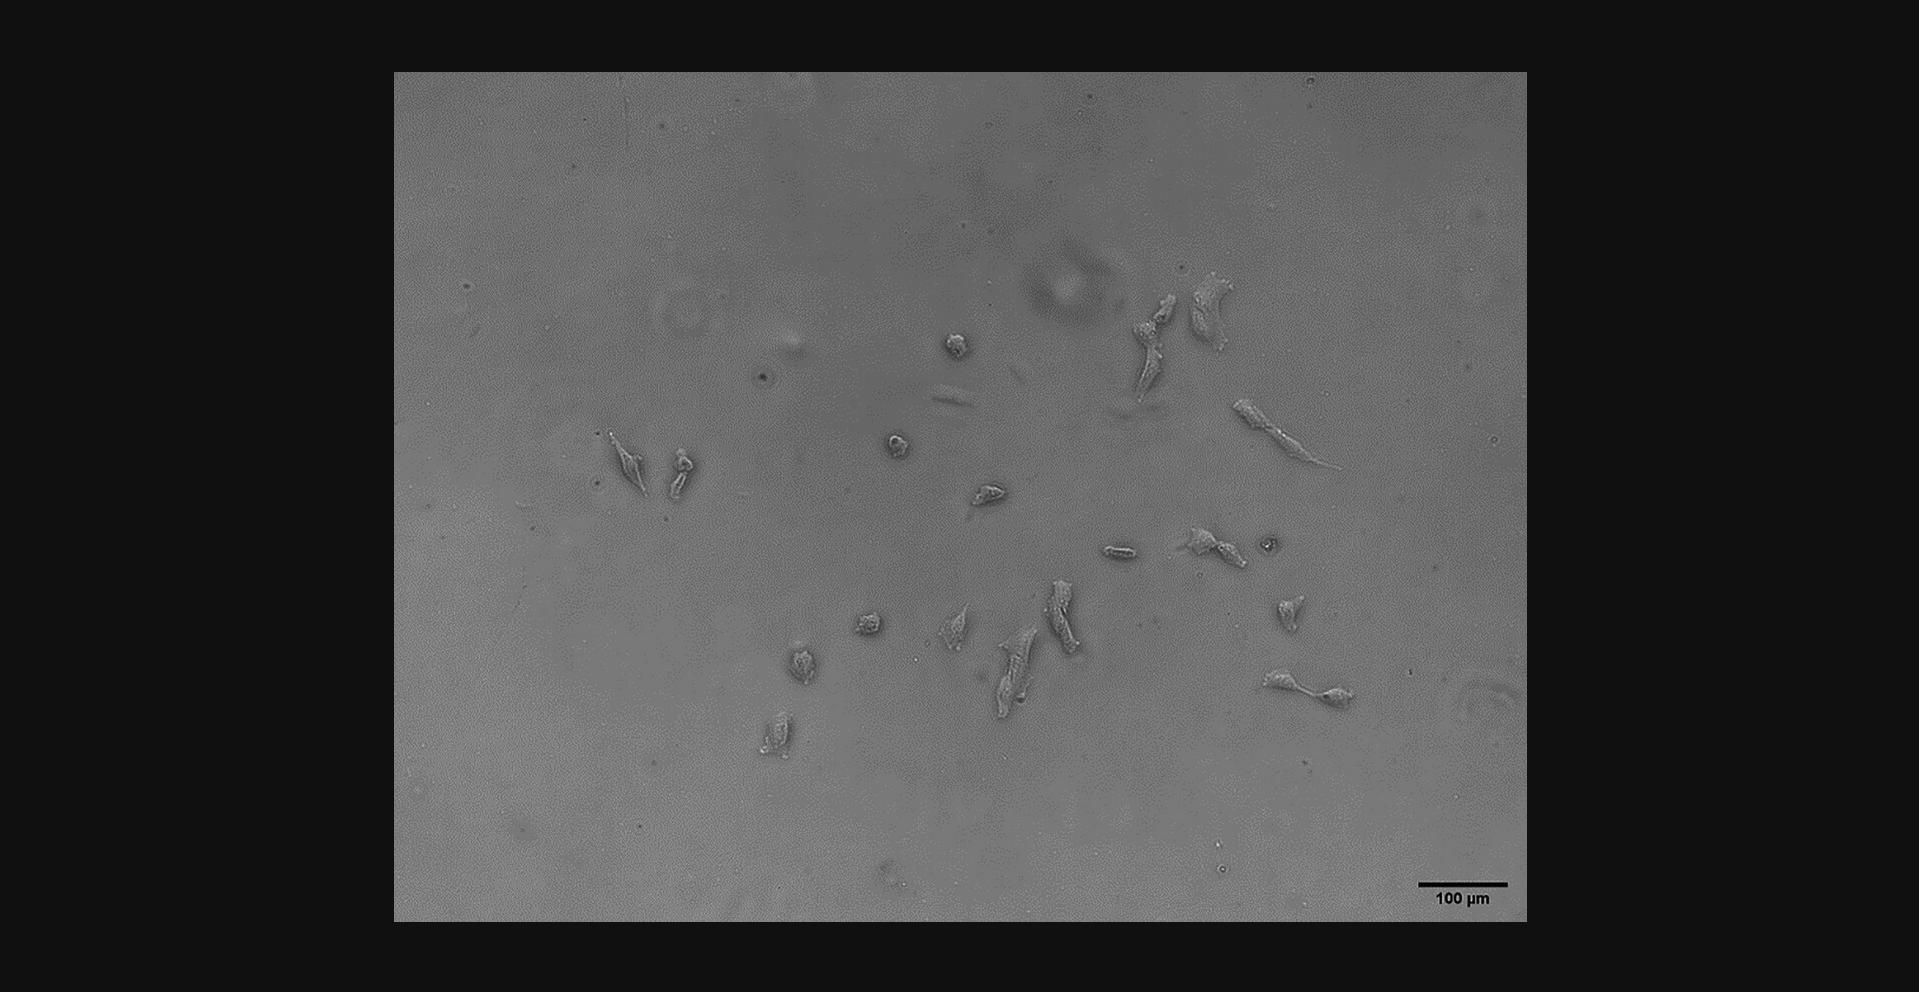
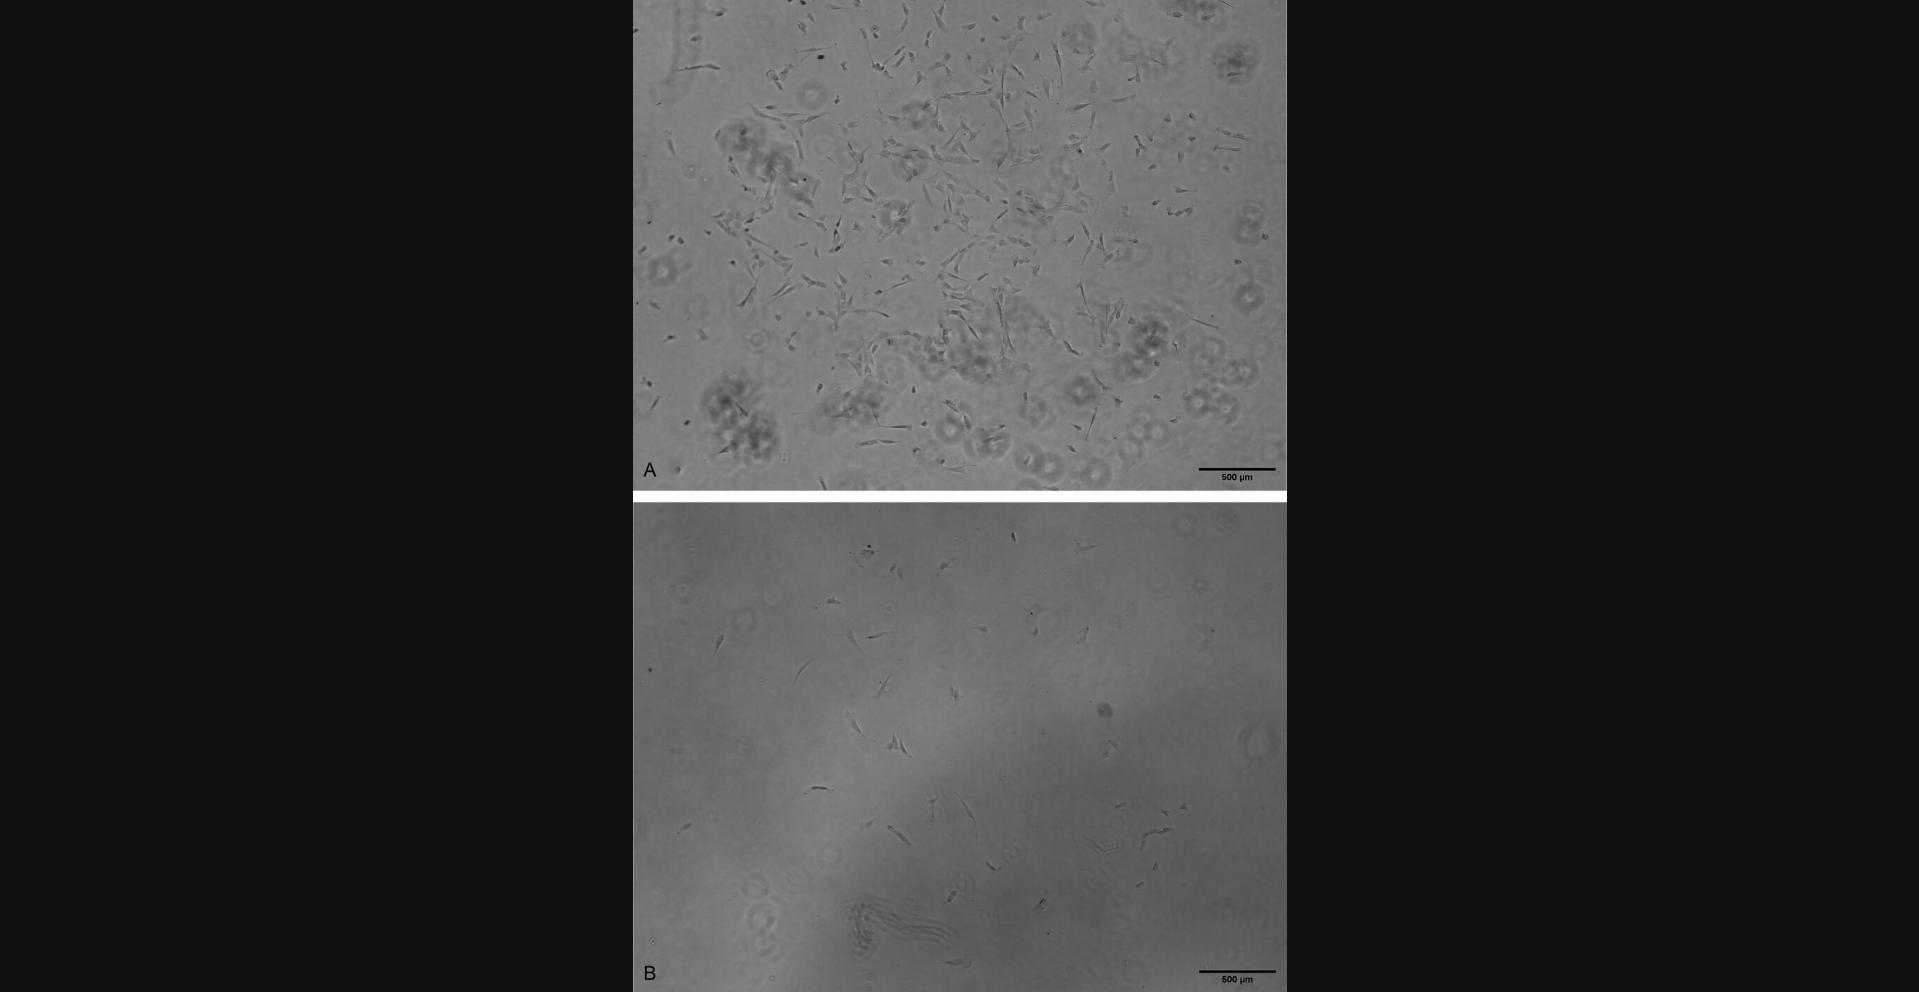
Around 7 days after cells are plated, small clusters of cells should be visible (Fig. 2). Such clusters may contain mixture of small circular ‘young’ cells, as well as those that have begun to adhere and elongate along the bottom of the flask. Over the next 5 to 7 days, more confluent clusters of cells should become visible. Figure 3A and 3B show cells 12 days after plating that have multiplied and elongated compared to the first week of culture. Figure 3A represents a more confluent cluster of cells, whereas Figure 3B represents a sparser grouping. By day 12, individual cells or sparse clusters such as Figure 3B are unlikely to form the confluent clusters required for passaging. Cells will continue to multiply until clusters are around 80% to 90% confluent, at which point they can be passaged (around day 14-16).
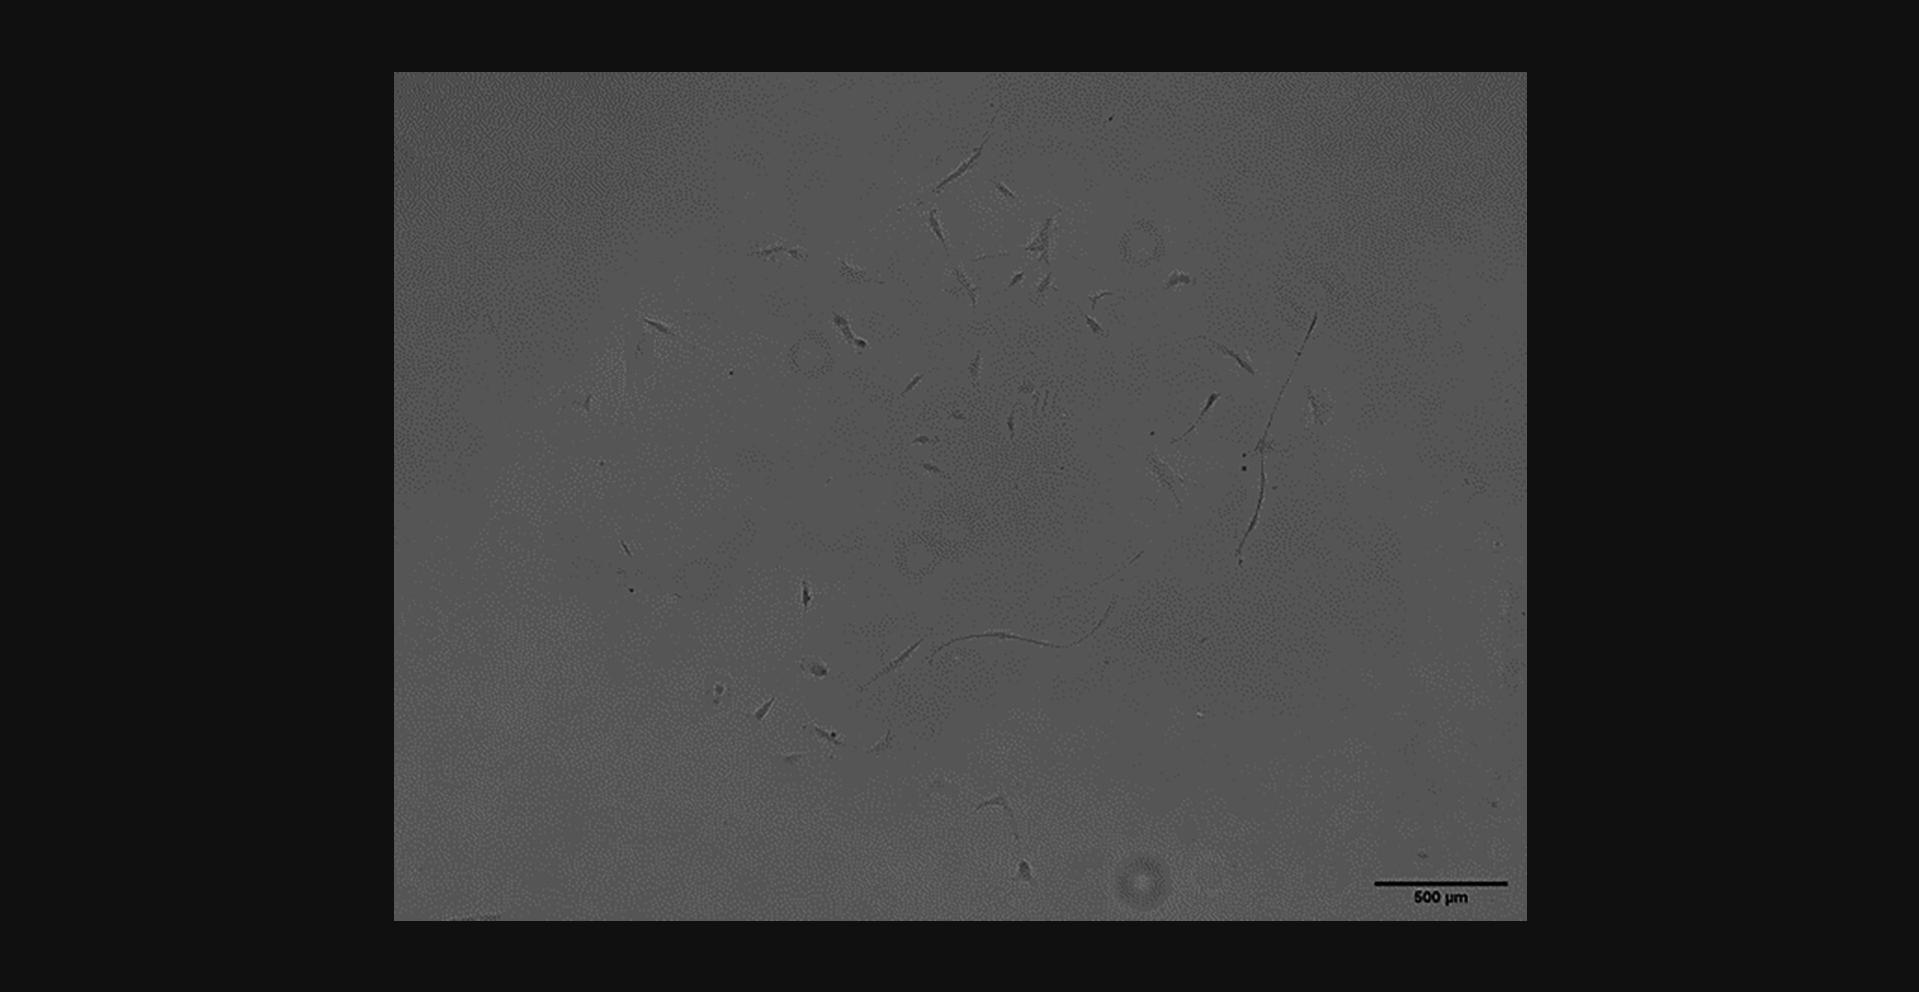
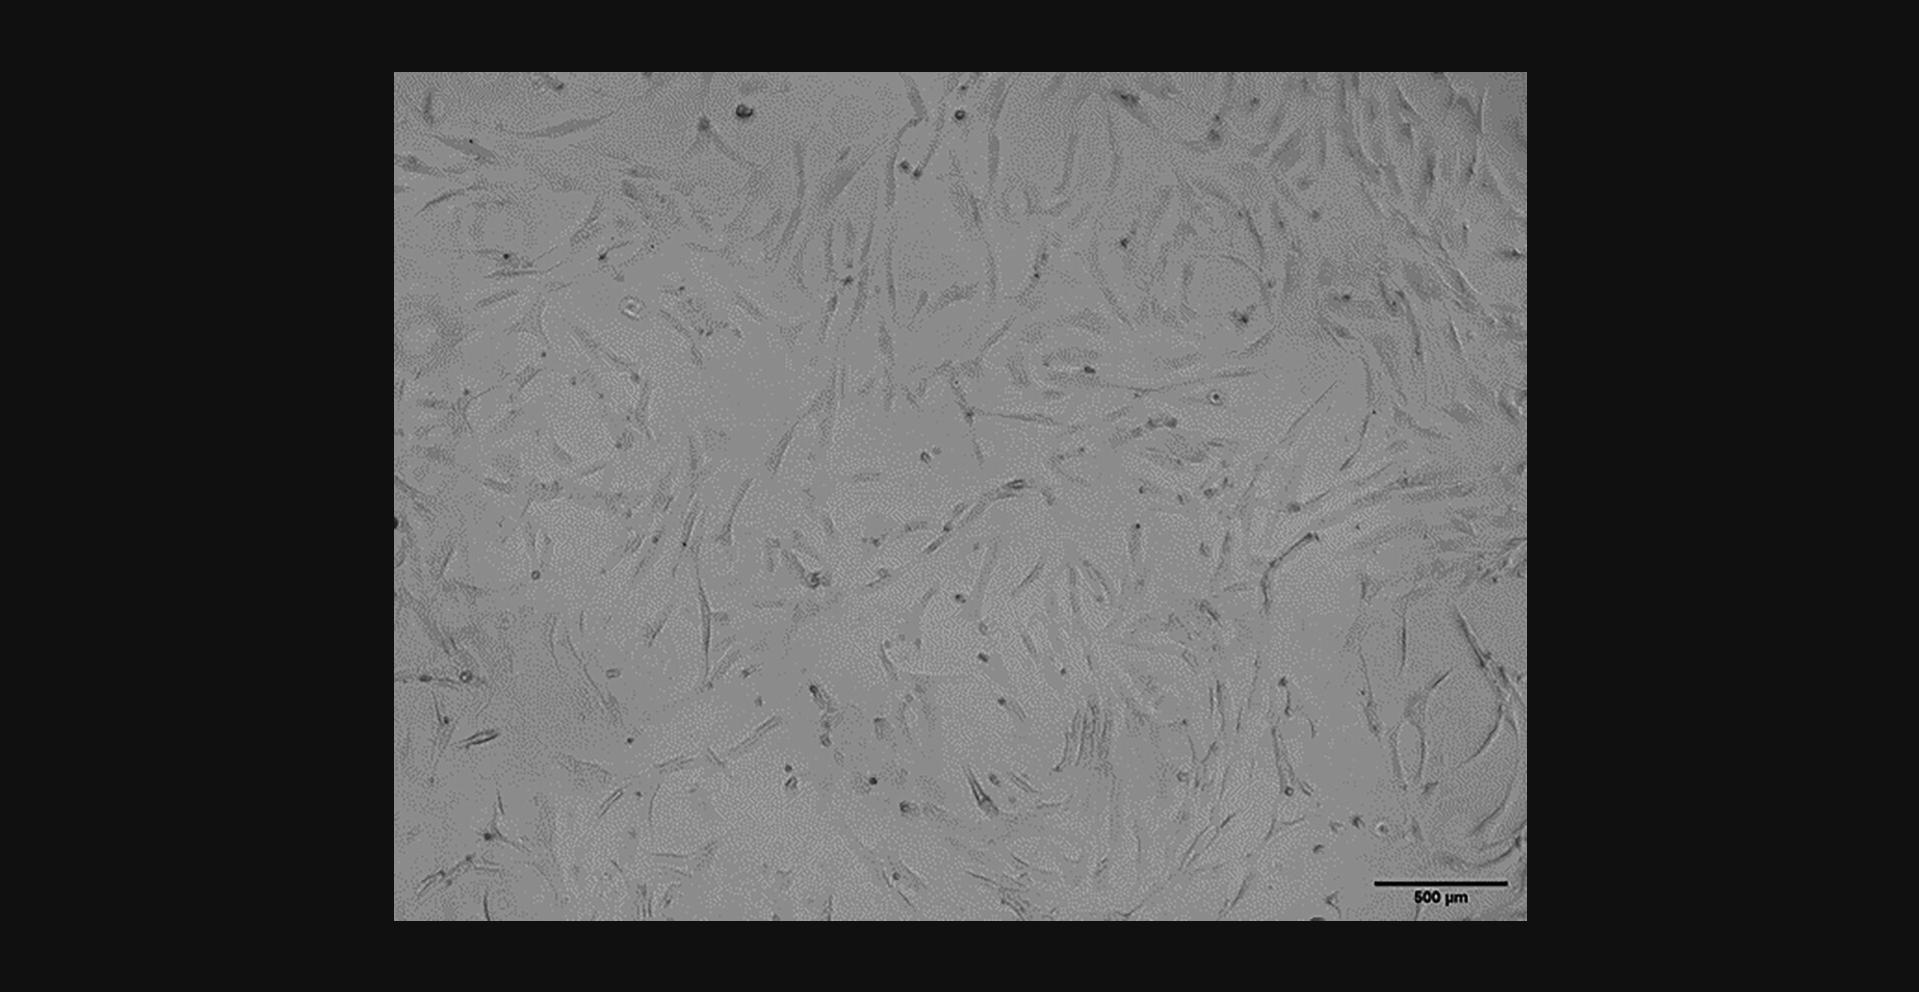
After passaging, cells will continue to grow in clusters, but these will appear more evenly distributed across the bottom of the flask as they expand toward each other. Figure 4 shows an RSF culture 8 days after 1st passage–showing a more even distribution of elongated cells than Figure 2. Once multiplying well after the 1st passage, cells should continue to grow well before and after their 2nd passage. Figure 5 shows a confluent RSF culture 11 days after the second passage. Once they have reached 80% to 90% confluence at their second passage, they can be frozen for long-term storage.
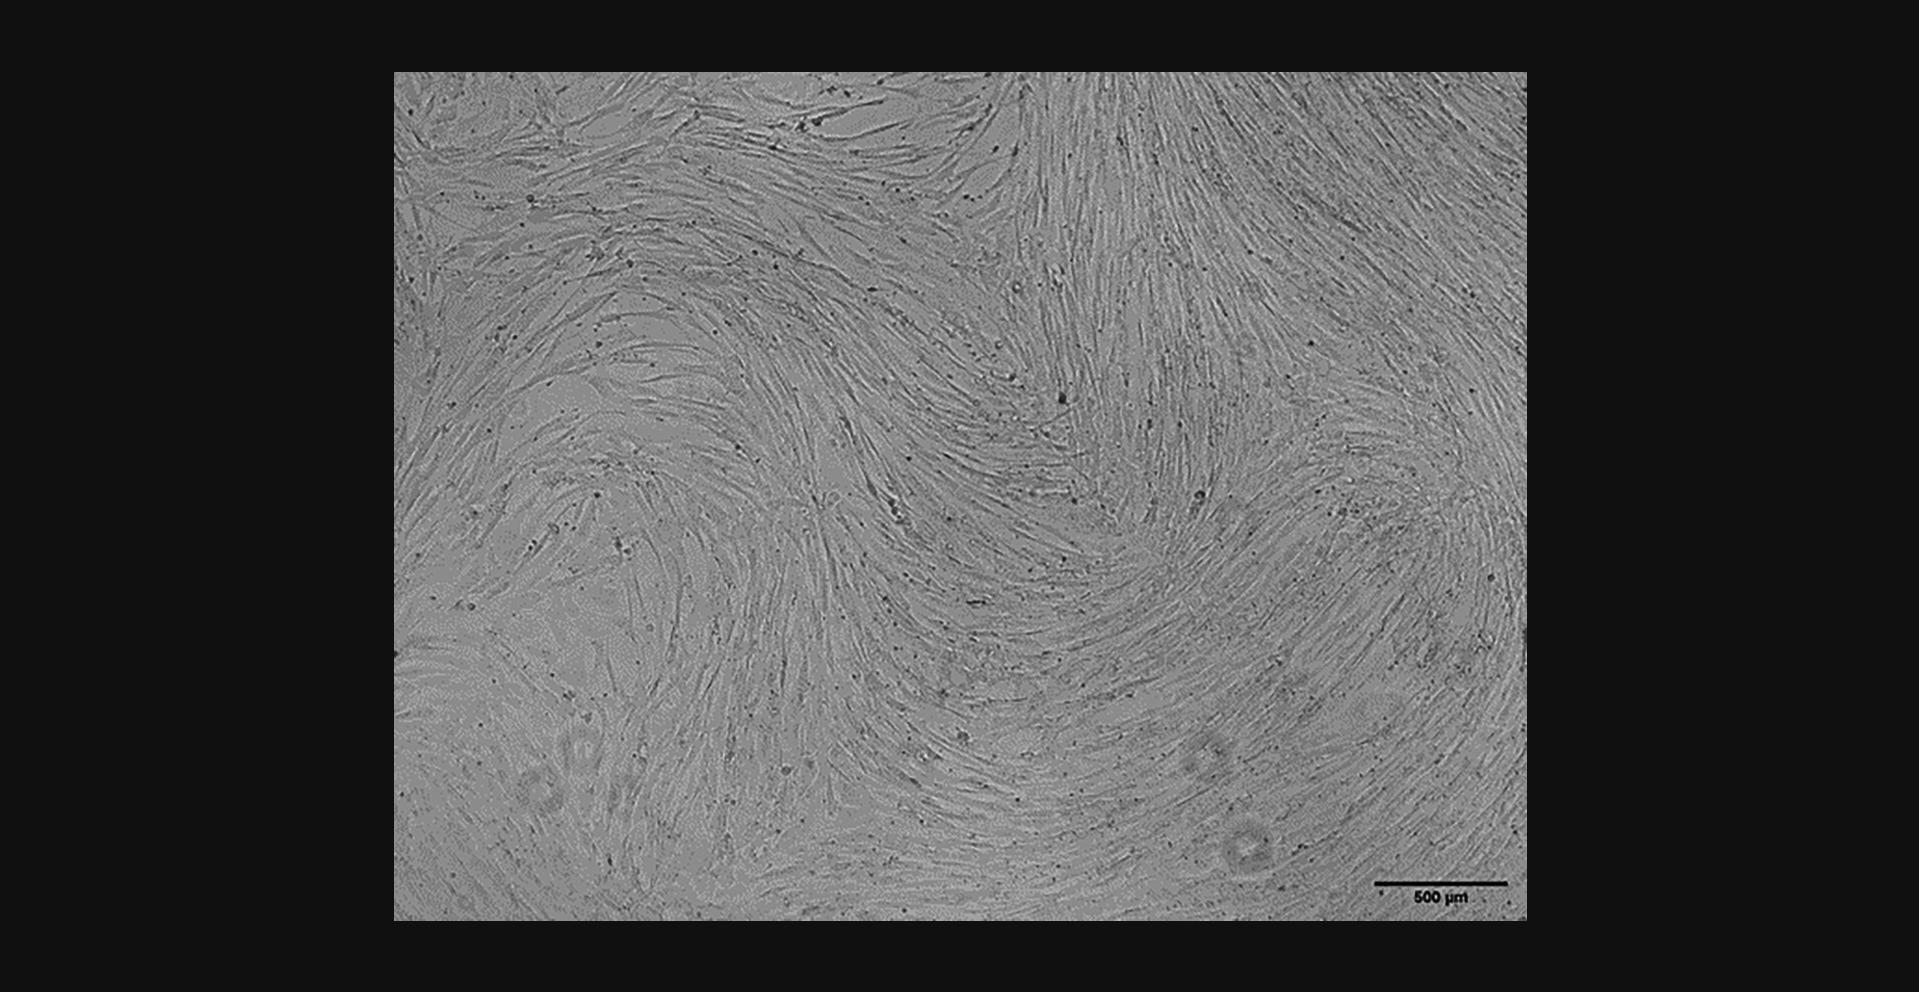
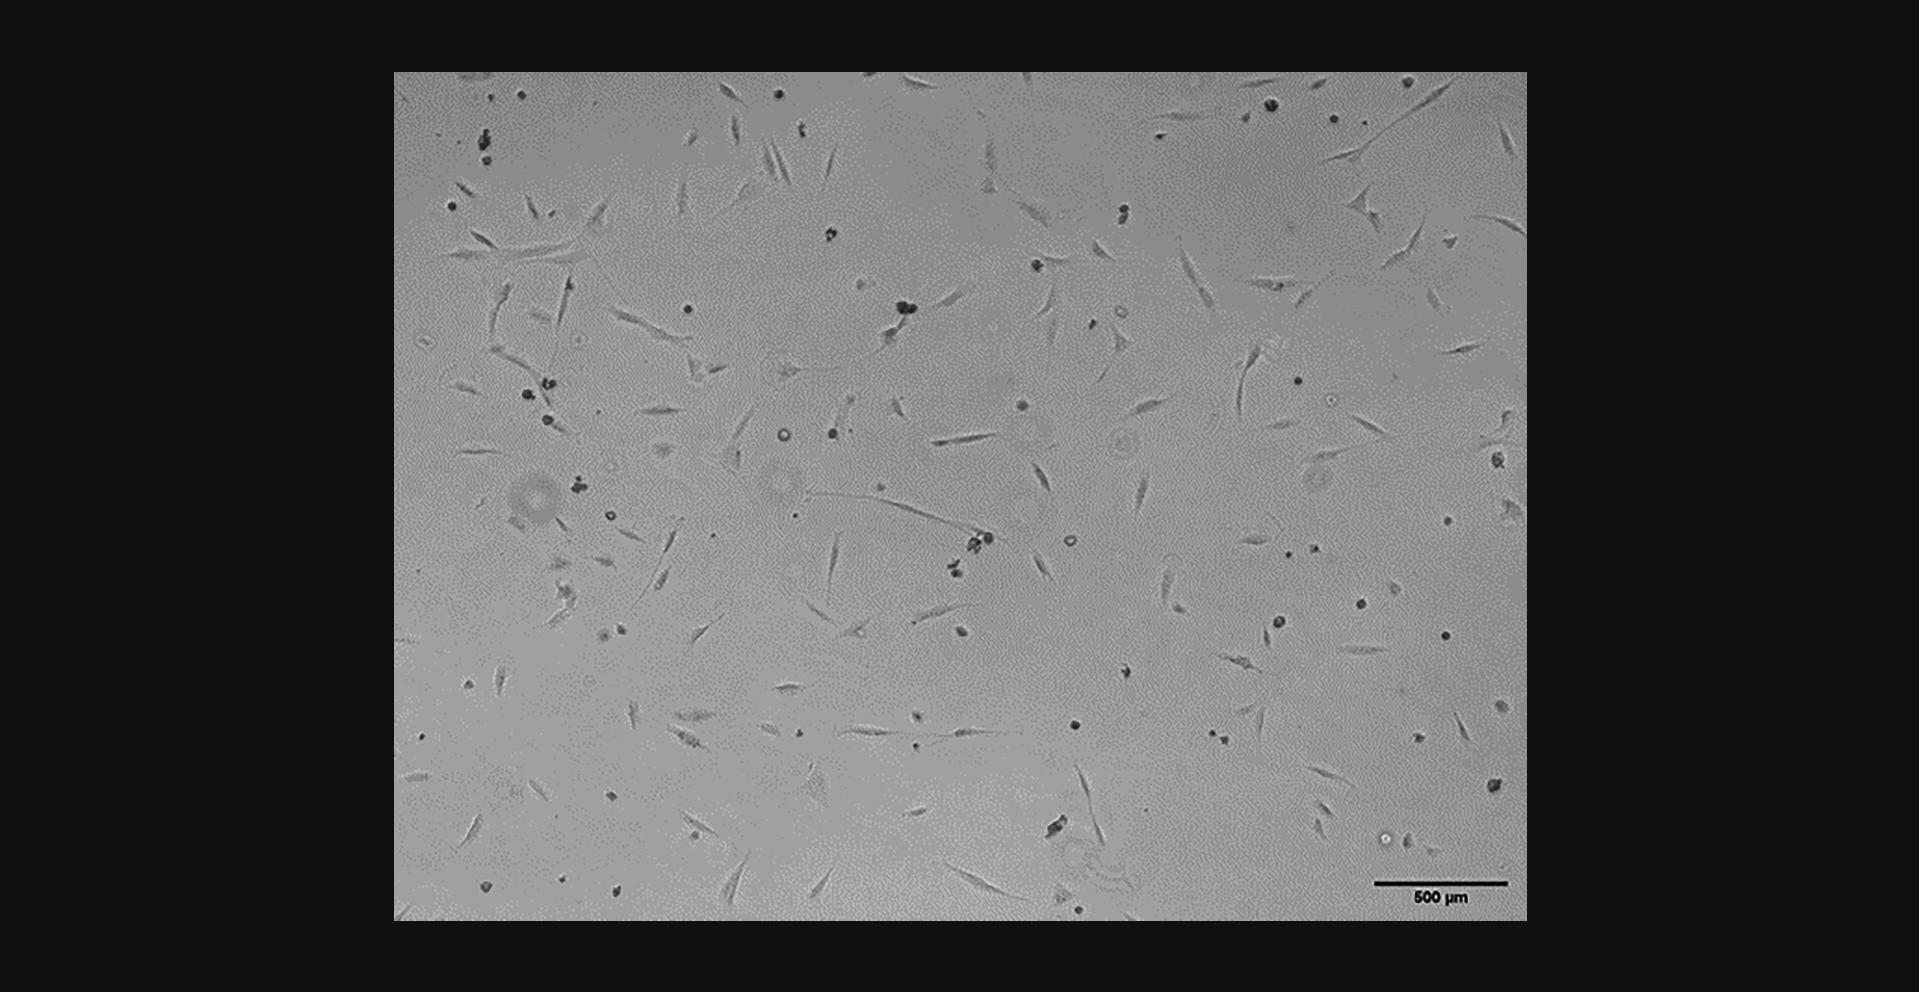
After freezing and thawing, cells should be visible, adherent, and healthy around 1 day after plating. Figure 6 shows RSF culture 1 day after thawing and re-plating. There will be some dead cells that have not survived the freeze/thaw process, however, enough should survive to develop an ongoing healthy culture. Figure 7 shows a growing RSF culture 4 days after thawing. Cells are shown to be multiplying well on their way to confluence.
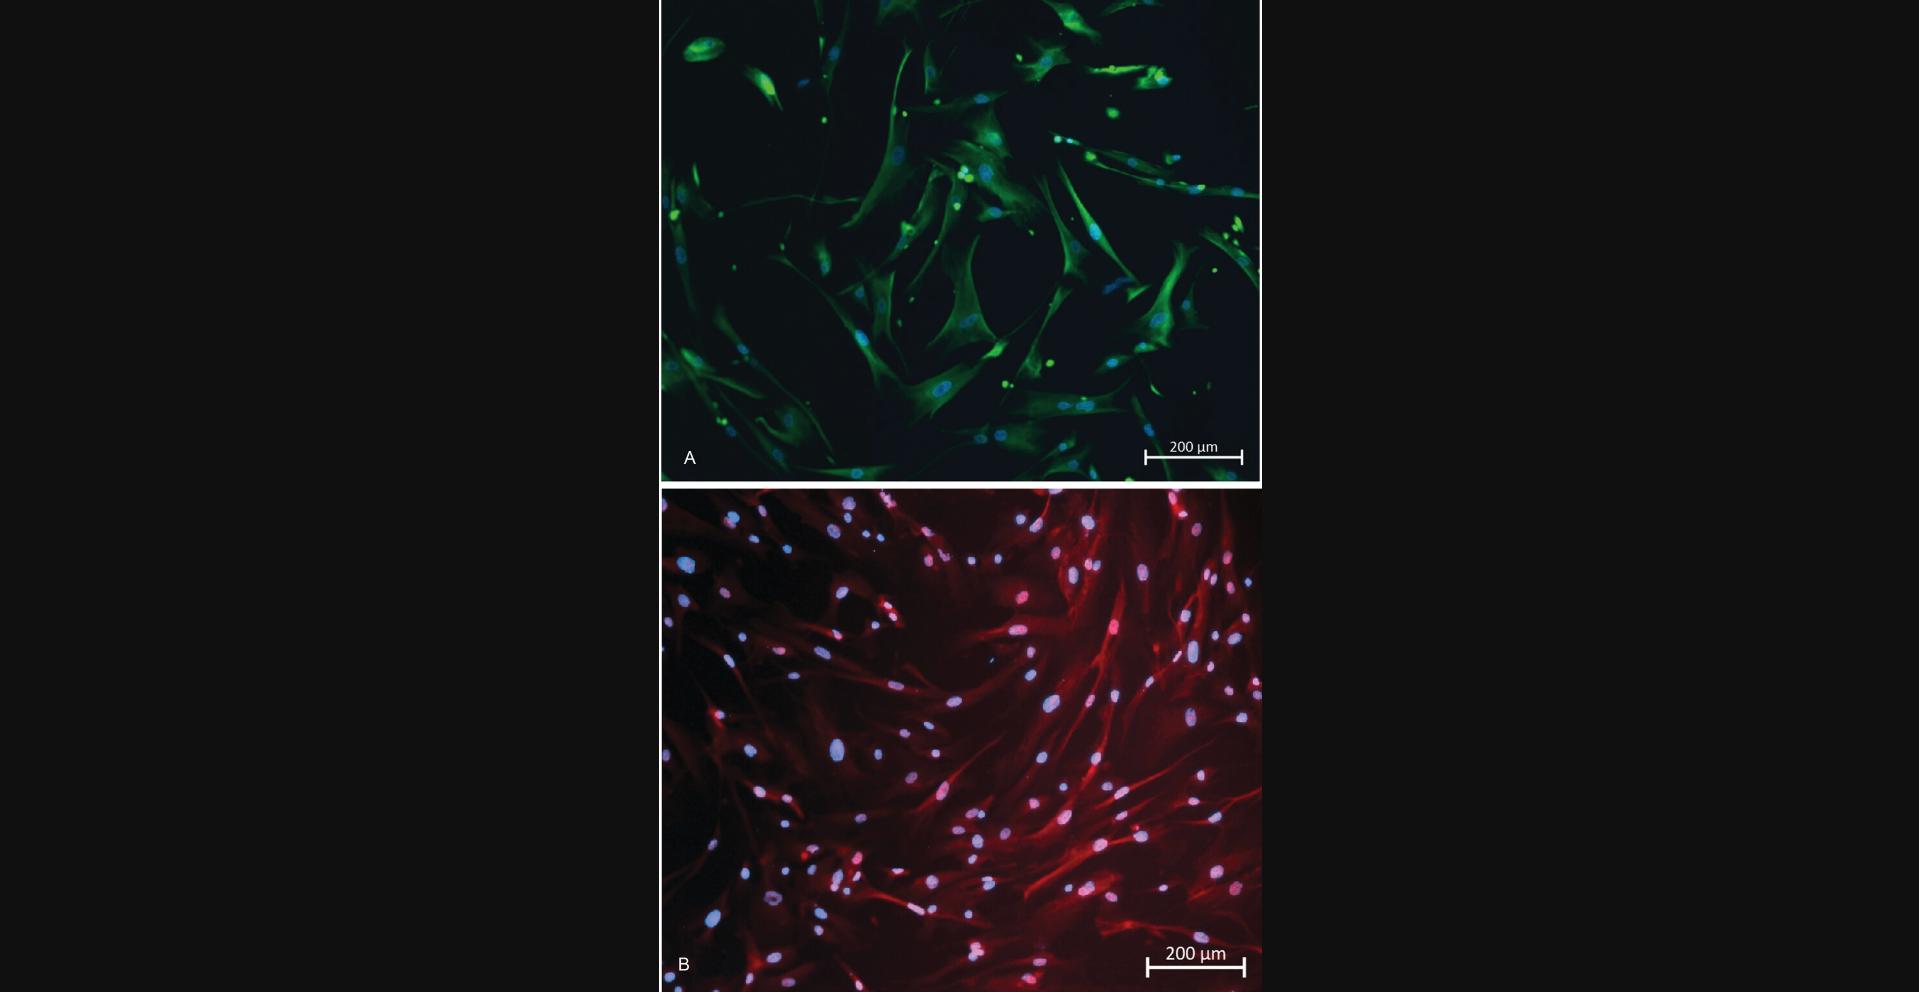
Cells isolated with this protocol stain positively for intracellular markers of fibroblast lineage and show characteristic morphology for fibroblasts. Figure 8A and 8B are images of RSFs in 4th passage, having been passaged once post thawing. Both images show positive staining for vimentin (Figure 8A) and α-smooth muscle actin (Figure 8B).
Time Considerations
Expected times for cell culture and tissue digestion have been provided within the main body of the protocol. Aside from these, approximate times for each protocol are as follows:
Basic Protocol
Tissue prep and mincing: 30 min. Cell plating after digestion: 30 min. Passaging cells: 20 min.
Alternate Protocol
Tissue prep and mincing: 30 min. Cell plating after digestion: 5 to 10 min. Passaging cells: 20 min.
Support Protocol
Freezing cells: 30 min. Thawing cells: 15 min.
Acknowledgments
The authors would like to thank the British Hernia Society who have provided funding for this work in the form of a research grant.
Author Contributions
Thomas Whitehead-Clarke : Conceptualization, funding acquisition, investigation, methodology, project administration, and writing original draft. Alessandra Grillo : Investigation, methodology, and writing original draft. Vivek Mudera : Supervision, writing review, and editing. Alvena Kureshi : Conceptualization, methodology, resources, and supervision.
Conflict of Interest
The authors declare no conflict of interest. This work was partly funded by a research grant from the British Hernia Society.
Open Research
Data Availability Statement
These protocols yield no quantitative data. As such, no data is available publicly.
Literature Cited
- Culbertson, E. J., Xing, L., Wen, Y., & Franz, M. G. (2011). Loss of mechanical strain impairs abdominal wall fibroblast proliferation, orientation, and collagen contraction function. Surgery , 150(3), 410–417. https://doi.org/10.1016/j.surg.2011.06.011
- Deerenberg, E. B., Harlaar, J. J., Steyerberg, E. W., Lont, H. E., van Doorn, H. C., Heisterkamp, J., Wijnhoven, B. P., Schouten, W. R., Cense, H. A., Stockmann, H. B., Berends, F. J., Dijkhuizen, F. P. H., Dwarkasing, R. S., Jairam, A. P., van Ramshorst, G. H., Kleinrensink, G.-J., Jeekel, J., & Lange, J. F. (2015). Small bites versus large bites for closure of abdominal midline incisions (STITCH): A double-blind, multicentre, randomised controlled trial. Lancet , 386(10000), 1254–1260. https://doi.org/10.1016/s0140-6736(15)60459-7
- Dubay, D. A., Wang, X., Kirk, S., Adamson, B., Robson, M. C., & Franz, M. G. (2004). Fascial fibroblast kinetic activity is increased during abdominal wall repair compared to dermal fibroblasts. Wound Repair and Regeneration: Official Publication of the Wound Healing Society [and] the European Tissue Repair Society , 12(5), 539–545. https://doi.org/10.1111/j.1067-1927.2004.012506.x
- Franz, M. G., Smith, P. D., Wachtel, T. L., Wright, T. E., Kuhn, M. A., Ko, F., & Robson, M. C. (2001). Fascial incisions heal faster than skin: A new model of abdominal wall repair. Surgery , 129(2), 203–208. https://doi.org/10.1067/msy.2001.110220
- Mukhey, D., Phillips, J. B., Daniels, J. T., & Kureshi, A. K. (2018). Controlling human corneal stromal stem cell contraction to mediate rapid cell and matrix organization of real architecture for 3-dimensional tissue equivalents. Acta Biomaterialia , 67, 229–237. https://doi.org/10.1016/j.actbio.2017.11.047
- Richter, M., Piwocka, O., Musielak, M., Piotrowski, I., Suchorska, W. M., & Trzeciak, T. (2021). From donor to the lab: A fascinating journey of primary cell lines. Frontiers in Cell and Developmental Biology , 9, 711381. https://doi.org/10.3389/fcell.2021.711381
- Tomasek, J. J., Gabbiani, G., Hinz, B., Chaponnier, C., & Brown, R. A. (2002). Myofibroblasts and mechano-regulation of connective tissue remodelling. Nature Reviews Molecular Cell Biology , 3(5), 349–363. https://doi.org/10.1038/nrm809
- Walming, S., Angenete, E., Block, M., Bock, D., Gessler, B., & Haglind, E. (2017). Retrospective review of risk factors for surgical wound dehiscence and incisional hernia. BMC Surgery , 17(1), 19. https://doi.org/10.1186/s12893-017-0207-0
Citing Literature
Number of times cited according to CrossRef: 1
- R. Khader, T. Whitehead-Clarke, V. Mudera, A. Kureshi, Assessment of mesh shrinkage using fibroblast-populated collagen matrices: a proof of concept for in vitro hernia mesh testing, Hernia, 10.1007/s10029-023-02941-6, (2024).

