Salmonella serotype prediction using the GalaxyTrakr SeqSero2 workflow
Ruth Timme, Paul Morin, Michelle Moore, Shauna Madson, Evelyn Ladines, Julia Manetas, Karen Jinneman
Disclaimer
Please note that this protocol is public domain, which supersedes the CC-BY license default used by protocols.io.
Abstract
Salmonella serotypes are defined by two surface structures, O antigen and two H antigens. Traditional serotype determination is performed with the Salmonella serological somatic (O) and flagellar (H) tests and paired with biochemical confirmation. More than 2,600 Salmonella serotypes have been described in the White-Kauffmann-Le Minor scheme. Molecular methods for serotype determination have been developed based on genes responsible for serotype antigens. These genes are encoded in the rfb gene cluster, fliC , and fljB . SeqSero2 is a bioinformatic pipeline that uses whole genome sequence (WGS) data from pure-culture isolates to perform in silico analysis to determine the antigenic formula, including somatic (O) antigens and both flagellar (H) antigens. This provides continuity with the well-established scheme for phenotypic Salmonella serotypes.
PURPOSE:
This document outlines the steps required to run SeqSero2 v1.1.1 on a collection of isolates in the GalaxyTrakr environment. This is performed by utilizing a custom workflow called “SeqSero2 v1.1.1 collection workflow” and downloading the resulting table.
SCOPE: This protocol covers the following tasks:
-
set up an account in GalaxyTrakr
-
Create a new history/workspace
-
Upload data
-
Execute the SeqSero2 workflow
-
Download the results
Before start
When using GalaxyTrakr, it is recommended to use Google Chrome for optimal browser experience although Microsoft Edge and Safari are also compatible browsers. Internet Explorer and Mozilla FireFox are NOT compatible with GalaxyTrakr.
Steps
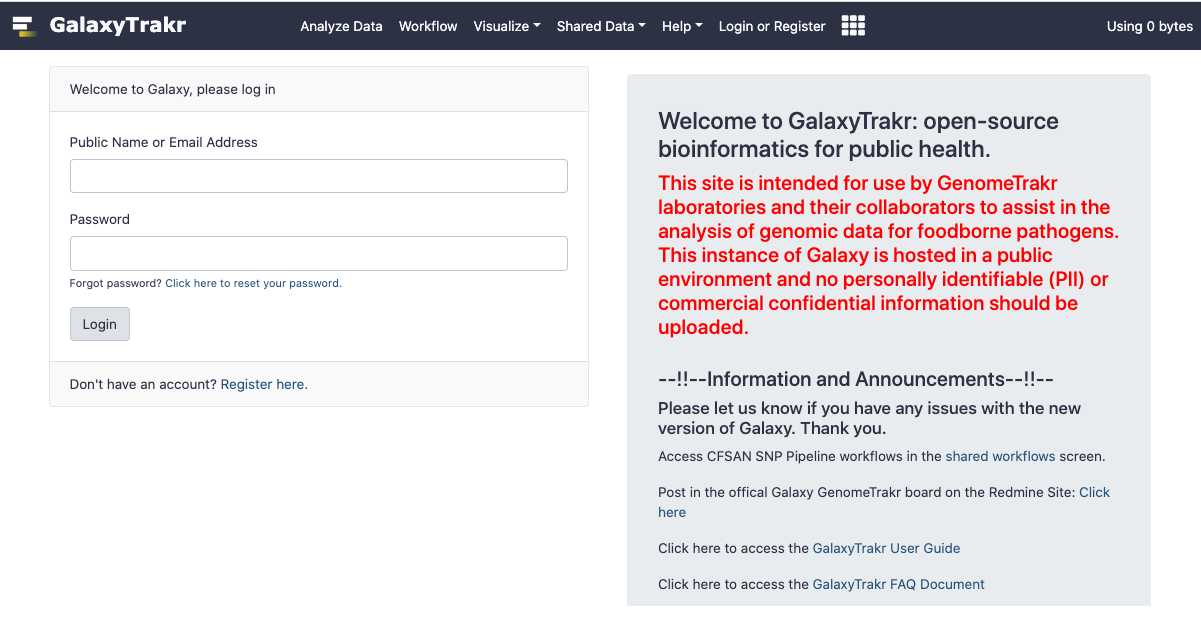
Login and import workflow
Log into GalaxyTrakr 1909 (https://galaxytrakr.org/root/login)
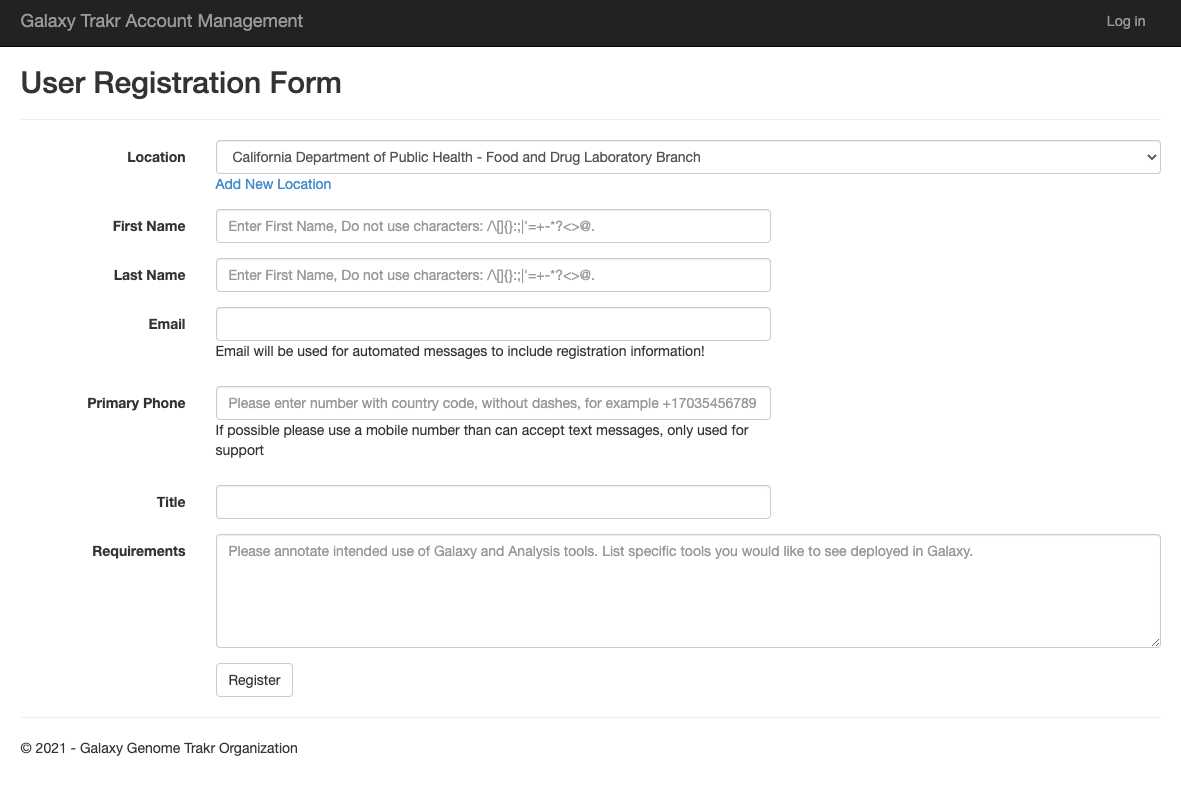
Link to create a new GalaxyTrakr account: https://account.galaxytrakr.org/Account/Register
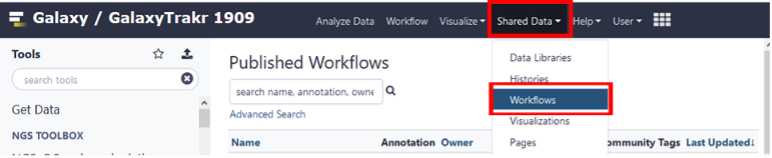
Import the SeqSero2 workflow into the Tools Panel
Click on Shared Data and then Workflows from the dropdown menu.
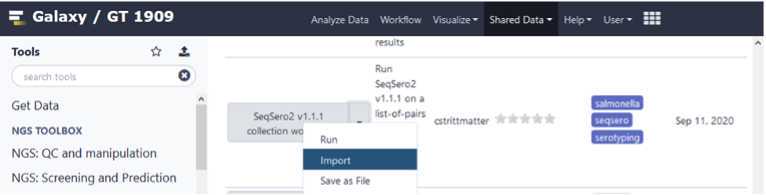
Select the shared workflow: SeqSero2 v1.1.1 collection workflow (cstrittmatter 9/11/2020) and select import from the dropdown arrow.
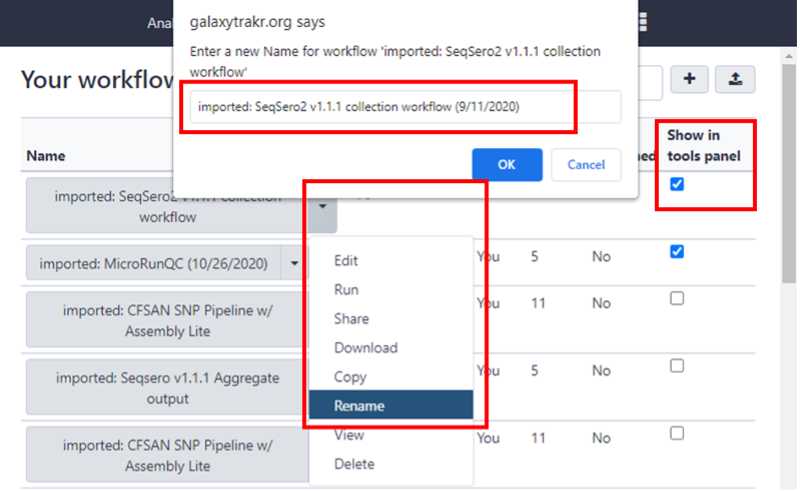
In Your Workflows you can use the dropdown arrow to rename of this workflow.
Adding a date to the name will help you in keeping track of newer versions of this workflow. Workflows do get updated periodically and you want to ensure you are working with the most recent version.
Check the box “Show in tools panel” .
This will move the Seqsero2 v1.1.1 collection workflow into your tools panel permanently and you will now have this workflow available to you every time you log into GalaxyTrakr.
Step 2 only needs to be done once for each workflow that is being imported into your Tools.
Import data for analysis
If your data is already in GalaxyTrakr, open the history containing that data to be analyzed or move the data to a new history for analysis and proceed to Step # . This option may be preferred if the data was already uploaded for other purposes such as MicroRunQC. It’s ok if there are non- Salmonella isolates in your dataset.They will not return an antigenic formula or serovar name.
For uploading new data proceed to next step to create a new history and upload your data to be analyzed.
Create new History:
Click on the “+” button in the upper right corner.
Type in a custom name (i.e., “SeqSero Prediction”)

Import data:
Click on the Tool “ Get Data ”, top of left panel.
Click on the sub-tool of choice to bring in data for analysis.
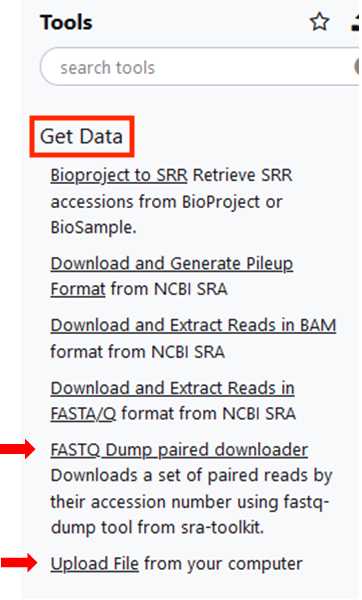
Next steps will show how to import data from NCBI OR upload from your computer.
“Upload File” for .gz files stored locally.
-
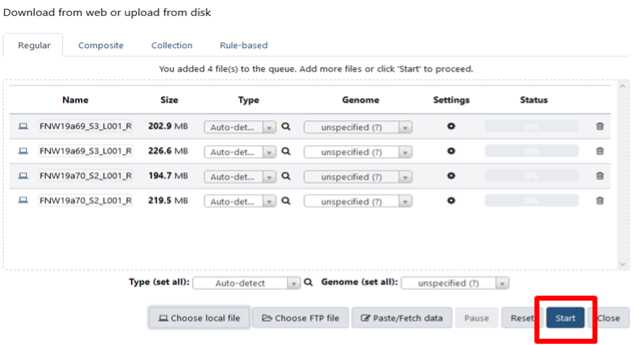
Click on “Choose files”
-
Find your WGS fastq.gz files and select those (2 data files: Read 1 and Read 2 per organism).
-
Click “Start” The amount of time to upload depends on how many files have been selected and the size of those files. The status bar will start to fill as upload progress is made and turn green when completed.
“FASTQ Dump Paired downloader” to import data from NCBI.
-
Enter the NCBI SRR for each sequence to be retrieved.
-
Click “Execute”

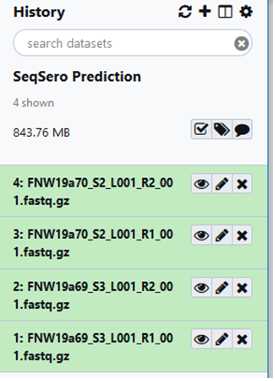
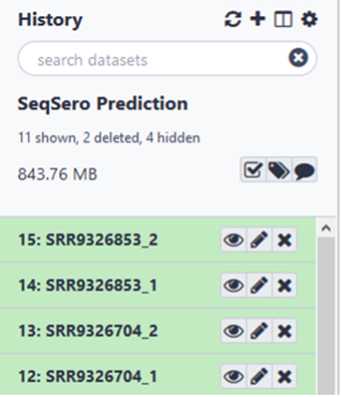
When the data has finished importing, you should see the successfully uploaded files listed in green in the right panel.
Files will be highlighted in RED if they were NOT successfully uploaded.
Example of .gz files uploaded:
Example of SRR data downloaded from NCBI:
Build your dataset of paired-reads
Build “list of data set pairs”
Click on the check mark in the history panel then select all files you want to include in the data set for SeqSero analysis.
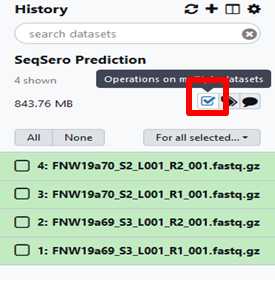
Open options under “For all selected” and then choose “Build List of Dataset Pairs”

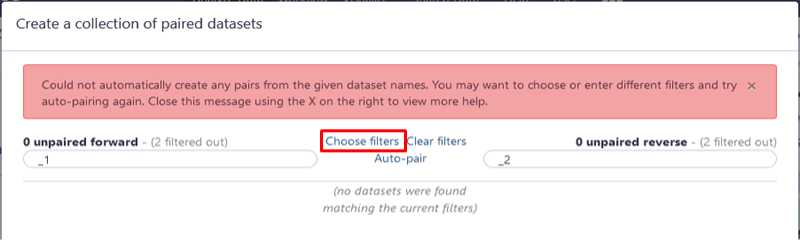
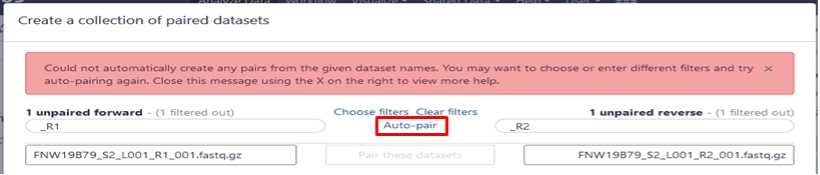
Click “ Choose Filters ”
Click the correct file extension “ Forward: _R1, Reverse: _R2”
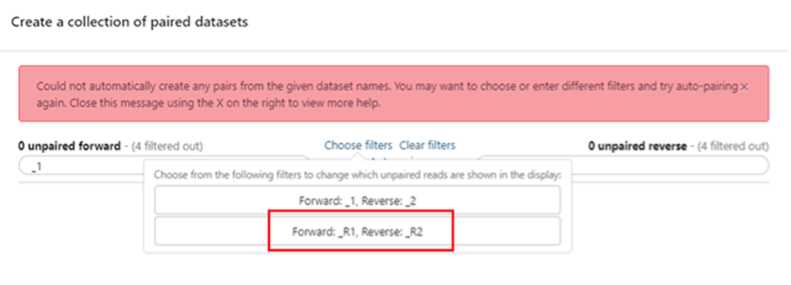
Click “ Auto-pai r”
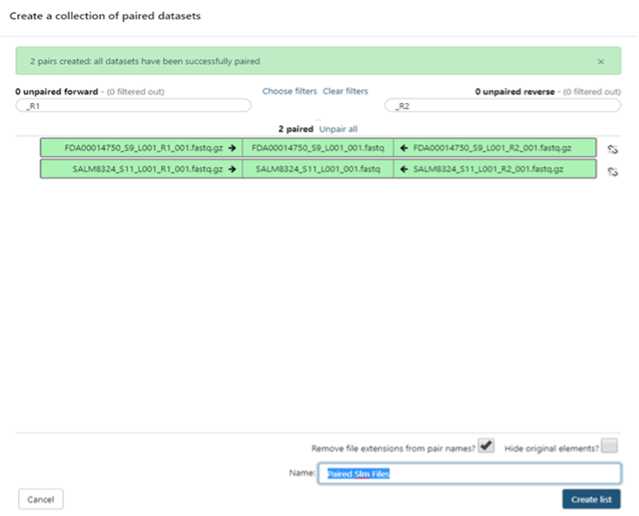
The Read 1 and Read 2 fastq.gz files should automatically pair together. Note: For data downloaded from NCBI the two reads will already be paired and you will not need to select filter and auto-pair.
Type in a custom name for the dataset (i.e., “Paired Slm Files”)
Click “ Create list”
You should see your named list in the history panel
Analyze your data using the SeqSero2 workflow
In NGS TOOLBOX, left panel:
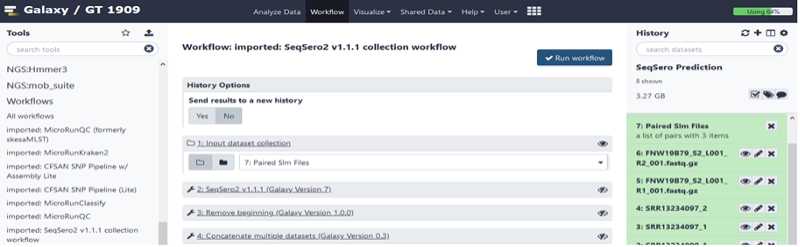
Click on the imported and saved version of the “ SeqSero2 v1.1.1 collection workflow ”.
In the Main window, the newly created list of paired files should automatically show up in the “Input dataset collection” window.
If it doesn’t, click and drag the file from your history panel into the “Input dataset collection” window.
Click “ Run Workflow”
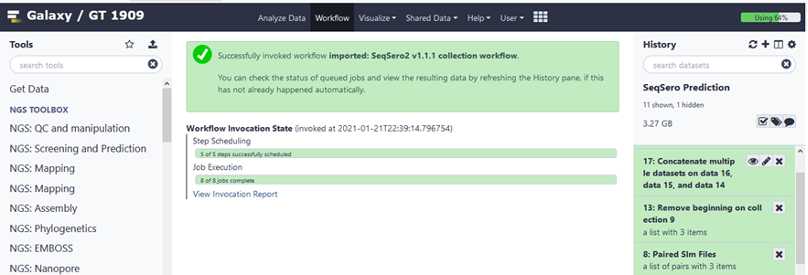
Your working panel should appear green with a white check mark on the upper left-hand corner.
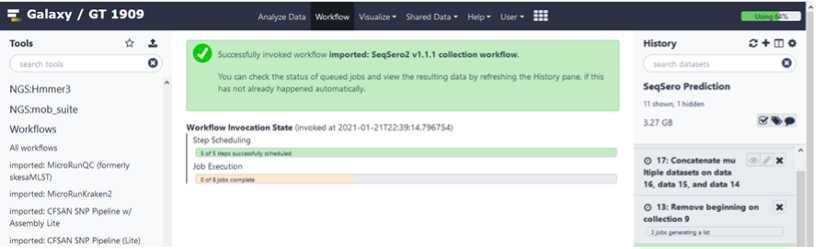
After the SeqSero analysis is complete, the “Concatenate multiple datasets on data” will appear green.
View and export results
Click on the “eyeball” in the “ Concatenate multiple datasets on data” to view table of predicted serotypes for the collection.
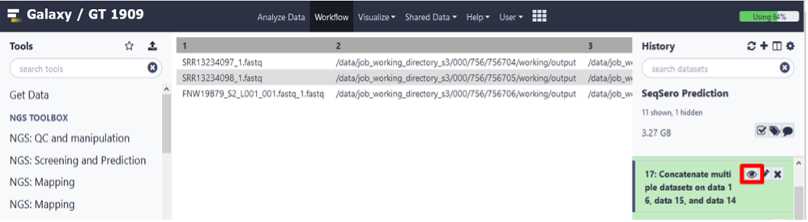
Note: Scroll across the table to see additional information.
Export SeqSero results: cut/paste method

-
Click and drag to highlight text
-
Copy
-
Paste Special as “Text” or “Unicode Text” into Excel
Alternatively, click on the table and “Ctrl-A” to select the entire Table, “Ctrl-C” to copy data and paste the copied data into Excel by “Ctrl-V”
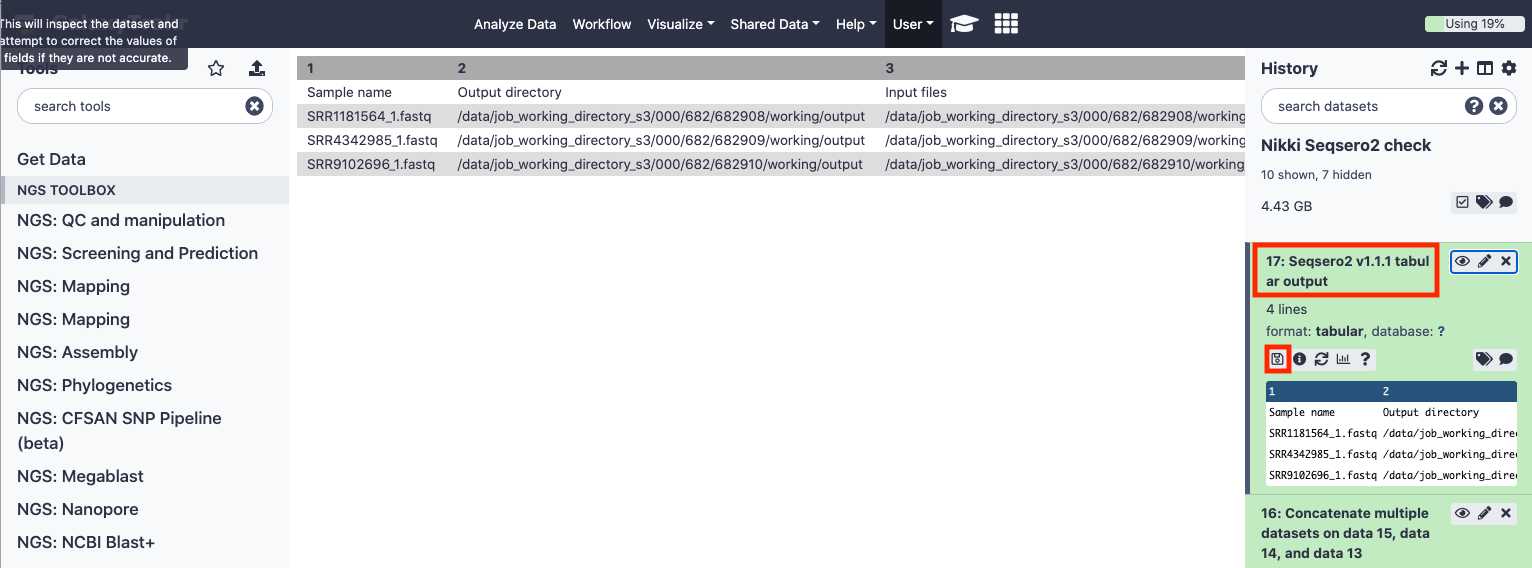
Export SeqSero2 results : download tab-delimited text file
Click the dataset name.
The panel will expand, enabling more options.
Click the " Save " icon to download a tab-delimited file of results.
Example results file: SeqSeroExampleResults.tabular
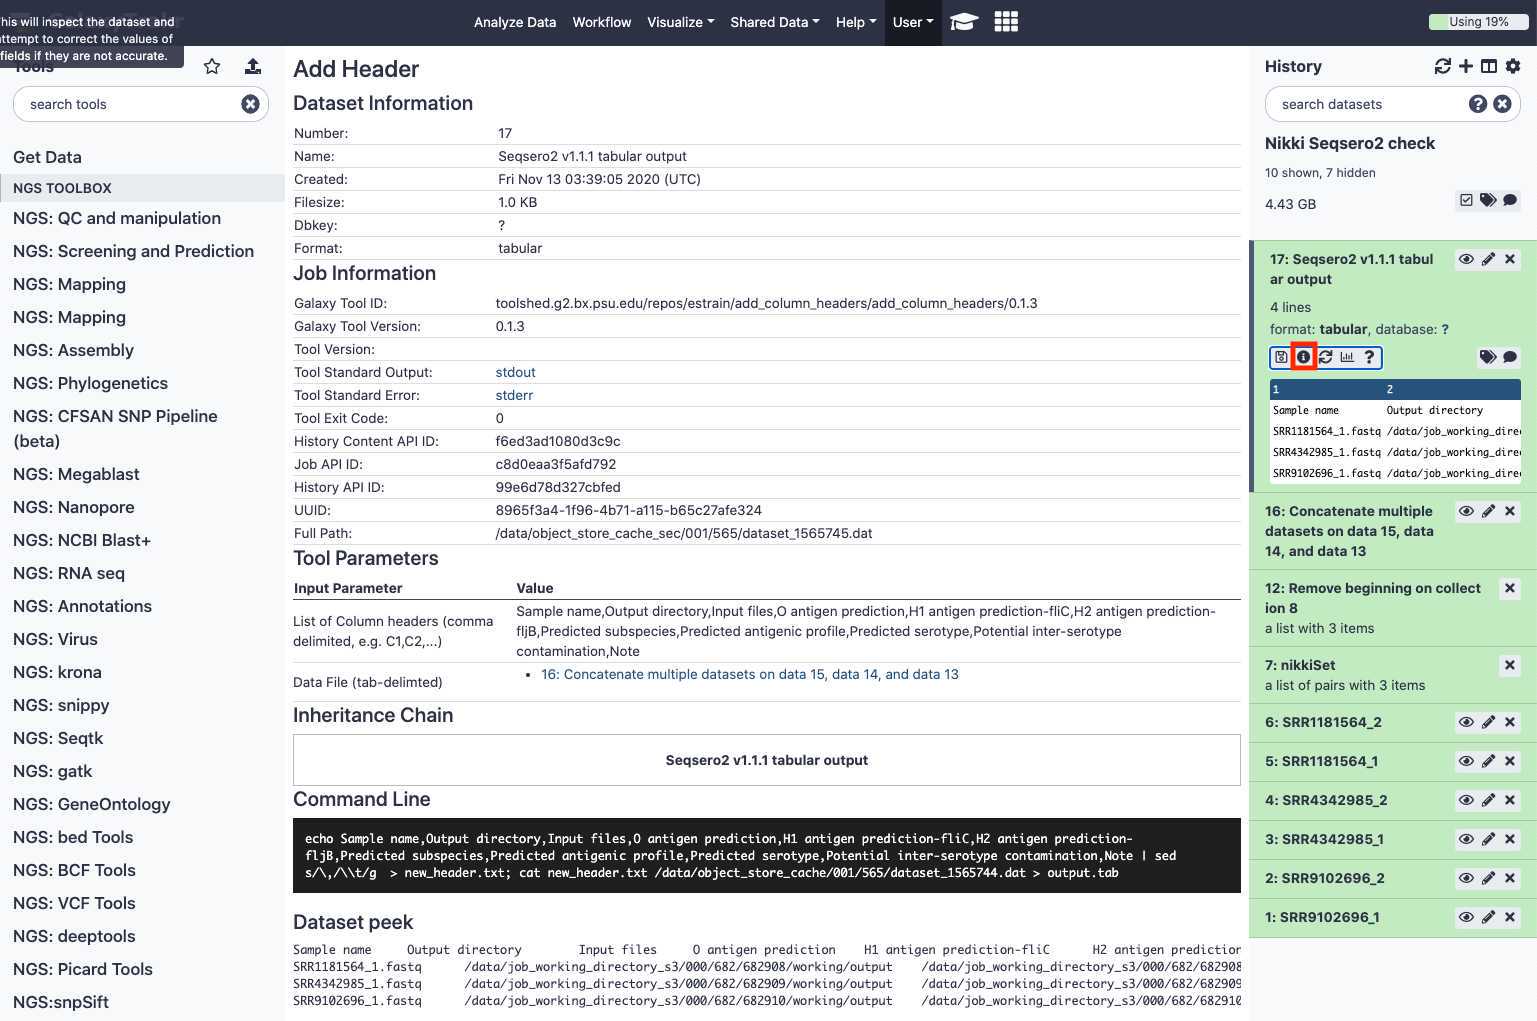
Optional:
The small "Info" icon results in a detailed view of the dataset, analysis, parameters used, etc., which can be helpful for troubleshooting.
GalaxyTrakr Account set up
Login to GalaxyTrakr: https://galaxytrakr.org/root/login
Otherwise, create a GalaxyTrakr account here: https://account.galaxytrakr.org/Account/Register