E-Gel Protocol EFGL
EagleFish GeneticsLab
Abstract
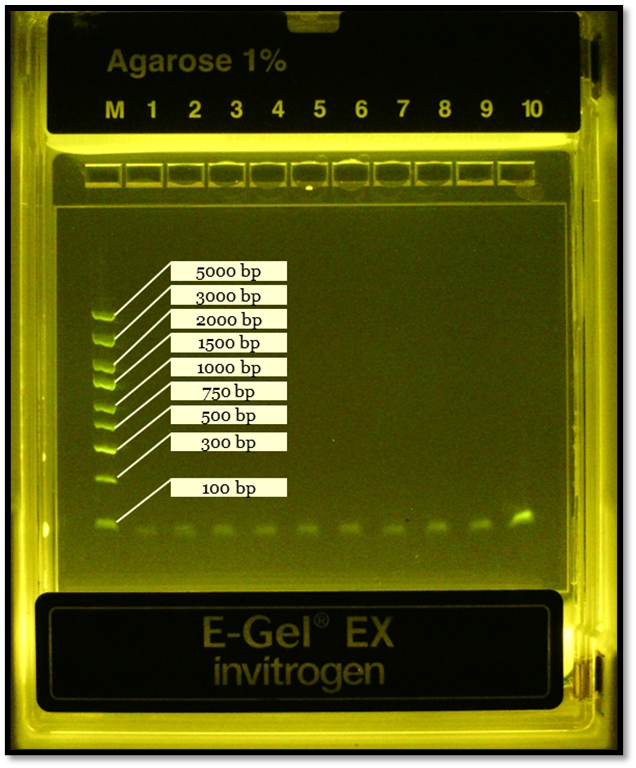
The purpose of this protocol is to determine successful polymerase chain reaction (PCR) amplification. This is achieved by preparing PCR sample and ladder droplets, preparing the E-GelTM Power Snap, depositing all samples into appropriate lanes on an E-gel of the E-gel, and viewing the results on the E-GelTM Power Snap Camera. This will result in an image of a gel, that has a ladder that can be compared to the desired PCR samples.
Steps
WARNING
This machine uses UV that will damage your eyes if you don’t use the protective orange screen as intended.
Required Materials:
PCR Sample(s)* Single channel pipette (2-20 µL)
- Pipette tips
- E-Gel 1 Kb Plus DNA Ladder
- Lab grade nucleus free water
- E-Gel Agarose cassette
- PCR Product
- Parafilm wax paper
- Tape
- Kim wipe
- Flash drive
- E-GelTM Power Snap and Camera
- Gloves
Protocol:
Prepare the working stock of E-Gel 1 Kb Plus DNA Ladder, it is stored in the EFGL primers fridge
1. Vortex and spin

Prepare the PCR Sample(s)
1.      Vortex and spin PCR sample(s)

2.     At EFGL, E-Gels are used to confirm successful PCR amplification
Prepare working space
1.      Vortex and spin PCR sample(s)

2.     At EFGL, E-Gels are used to confirm successful PCR amplification
Prepare working space
1. Secure Parafilm wax paper to bench top with tape
Choose an appropriate E-Gel Agarose cassette with SYBR stain, and the appropriate agarose percentage.
1.      DO NOT OPEN CASSETTE PACKAGE (at this point)

2.     At EFGL there are at least two options, a single comb (11 lanes) or a double comb (22 lanes).

              The single comb is NOT obviously marked. If you are uncertain, with the package closed, you

              should be able to feel one lump (single comb) or two lumps (double comb) through the front

              side of the package.

3.      Choose which one is less wasteful based on how many samples you have, and the type of band

              resolution you need. Remember, you will have to fill empty wells with water

2.     These are in the cabinet below the E-Gel station


Prepare the E-GelTM Power Snap
WARNING WARNING – This machine uses UV that will damage your eyes if you don’t use the protective orange screen as intended.
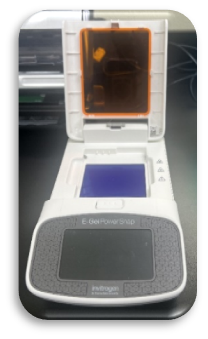
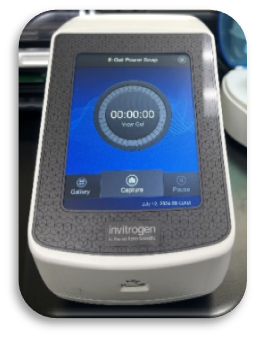
1.      There are two parts to the E-Gel<sup>TM</sup> Power Snap

                 i.     The E-Ge<sup>TM</sup>‱ Power Snap, which is where you will insert the cassette and has the orange


                        UV protective screen.

                 ii.     E-Ge<sup>TM</sup>‱ Power Snap Camera, which detaches from the machine. It is used to view the


                         gel progress and take images.
Prepare the E-GelTM Power Snap (continued)
1.      With the machine closed and the camera sitting on top, flip the switch at the back of the

               machine to make sure it is plugged in, and it turns on.

2.     Insert your flash drive to make sure it syncs with the machine.

3.       **TURN OFF THE MACHINE** , by flipping the switch at the back again.
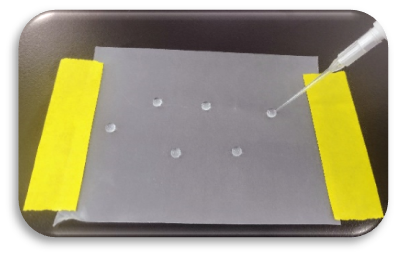
Note: These small samples evaporate quickly. Fully prepare your supplies first so you can move through the next steps efficiently.
Prepare Sample(s) for E-gels
1.      On the wax paper, aliquot out 18 µL of water for the ladder and each sample.

2.     Dispense 2 µL of the ladder into the first 18 µL water droplet

3.      Dispense 2 µL PCR product into the corresponding 18 µL water droplets

                i.     Use a new tip every time

                ii.     Each droplet should only have a total volume of 20µL.
Unwrap the E-Gel
Remove the comb protector by popping it off from the edges of the cassette
Check the cassette for irregularities.
1.      Clean the cassette face with a Kim wipe if you splashed any liquid when removing the comb

               protector

2.     The gel should be clear and transparent
Load the cassette onto the machine
1.      MACHINE OFF

2.     Lift off the camera

3.     Open the orange protective screen, by pressing the white latch release button under the

              warning symbol

4.     With the comb openings facing up, lower the right-hand side of the cassette into the

              machine first. Then press the left-hand side down until it clicks into place.
Moving quickly, use the single channel pipette set to 20 µL to transfer samples to their respective wells
1.      Careful not to overfill the wells

2.     Careful not to pierce the gel walls

3.      Use a new tip every time
In empty wells, add 20 µL of water.
1. Use a new tip every time
When the gel is loaded, snap the lid close and turn ON the machine.
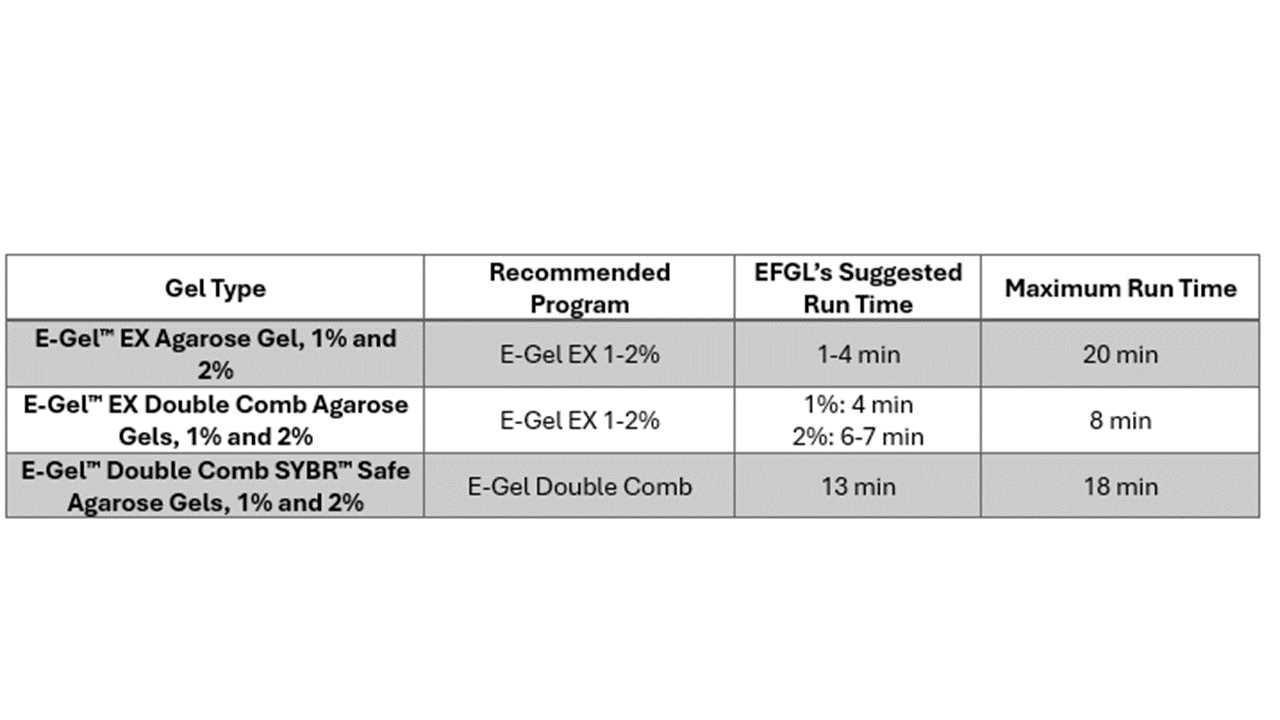
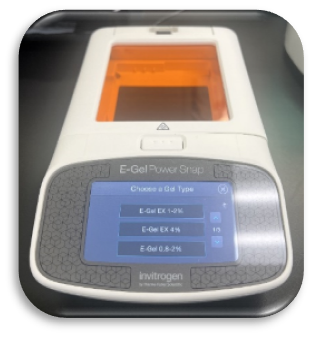
Select the appropriate E-Gel program.
1. Based on the agarose%, single/double comb, and stain
Begin the run.
Place the camera back onto the machine
Capture and export images to a flash drive throughout the gel run.