Genotyping Wheat Grains to Identify Parental Donation of Alleles
Delfi Dorussen, Samuel Burrows, Giorgia Di Santolo, Philippa Borrill
Abstract
In wheat research, KASP (Kompetitive Allele Specific PCR) is widely used to determine the genotypes of progeny from large, segregating populations. However, DNA extraction and genotyping is generally performed on seedling leaf tissue, and thus genotypes that affect seed formation/germination cannot be detected. We have developed a method that relies on DNA extraction from wheat grains to capture these missing genotypes. Furthermore, DNA extraction and genotyping of the endosperm, rather than the embryo, means that we can determine, for each individual, whether an allele is inherited maternally or paternally. This can be used to determine whether an allele is deleterious when inherited either maternally or paternally, or whether particular combinations of alleles are deleterious when inherited from the same parent, but not two separate parents. Moreover, the embryo remains intact throughout this protocol and is capable of germination, allowing adult plants to be recovered from genotypes of interest.
Steps
Grain Surface Sterilisation
Make up the sterilisation solution: add 5 mL sodium hypochlorite solution to 100 mL sterile diH2O.
Place the grains in a 15 mL Falcon tube and add 5 mL 70% ethanol. Vortex the tube for 10 seconds, leave for 5 minutes, and vortex again for 10 seconds.
Pour off the ethanol.
Add 5 mL of the sterilisation solution to the Falcon tube and shake to dislodge the grains from the bottom of the tube. Place the tube on a shaker for 15 minutes.
Pour off the sterilisation solution.
Wash the grains four times with sterile diH2O, using 10 mL of diH2O for each wash.
Grain Dissection & Germination
Working in a flow hood, add 50 μL of sterile diH2O to each well of the shallow 96-well plate.
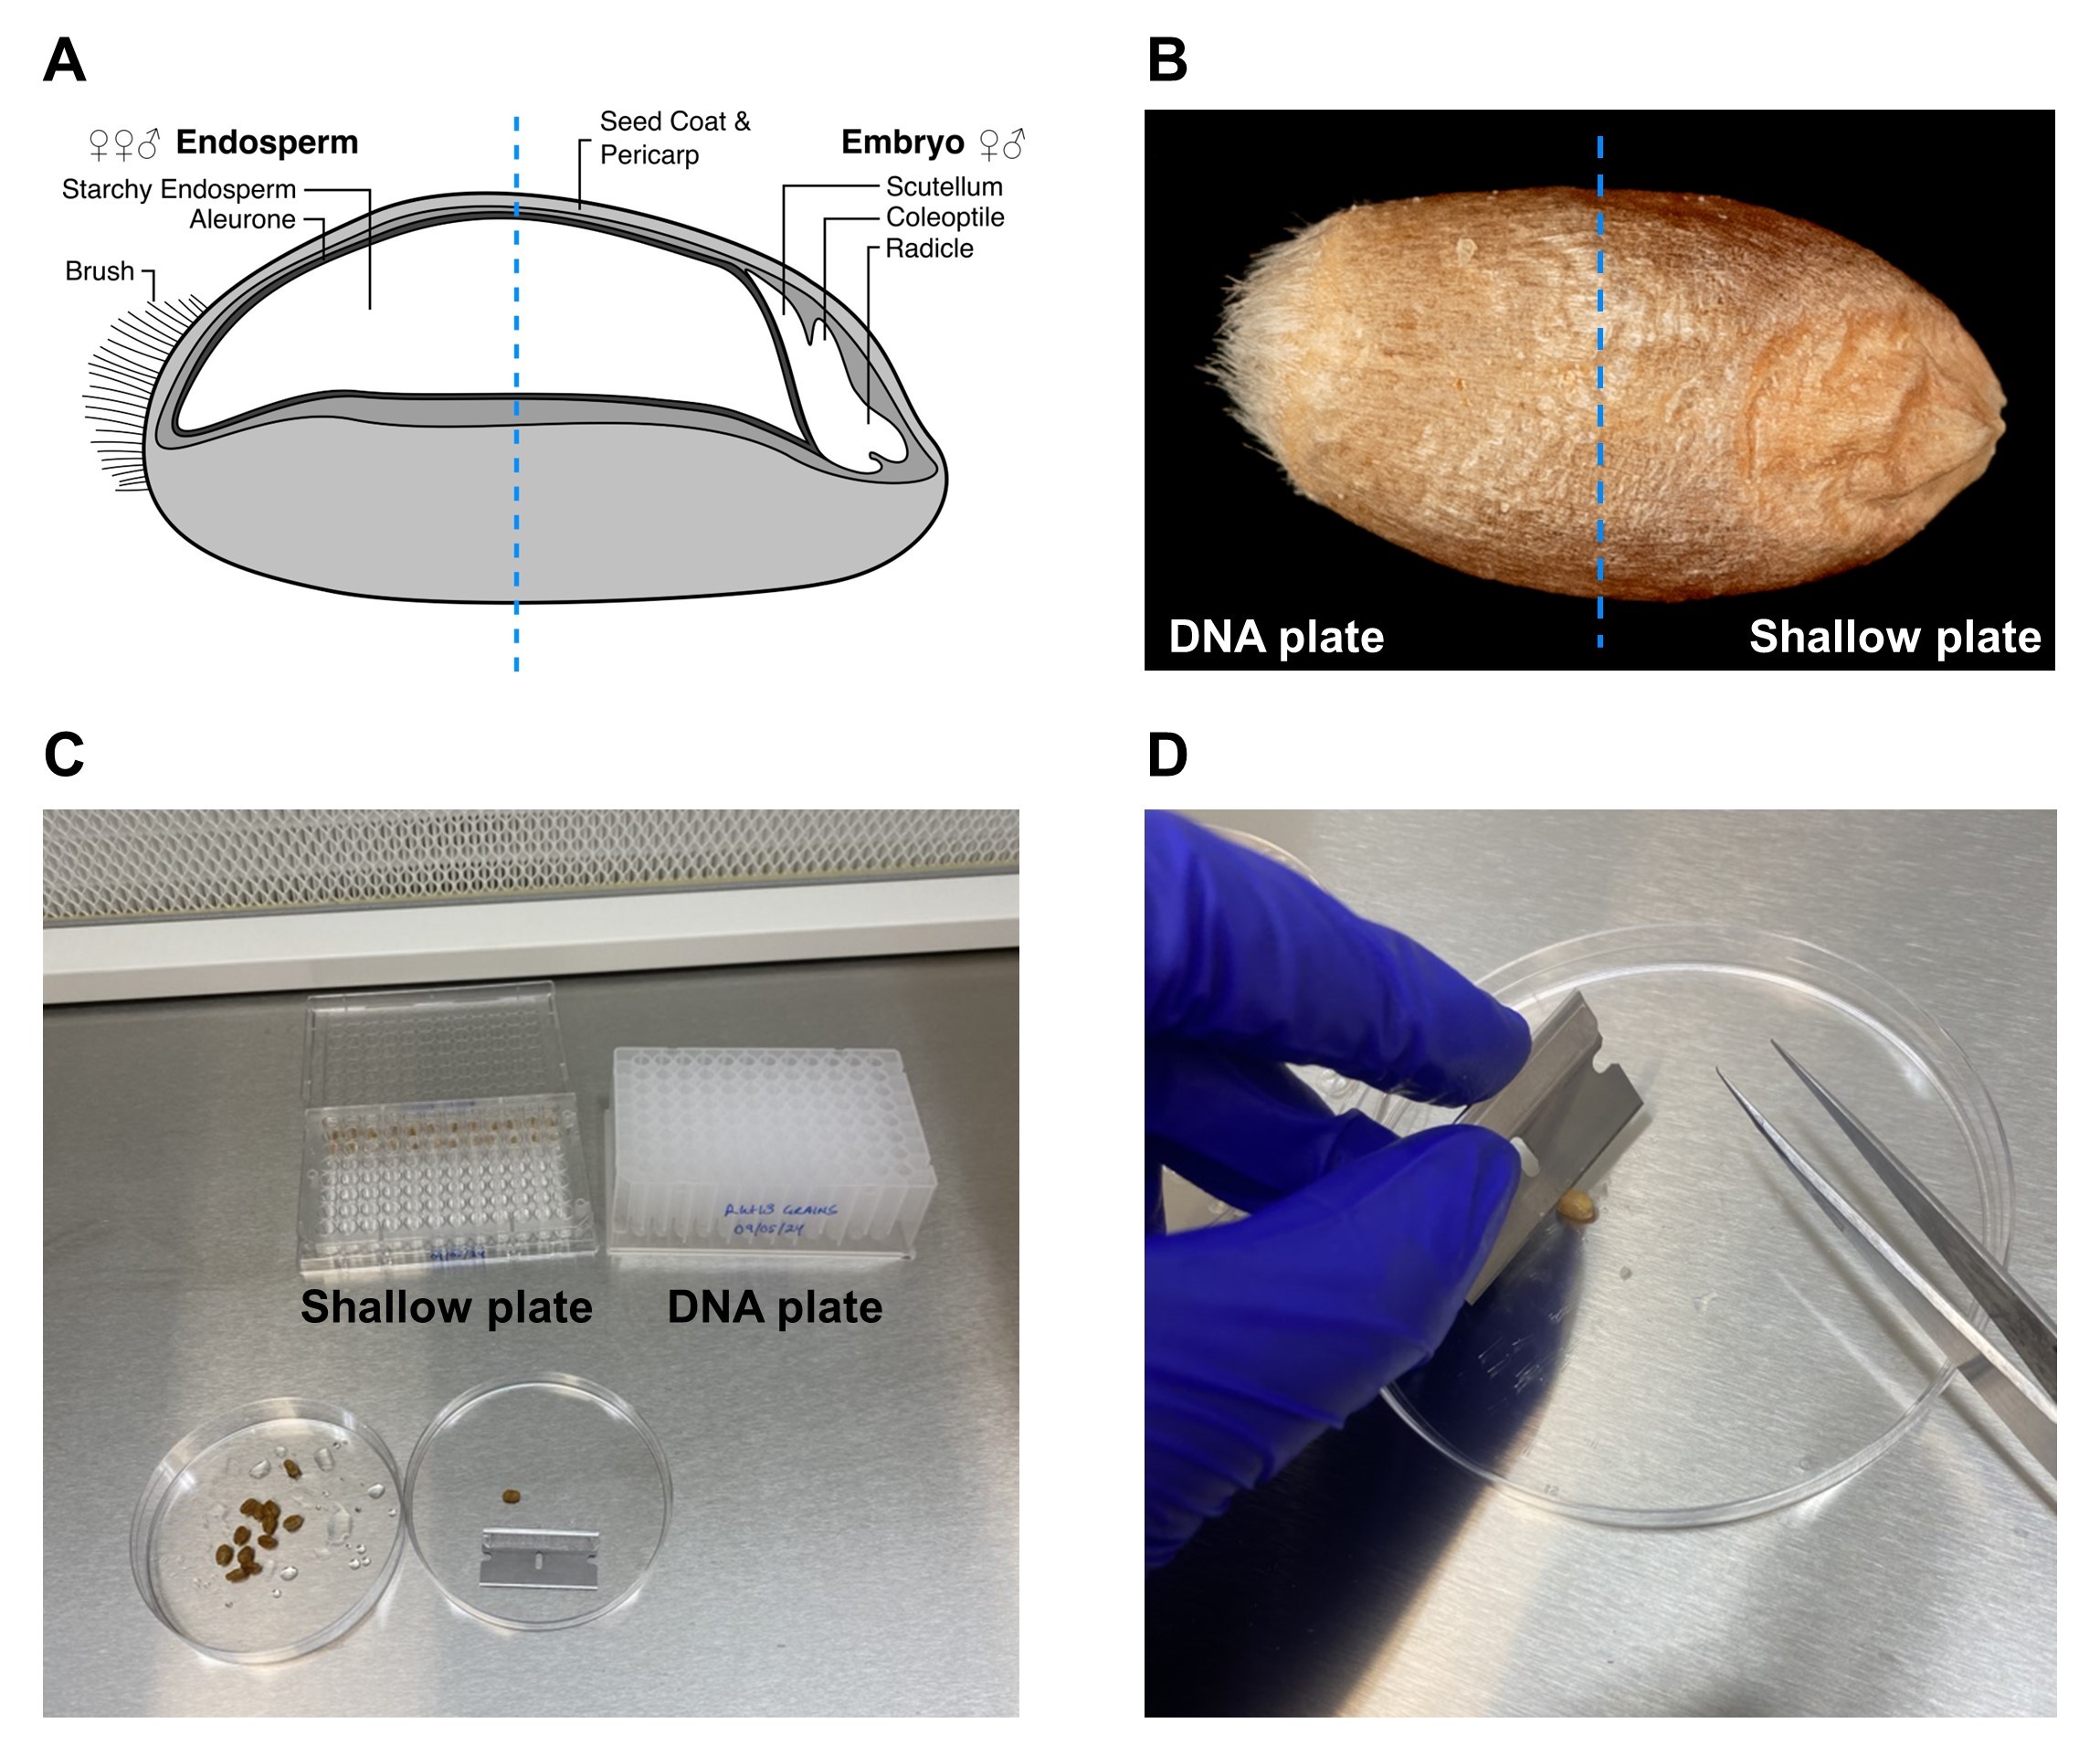
Cut each grain laterally in half with a razor blade ( Figure 1 ).

Place the half of the grain containing the embryo in a well of the shallow 96-well plate. Place the half of the grain containing only the endosperm in a well of the 96-well DNA plate. Ensure that the two grain halves are placed in corresponding wells in the two plates.
Once all of the grains are dissected, cover the 96-well DNA plate with a sticky seal. If DNA extraction will be completed the same day, the DNA plate can be stored in the fridge at 4ºC. Otherwise, store the DNA plate at -20ºC.
Seal the shallow 96-well plate containing the embryo grain halves with parafilm and wrap the plate in aluminium foil. Place the plate in the fridge (4ºC) for two days.
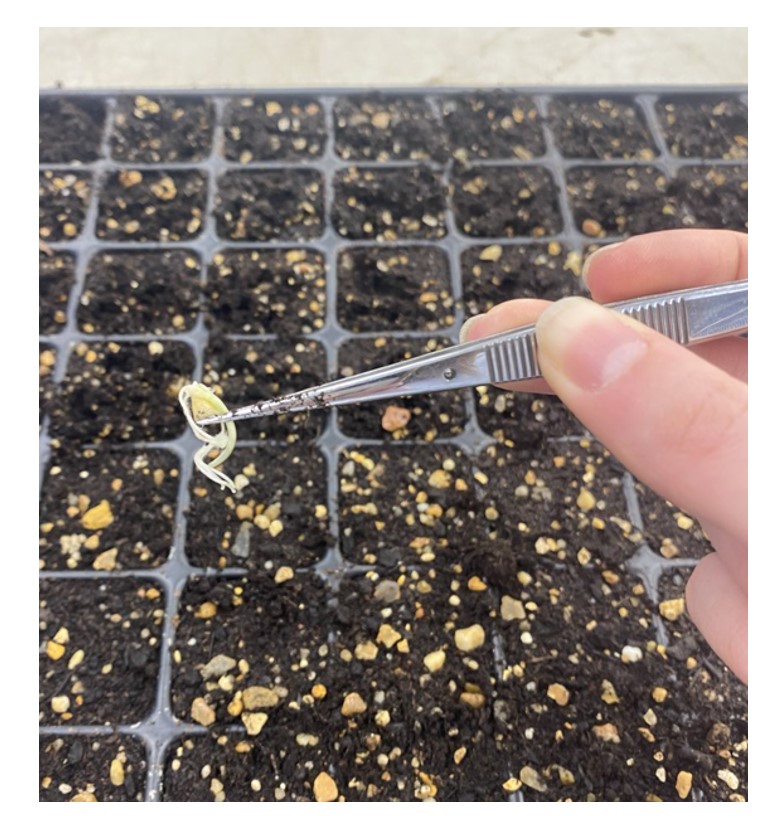
After two days, take the shallow 96-well plate out of the fridge, unwrap the aluminium foil, and leave at room temperature for three to four days to promote germination.
DNA Extraction
If the endosperm grain halves were stored at -20ºC (step 10), leave to defrost at room temperature before continuing.
Preheat the DNA extraction buffer to 65ºC.
Place a tungsten carbide bead in each well of the DNA plate and cap the wells with microtube caps. Shake in a tissue homogeniser (e.g. Geno Grinder) at 1250 rpm for 2 minutes.
Add 333 μL of DNA extraction buffer to each well of the DNA plate and cap the wells (ensuring the same cap is used for each well as in step 16).
Shake the DNA plate in a tissue homogeniser at 1750 rpm for 2 minutes.
Briefly spin the DNA plate in a centrifuge until 3000 rpm is reached.
Incubate the plate at 65ºC for 45 minutes. During the incubation, invert the plate a few times every 15 minutes.
During the incubation, aliquot 240 μL of isopropanol into each well of a new 96-well DNA plate. Seal with a sticky plate seal and store at -20ºC.
Once the plate has been incubated at 65ºC for 45 minutes, place it in the fridge (4ºC) for 15 minutes.
Briefly spin the DNA plate in a centrifuge until 5000 rpm is reached.
Add 167 μL of 6 M ammonium acetate (stored at 4ºC) to each well. Seal the plate with caps and shake vigorously for 15 seconds. Store the plate at -20ºC for 15 minutes.
Centrifuge the plate for 8 minutes at 6000 rpm.
Transfer 400 μL of the supernatant from each well into the plate containing the isopropanol (prepared in step 21). Seal the plate with caps and shake vigorously for 15 seconds.
Briefly spin the DNA plate in a centrifuge until 5000 rpm is reached. Remove the caps from the plate and replace with a sticky plate seal.
Place the DNA plate at -20ºC for 15 minutes to precipitate the DNA.
Centrifuge the plate for 12 minutes at 5200 rpm.
Remove the plate seal and invert the plate to pour off the supernatant. Place the inverted plate on a paper towel for 10 seconds to remove the remaining liquid.
Add 350 μL of 70% ethanol to each well. Centrifuge the plate for 12 minutes at 5200 rpm and pour off the supernatant as before (step 30).
Leave the plate (uncovered) at room temperature overnight, or at 65ºC for 30 minutes.
Add 200 μL of sterile diH2O to each well. Seal with a sticky plate seal and vortex the plate.
Leave the DNA to resuspend at room temperature for 15 minutes or overnight in the fridge (4ºC).
Vortex the plate and then centrifuge for 10 minutes at 5200 rpm.
Genotyping
Prepare the primer mix by combining the following, and vortex to mix:
| A | B |
|---|---|
| 100 μM Vic primer | 12 μL |
| 100 μM Fam primer | 12 μL |
| 100 μM common primer | 30 μL |
| Water | 46 μL |
| Total | 100 μL |
Amount of each component of the primer mix.
Prepare the master mix, scaled for the total number of reactions. For one reaction, combine 2.5 μL PACE/KASP mix with 0.07 μL primer mix. When preparing a large number of reactions, prepare 15% additional master mix. Vortex to mix.
Add 2.5 μL of master mix into each well of a 384-well plate.
Add 2.5 μL of DNA to each well and pipette up and down to mix with the master mix. Seal the plate with an optically clear sticky seal.
Briefly spin the plate in a centrifuge until 5000 rpm is reached.
Place the 384-well plate in a thermocycler with the following run conditions:
| A | B | C | D |
|---|---|---|---|
| Denaturation | 94ºC | 15:00 min | |
| Denaturation | 94ºC | 00:20 min | x10 |
| Annealing/ extension | 65-57ºC | 01:00 min | |
| Denaturation | 94ºC | 00:20 min | x35 |
| Annealing/ extension | 57ºC | 01:00 min | |
| Hold | 12ºC |
Run conditions for KASP genotyping.
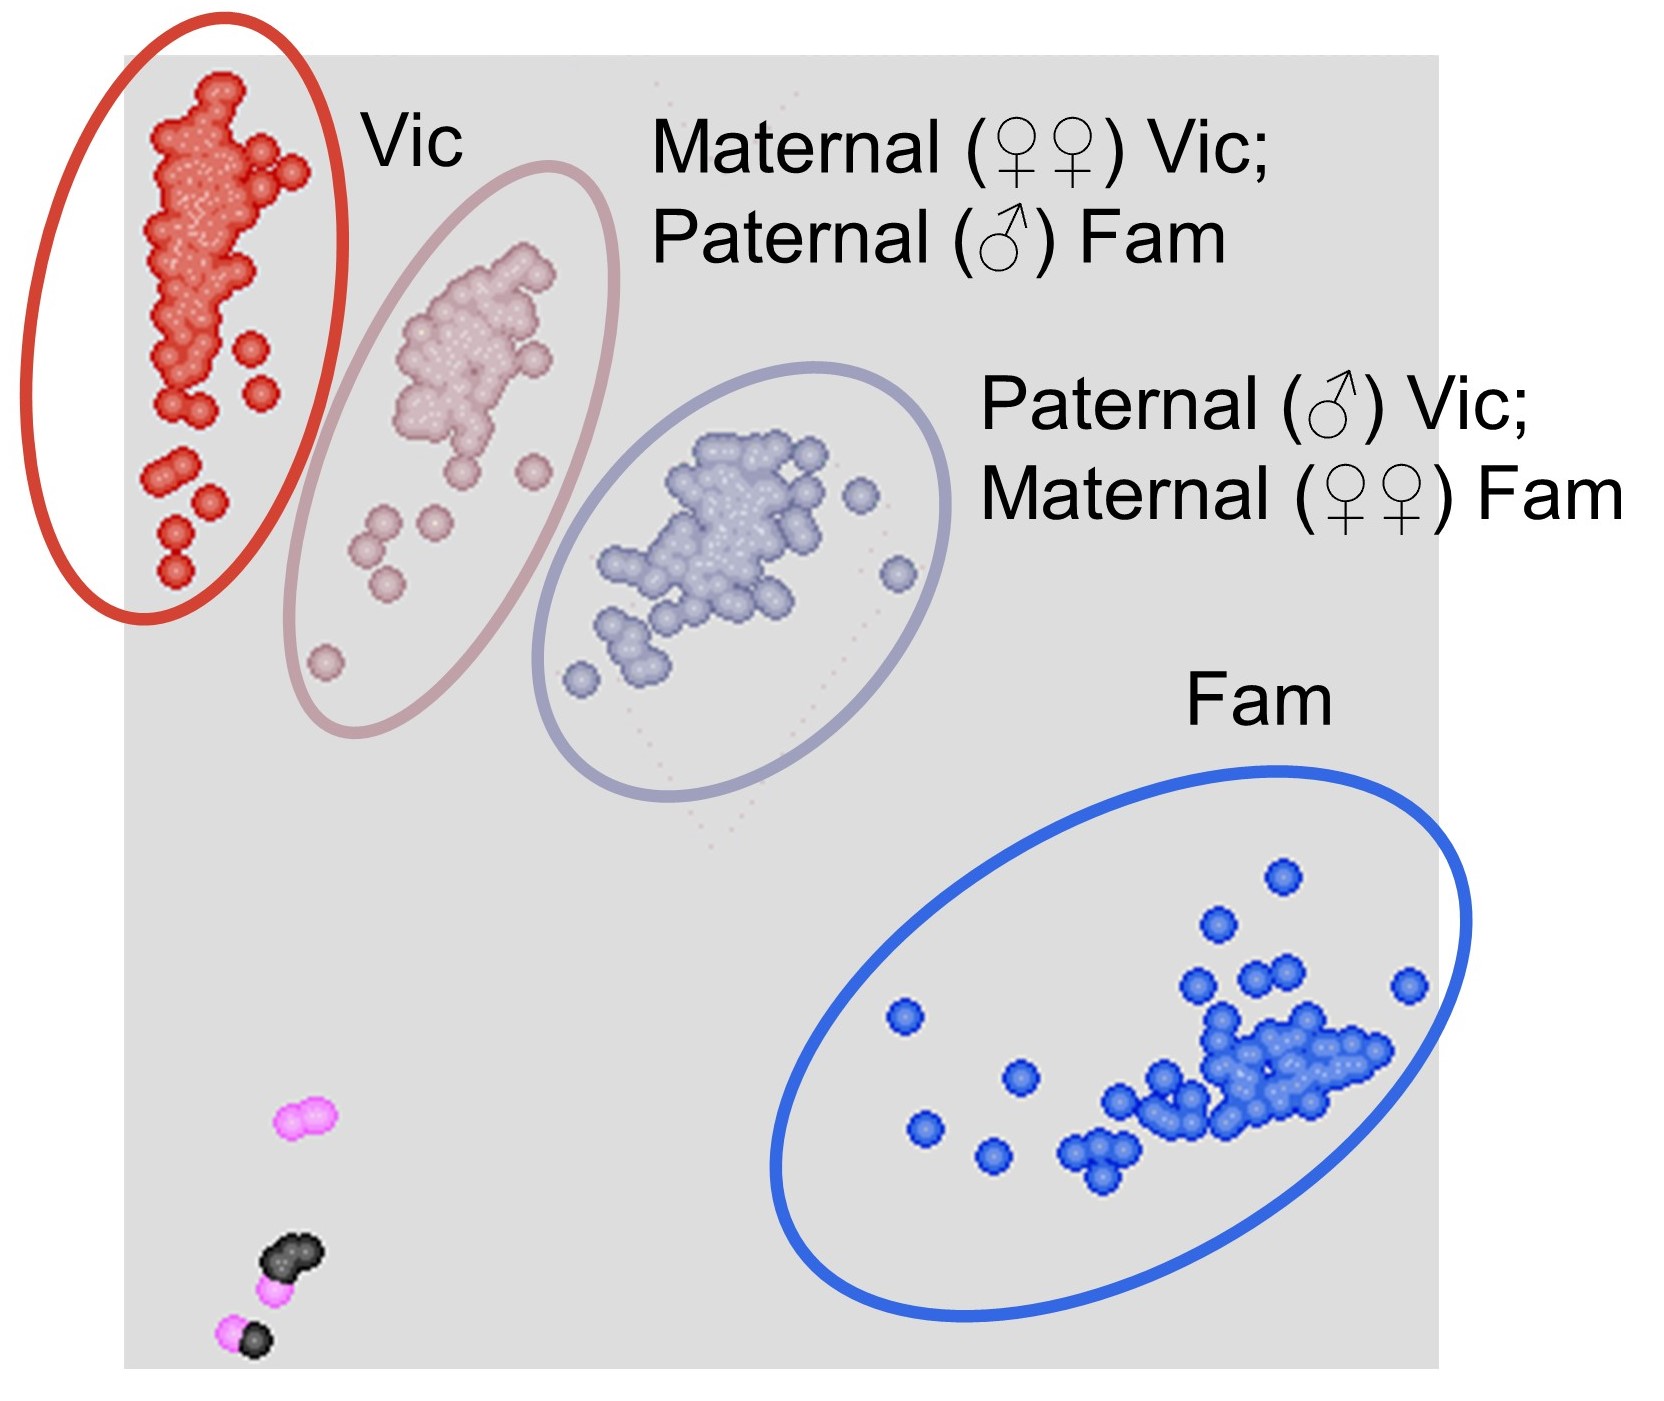
Read the plate in a plate reader and visualise the results using a cluster calling software (e.g. KlusterCaller). Four clusters should be visible on the plot, corresponding to the homozygous Vic genotype, heterozygous with maternal donation of the Vic genotype, heterozygous with maternal donation of the Fam genotype, and the homozygous Fam genotype ( Figure 3 ).


