Nanopore (SQK-LSK109) without barcode
Wen-Ting Zeng
Abstract
Nanopore (SQK-LSK109) without barcode
Steps
Step1. DNA repair and end-prep
In a 200μl PCR tube, mix the following:
| A | B | C |
|---|---|---|
| Reagent | Volume | Color |
| 49~100fmol sample DNA + DI Water | 50μl | |
| End Repair&A-Tailing Buffer (KAPA) | 7μl | Purple |
| End Repair&A-Tailing Enzyme Mix (KAPA) | 3μl | Purple |
| Total | 60μl |
Ensure the components are thoroughly mixed by pipetting, and spin down.
Using a thermal cycler, incubate at 20°C for 0h 30m 0s and 65°C for 0h 30m 0s. Hold at 4°C
1.2
Step2. Adapter ligation
Spin down the Adapter Mix (AMX) and Quick T4 Ligase, and place on ice.
Thaw Ligation Buffer at room temperature, spin down and mix by vortex.
In a 200μl PCR tube, mix in the following order:
| A | B | C |
|---|---|---|
| Reagent | Volume | Color |
| End repaired & A-tailing product | 60μl | |
| Adapter Mix (AMX) | 5μl | Green |
| DI Water | 5μl | |
| Ligation Buffer (KAPA) | 30μl | Yellow |
| NEBNext Quick T4 DNA Ligase (KAPA) | 10μl | Yellow |
| Total | 110μl |
Ensure the components are thoroughly mixed by pipetting, and spin down.
Using a thermal cycler, incubate at 20°C 0h 30m 0s .
Step3. Adapter ligation clean-up
| A | B | C |
|---|---|---|
| Reagent | Volume | Color |
| Ligation product | 110μl | |
| Agencourt AMPure XP beads | 44μl | Stored in 4°C |
| Long Fragment Buffer (LFB) or Short Fragment Buffer (SFB) | 250μl (twice) | Orange & Grey |
| Elution Buffer from the Oxford Nanopore kit (EB) | 14μl | Black |
Transfer the DNA sample (110μl) to a clean 1.5 ml tube.
Spin down and place the tube back on the magnet. Pipette off any residual supernatant.
Allow to dry for ~30 seconds, but do not dry the pellet to the point of cracking.
Remove the tube from the magnetic rack and resuspend the pellet in 14 μl Elution Buffer (EB).
Spin down and incubate for 10 minutes at room temperature.
Remove and retain 14 μl of eluate containing the DNA library into a clean 1.5 ml Eppendorf DNA tube.
Quantify 1 μl of eluted sample using a Qubit fluorometer.
Resuspend the AMPure XP beads by vortexing.
Add 44 μl (0.4X) of resuspended AMPure XP beads to the adapter-ligated reaction and mix by pipetting.
Incubate on a Hula mixer (rotator mixer) for 5 minutes at room temperature.
Spin down the sample and pellet on a magnet. Keep the tube on the magnet, and pipette off the supernatant.
Wash the beads by adding either 250 μl Long Fragment Buffer (LFB) or 250 μl Short Fragment Buffer (SFB).
Flick the beads to resuspend, spin down, then return the tube to the magnetic rack and allow the beads to pellet.
Remove the supernatant using a pipette and discard.
Repeat the previous step 3.6.
Step4. Priming and loading the SpotON flow cell
Thaw the flow cell, Sequencing Buffer (SQB), Loading Beads (LB), Flush Tether (FLT) and one tube of Flush Buffer (FB) at room temperature.
Complete the flow cell priming:
-
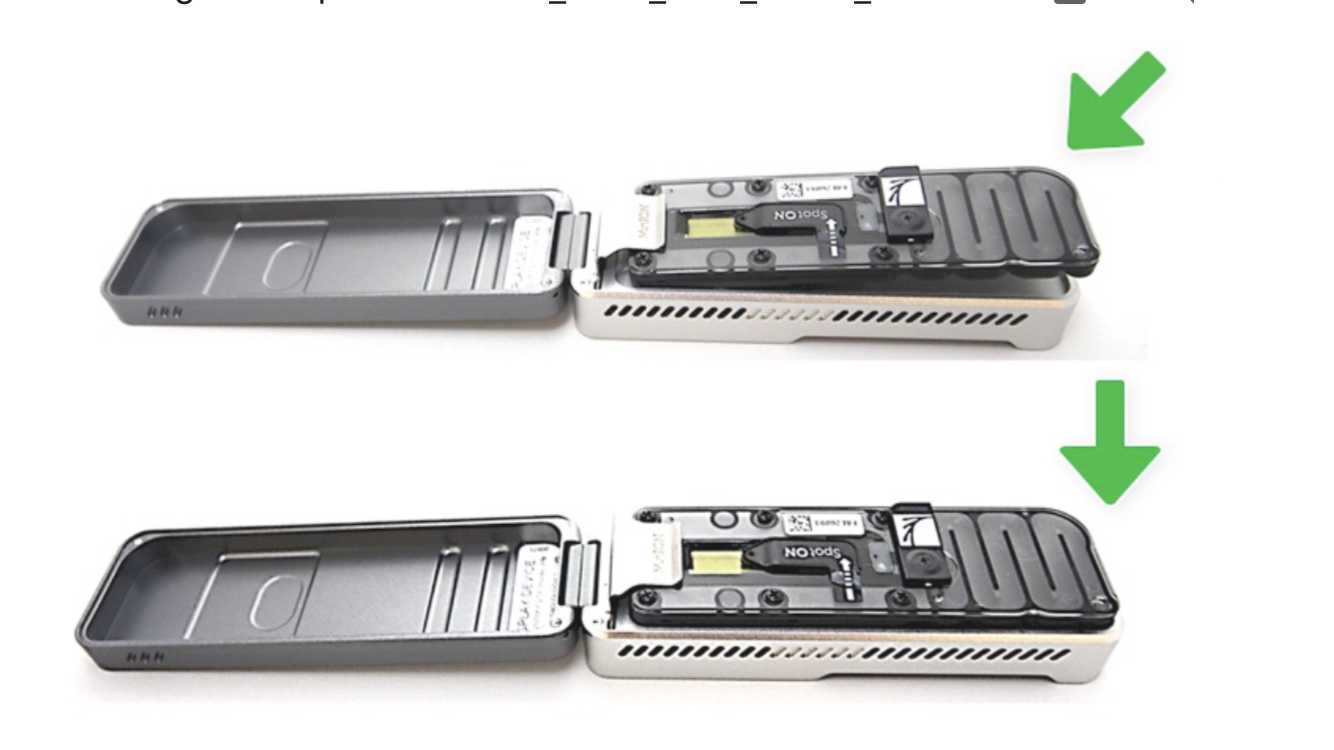
Gently lift the SpotON sample port cover to make the SpotON sample port accessible.
-
Load 200 μl of the priming mix into the flow cell via the priming port (not the SpotON sample port), avoiding the introduction of air bubbles.
Mix the prepared library gently by pipetting up and down just prior to loading.
Add 75 μl of sample to the flow cell via the SpotON sample port in a dropwise fashion. Ensure each drop flows into the port before adding the next.
Check flow cell (Check the pore)
Mix the Sequencing Buffer (SQB), Flush Tether (FLT) and Flush Buffer (FB) tubes by pipetting and spin down at room temperature.
After opening the priming port, check for a small air bubble under the cover. Draw back a small volume to remove any bubbles (a few μl):
-
Set a P1000 pipette to 200 μl.
-
Insert the tip into the priming port.
-
Turn the wheel until the dial shows 220-230 μl, or until you can see a small volume of buffer entering the pipette tip.
To prepare the flow cell priming mix, add 30 μl of thawed and mixed Flush Tether (FLT) directly to the tube of thawed and mixed Flush Buffer (FB), and mix by vortexing at room temperature.
| A | B | C |
|---|---|---|
| Reagent | Volume | Color |
| Flush Tether (FLT) | 30μl | Purple |
| Flush Buffer (FB) | New one | Blue |
| Total | 1.2ml |
Load 800 μl of the priming mix into the flow cell via the priming port, avoiding the introduction of air bubbles.
Wait for 5 minutes. During this time, prepare the library for loading by following the steps below.
Thoroughly mix the contents of the Loading Beads (LB) by flick.
In a new tube, prepare the library for loading as follows:
| A | B | C |
|---|---|---|
| Reagent | Volume | Color |
| Sequencing Buffer (SQB) | 37.5μl | Red |
| Loading Beads (LB),mixed immediately before use | 25.5μl | Pink |
| DNA library | 12μl | |
| Total | 75μl |
Step5. Flow Cell Wash
Place the tube of Wash Mix (WMX) on ice. Do not vortex the tube.
Thaw one tube of Wash Diluent (DIL) at room temperature.
Load 400 μl of the prepared Flow Cell Wash Mix into the flow cell via the priming port, avoiding the introduction of air.
Close the priming port and wait for 30 minutes.
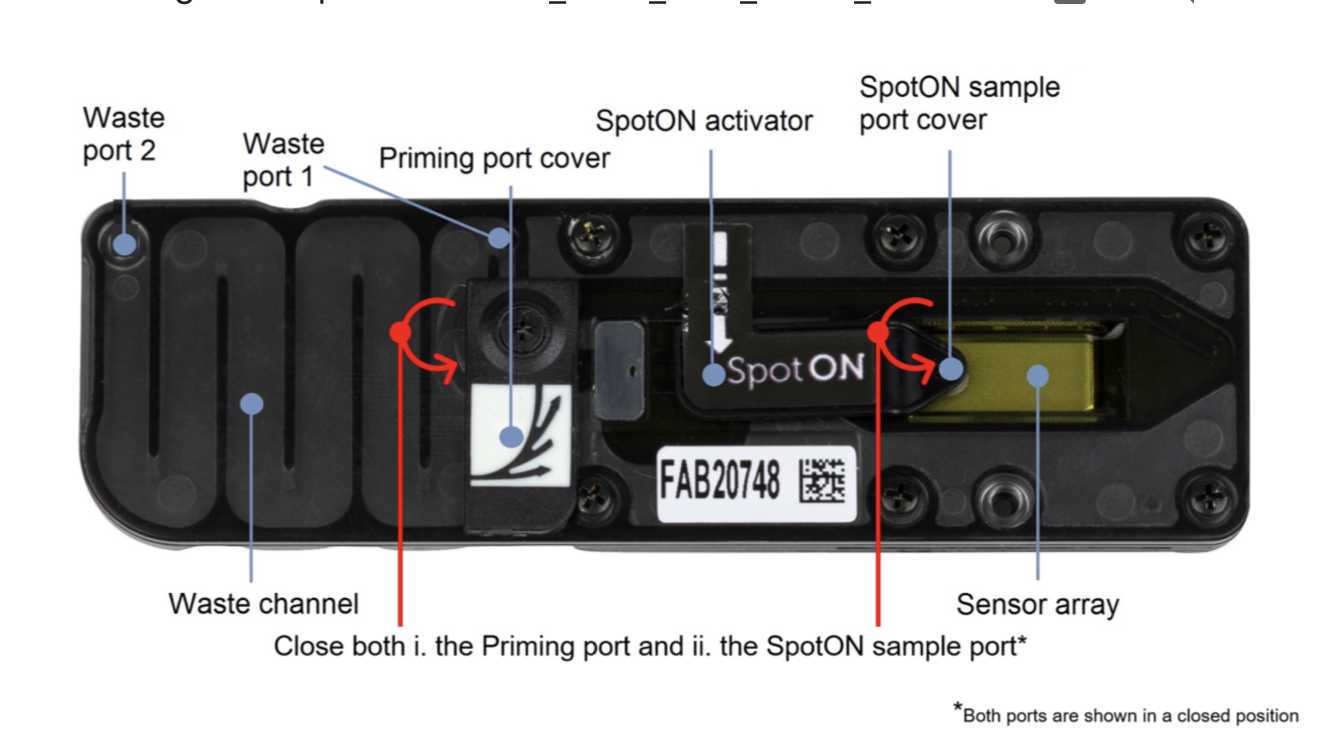
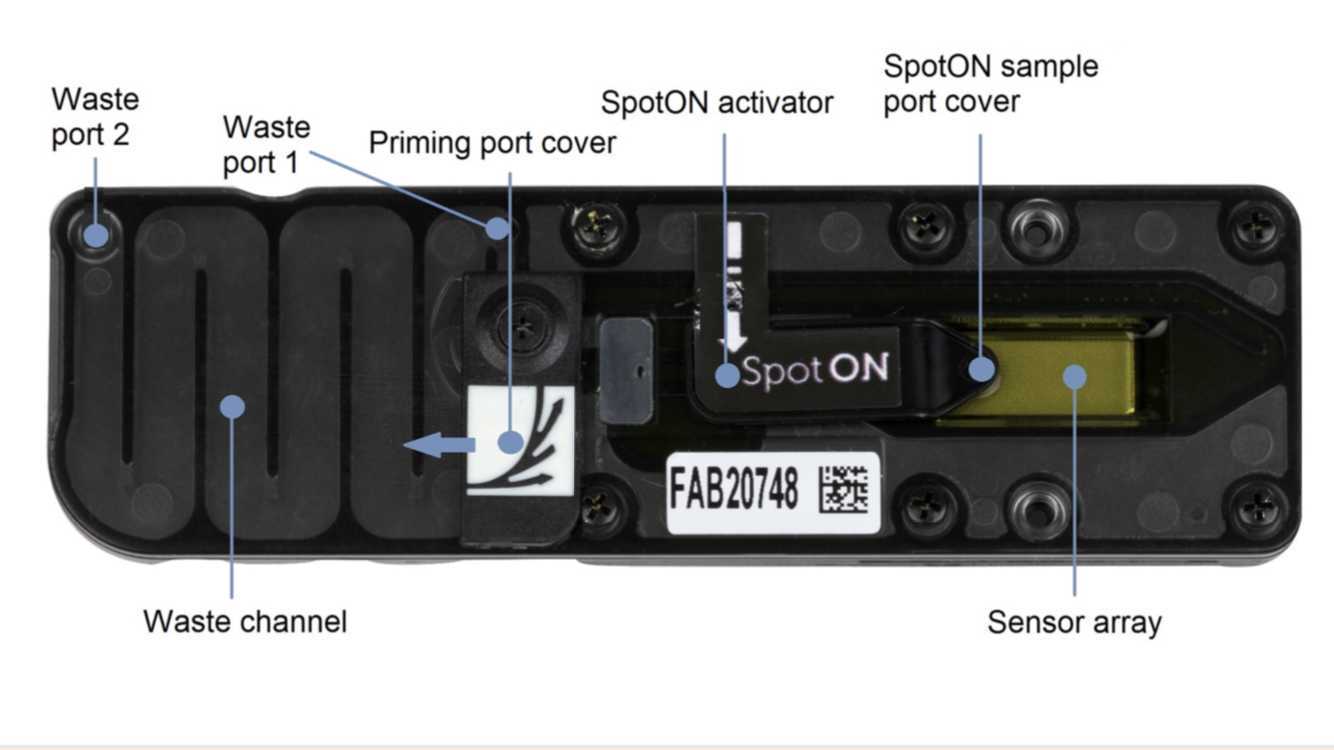
Ensure that the priming port cover and SpotON sample port cover are in the positions indicated in the figure below.
Using a P1000, remove all fluid from the waste channel through Waste port 1. As both the priming port and SpotON sample port are closed, no fluid should leave the sensor array area.
Mix the contents of Wash Diluent (DIL) thoroughly by vortexing, spin down briefly and place on ice.
In a clean 1.5 ml Eppendorf DNA tube, prepare the following Flow Cell Wash Mix:
| A | B | C |
|---|---|---|
| Component | Volume | Color |
| Wash Mix (WMX) | 2μl | Brown |
| Wash Diluent (DIL) | 398μl | Brown |
| Total | 400μl |
Mix well by pipetting, and place on ice. Do not vortex the tube.
Stop or pause the sequencing experiment in MinKNOW, and leave the flow cell in the device.
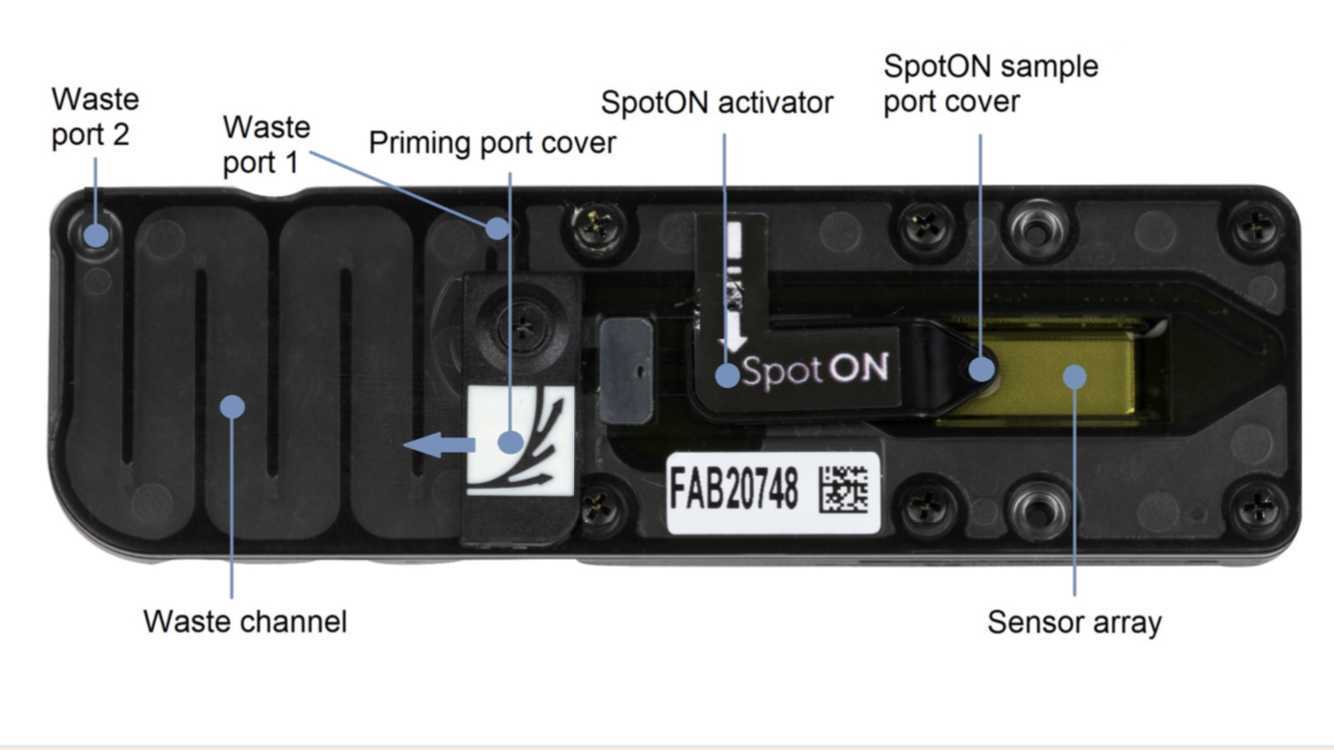
Ensure that the priming port cover and SpotON sample port cover are in the positions indicated in the figure below.
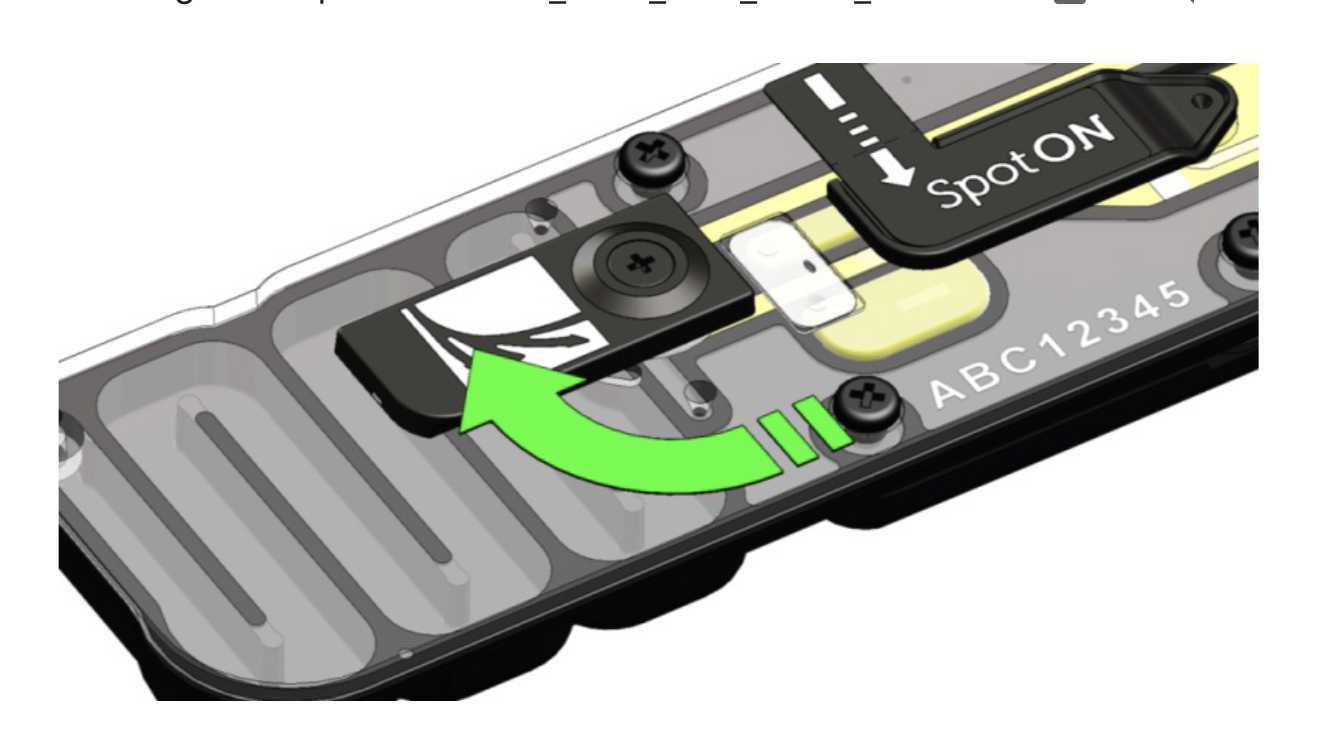
Rotate the flow cell priming port cover clockwise so that the priming port is visible.
Check for air between the priming port and the sensor array. If necessary, using a P1000 draw back a small volume to remove any air (a few μls):
-
Set a P1000 pipette to 200 μl.
-
Insert the tip into the priming port.
-
Turn the wheel until the dial shows 220-230 μl, or until you can see a small volume of buffer/liquid entering the pipette tip.
-
Visually check that there is continuous buffer from the priming port across the sensor array.
Step6. Store the MinION/GridION flow cell for later use
Thaw one tube of Storage Buffer (S) at room temperature.
Mix contents thoroughly by pipetting and spin down briefly.
Rotate the flow cell priming port cover clockwise so that the priming port is visible.
Check for air between the priming port and the sensor array. If necessary, using a P1000 draw back a small volume to remove any air (a few μls):
-
Set a P1000 pipette to 200 μl.
-
Insert the tip into the priming port.
-
Turn the wheel until the dial shows 220-230 μl, or until you can see a small volume of buffer/liquid entering the pipette tip.
-
Visually check that there is continuous buffer from the priming port across the sensor array.
Slowly add 500 μl of Storage Buffer (S) through the priming port of the flow cell.
Close the priming port.
Using a P1000, remove all fluid from the waste channel through Waste port 1. As both the priming port and SpotON sample port are closed, no fluid should leave the sensor array area.
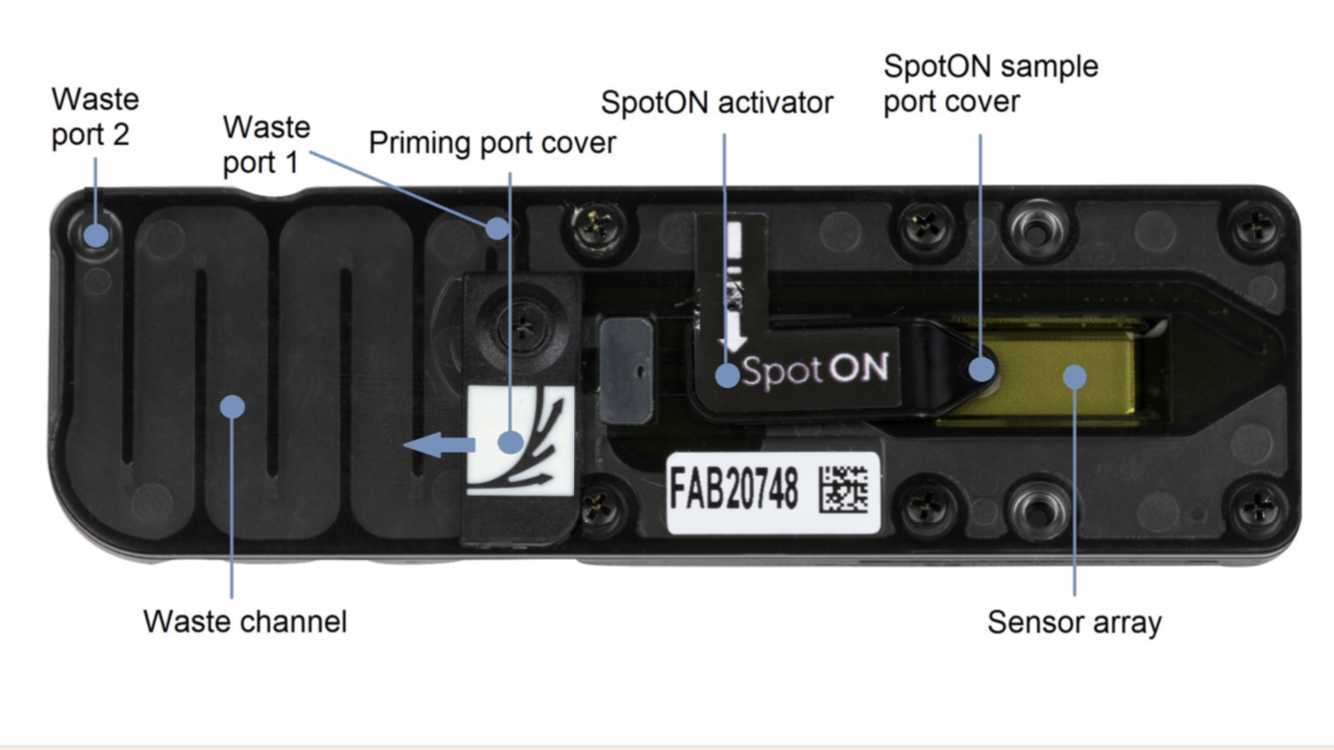
The flow cell can now be stored at 4-8°C.
When you wish to reuse the flow cell, remove the flow cell from storage, and allow it to warm to room temperature for ~5 minutes. You will need to perform a Flow Cell Check before loading the next library.
