HuBMAP | VU TMC Kidney | Human Kidney Processing
Jamie Allen, Jeff Spraggins, Melissa Farrow, Audramjudd, Olof Isberg, haichun.yang, Ray Harris, Agnes Fogo, Marc P. De Caestecker
Disclaimer
Adapted from this standard operating procedure established by the VU TMC Eye/Pancreas team.
Abstract
This protocol describes the workflow for collecting human kidney samples for multimodal downstream assays, in use by the Vanderbilt University HuBMAP Tissue Mapping Center.
Steps
Donor Selection Criteria
The International Institute for the Advancement of Medicine will identify patient kidneys for research with the following criteria:
Basic Requirements:
Age: 18-55 years

DCD - WIT < 15 minutes

Any Downtime

CIT < 36 hrs

Will accept CMV, EBV, HSV 1 or 2, TOXO & HBsAb (+) w/ confirmed vaccination only

Will accept DCD

Will accept IVDA (current use/ past use)

Will accept Chagas & Strongyloidiasis

Will accept Donor that previously tested COVID-19 (+) & now COVID-19 (-) on Case-By-Case Basis

Will accept Kidneys on a pump

Will accept Biopsy - Fibrosis on CASE-BY-CASE BASIS
Exclusionary Criteria:
Diabetes Type 1 or 2

Hepatitis B/C positive serology results

HIV positive serology results

Meningitis Bacterial/Viral positive

MRSA - any

RPR/Syphilis positive serology

Sepsis
Contraindications:
Biopsy - Necrosis

Kidney Disease (past/current)

DM Type 1 or 2

Donor on dialysis

Cancer (current/past hx)

Bacterial Viral meningitis

MRSA in any culture

Sepsis
Day Before Preparation
Ensure that 1 liter of 2.6% CMC is prepared (requires overnight preparation)* Label embedding molds with Date-Anterior/Posterior-Block Location 5.g. 05/26/23
Ant - A1

-
Label 2 paraffin fixation cassettes, one for anterior and one for posterior
-
Clear lab benches and safety hood
-
Transfer 2.6% CMC into 6 squeeze bottles and refrigerate overnight
-
Gather materials and place on appropriate benches: Dry Ice Pans with Lids iPad Stand
Labeled embedding molds Foil squares Face shields Lab Gowns Gloves Styrofoam box -
Clean biosafety hood items with 70% Ethanol. Place in a cleaned (70% EtOH) plastic container in a 4oC refrigerator to cool overnight. 2 steel pans Large knife
  teflon mold                                          styrene divider sheets

  disposable scalpel                              surgical scissors

  forceps                                                 labeled rulers
Day of Preparation Before Sample Arrives
Clean biosafety hood with 70% Ethanol* Print "Sample Mold Chart" with Kidney ID and side for notetaker and freezing station
-
Set up stations Picture station: iPad stand, iPhone, aluminum tray lid for transporting samples
Placement station: Dry ice pan with ice, disposable aluminum pan, labeled embedding molds, forceps, plastic jar with 10% formalin Freezing Station: 2 dry ice pans with ice, isopentane, chilled 2.6% CMC in squeeze bottles, foil squares, sharpie markers, freezer boxes with labels (kidney ID & date), timers, dry ice box for holding frozen/wrapped samples Note Taker: place chair next to biosafety hood, notebook, pens -
Label rulers, foil trays, embedding molds, and wrapping foil with block names.
Organ dissection
Remove kidney from shipping container and place on cold dissection tray. Remove as much outer fat as possible.
Dissect the kidney by carefully cutting it in half and remove any visible fat. Work on one half of the kidney while the other half is left on an ice tray to keep cool.
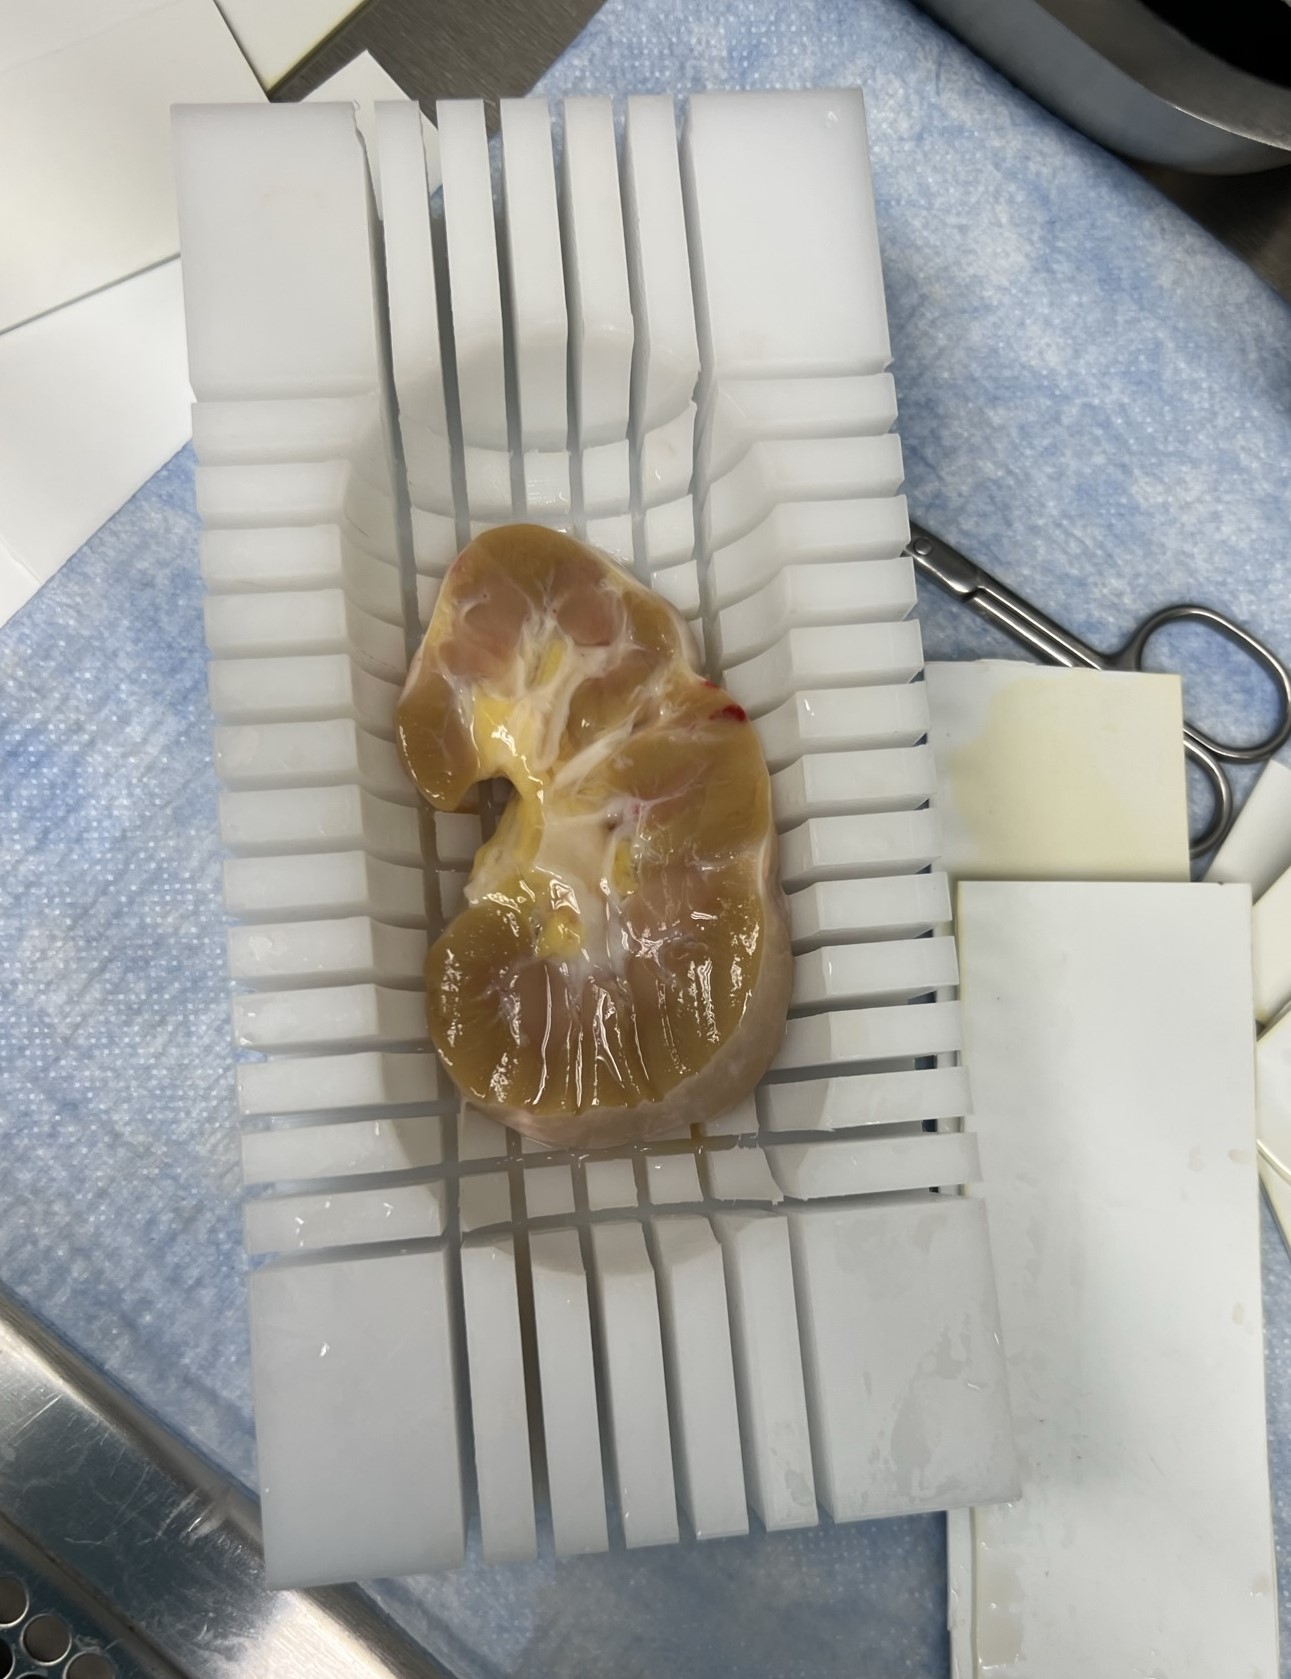
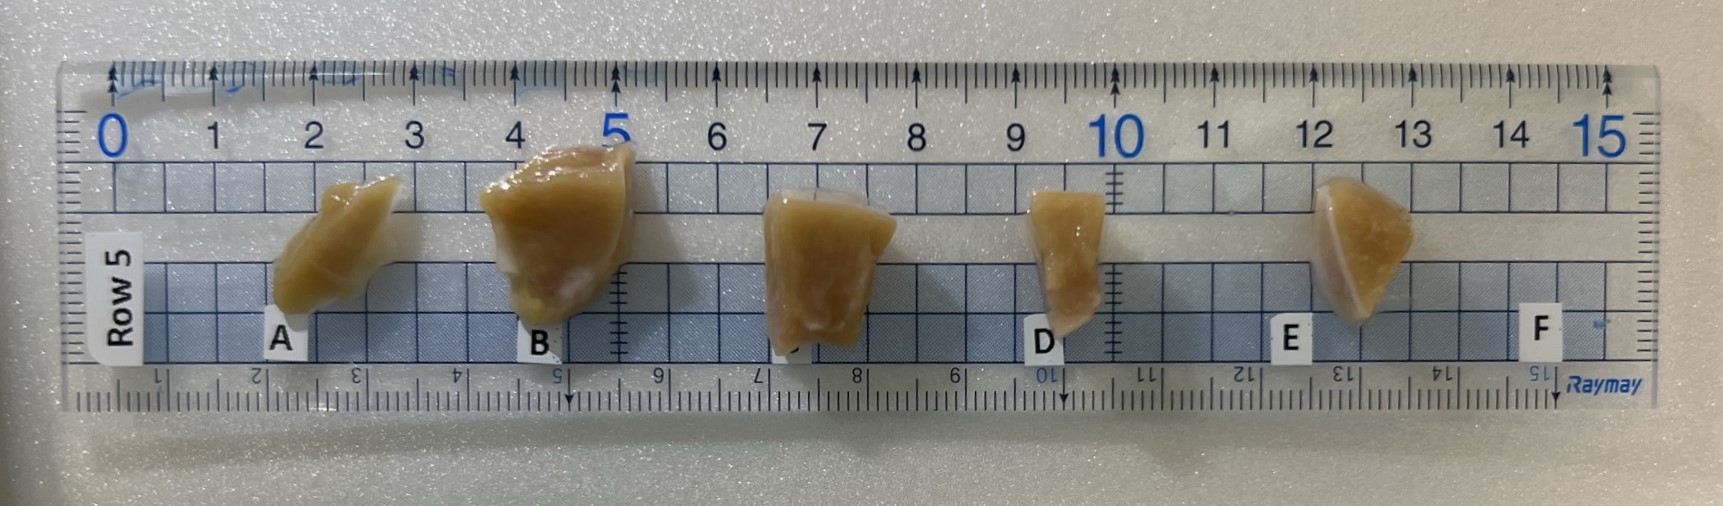
Once the fat is removed, place the kidney half into the millotome. The kidney is first cut longitudinally, after each cut dividers are put down to hold the kidney in its place. Next, the kidney is cut latitudinally. After each latitudinal cut, that row of tissue block is collected and transferred to labelled ruler. The ruler is transferred at a photo stage where an iPad/iPhone is used to take a quick snapshot before each block is transferred to a labelled foil tray on an isopentane slurry.
Note: if the kidney doesn't fill out in the mold, place dividers into the edge of the mold to make it fit.
Note: remove any extra visible fat from the tissue blocks
Collect 1 sample from each side for FFPE.
Choose block and cut a thin nickel thick section. Place in labeled tissue cassette and then into a container of 10% neutral buffered formalin. Follow Freezing and Formalin Fixation of Tissue V.3 for processing the formalin samples.
Place aluminum pan on top of filled dry ice pan. After taking a picture of the sample ruler, place each tissue into the corresponding labeled mold. After two rows are placed, move entire sample pan to the freezing station.
Flash freezing and CMC embedding (FCMC)
Prepare isopentane slurry. Place a layer of dry ice into an insulated, lidded dry ice pan and add enough isopentane to cover the dry ice.
Place each tissue mold into the isopentane slurry. Cover the dry ice pan with lid and allow tissue to completely freeze.
Once the tissue is completely frozen, slowly add CMC to the mold until the tissue is completely covered. Keep the lid closed over the slurry as much as possible. When completely frozen, wrap mold in prelabeled square of aluminum foil.
Note time that the CMC is completely frozen for each sample on the Sample Mold chart.
Place all wrapped samples in prelabeled freezer boxes and store at -80°C
