iPad_Lidar_surface_roughness_processing
Alex White
Disclaimer
DISCLAIMER – FOR INFORMATIONAL PURPOSES ONLY; USE AT YOUR OWN RISK
The protocol content here is for informational purposes only and does not constitute legal, medical, clinical, or safety advice, or otherwise; content added to protocols.io is not peer reviewed and may not have undergone a formal approval of any kind. Information presented in this protocol should not substitute for independent professional judgment, advice, diagnosis, or treatment. Any action you take or refrain from taking using or relying upon the information presented here is strictly at your own risk. You agree that neither the Company nor any of the authors, contributors, administrators, or anyone else associated with protocols.io, can be held responsible for your use of the information contained in or linked to this protocol or any of our Sites/Apps and Services.
Abstract
This protocol was used to process LIDAR data acquired over 3-m transects of forest floor, using an Apple iPad Pro 2022 app entitled 3D Scanner App in “LIDAR Advanced” mode set to the smallest possible maximum depth (30 cm) and resolution (5 mm), as documented in "Soil Surface Roughness in Temperate Forest During SMAPVEX19-22" by Walker et al. (2024).
Steps
Open CloudCompare.
Open textured output file:
Click the folder icon.

Navigate to a transect folder (e.g. MA404-1-EW_20_02_48 ) in Box > SMAPVEX22_data > MA_lidar_scans .
- Load from Box Drive, or download files to PC and load from there.
- There are 36 surface roughness transects, in folders named according to the site (e.g. MA404), plot (1-3), and orientation (NS or EW). Skip any BD folders.
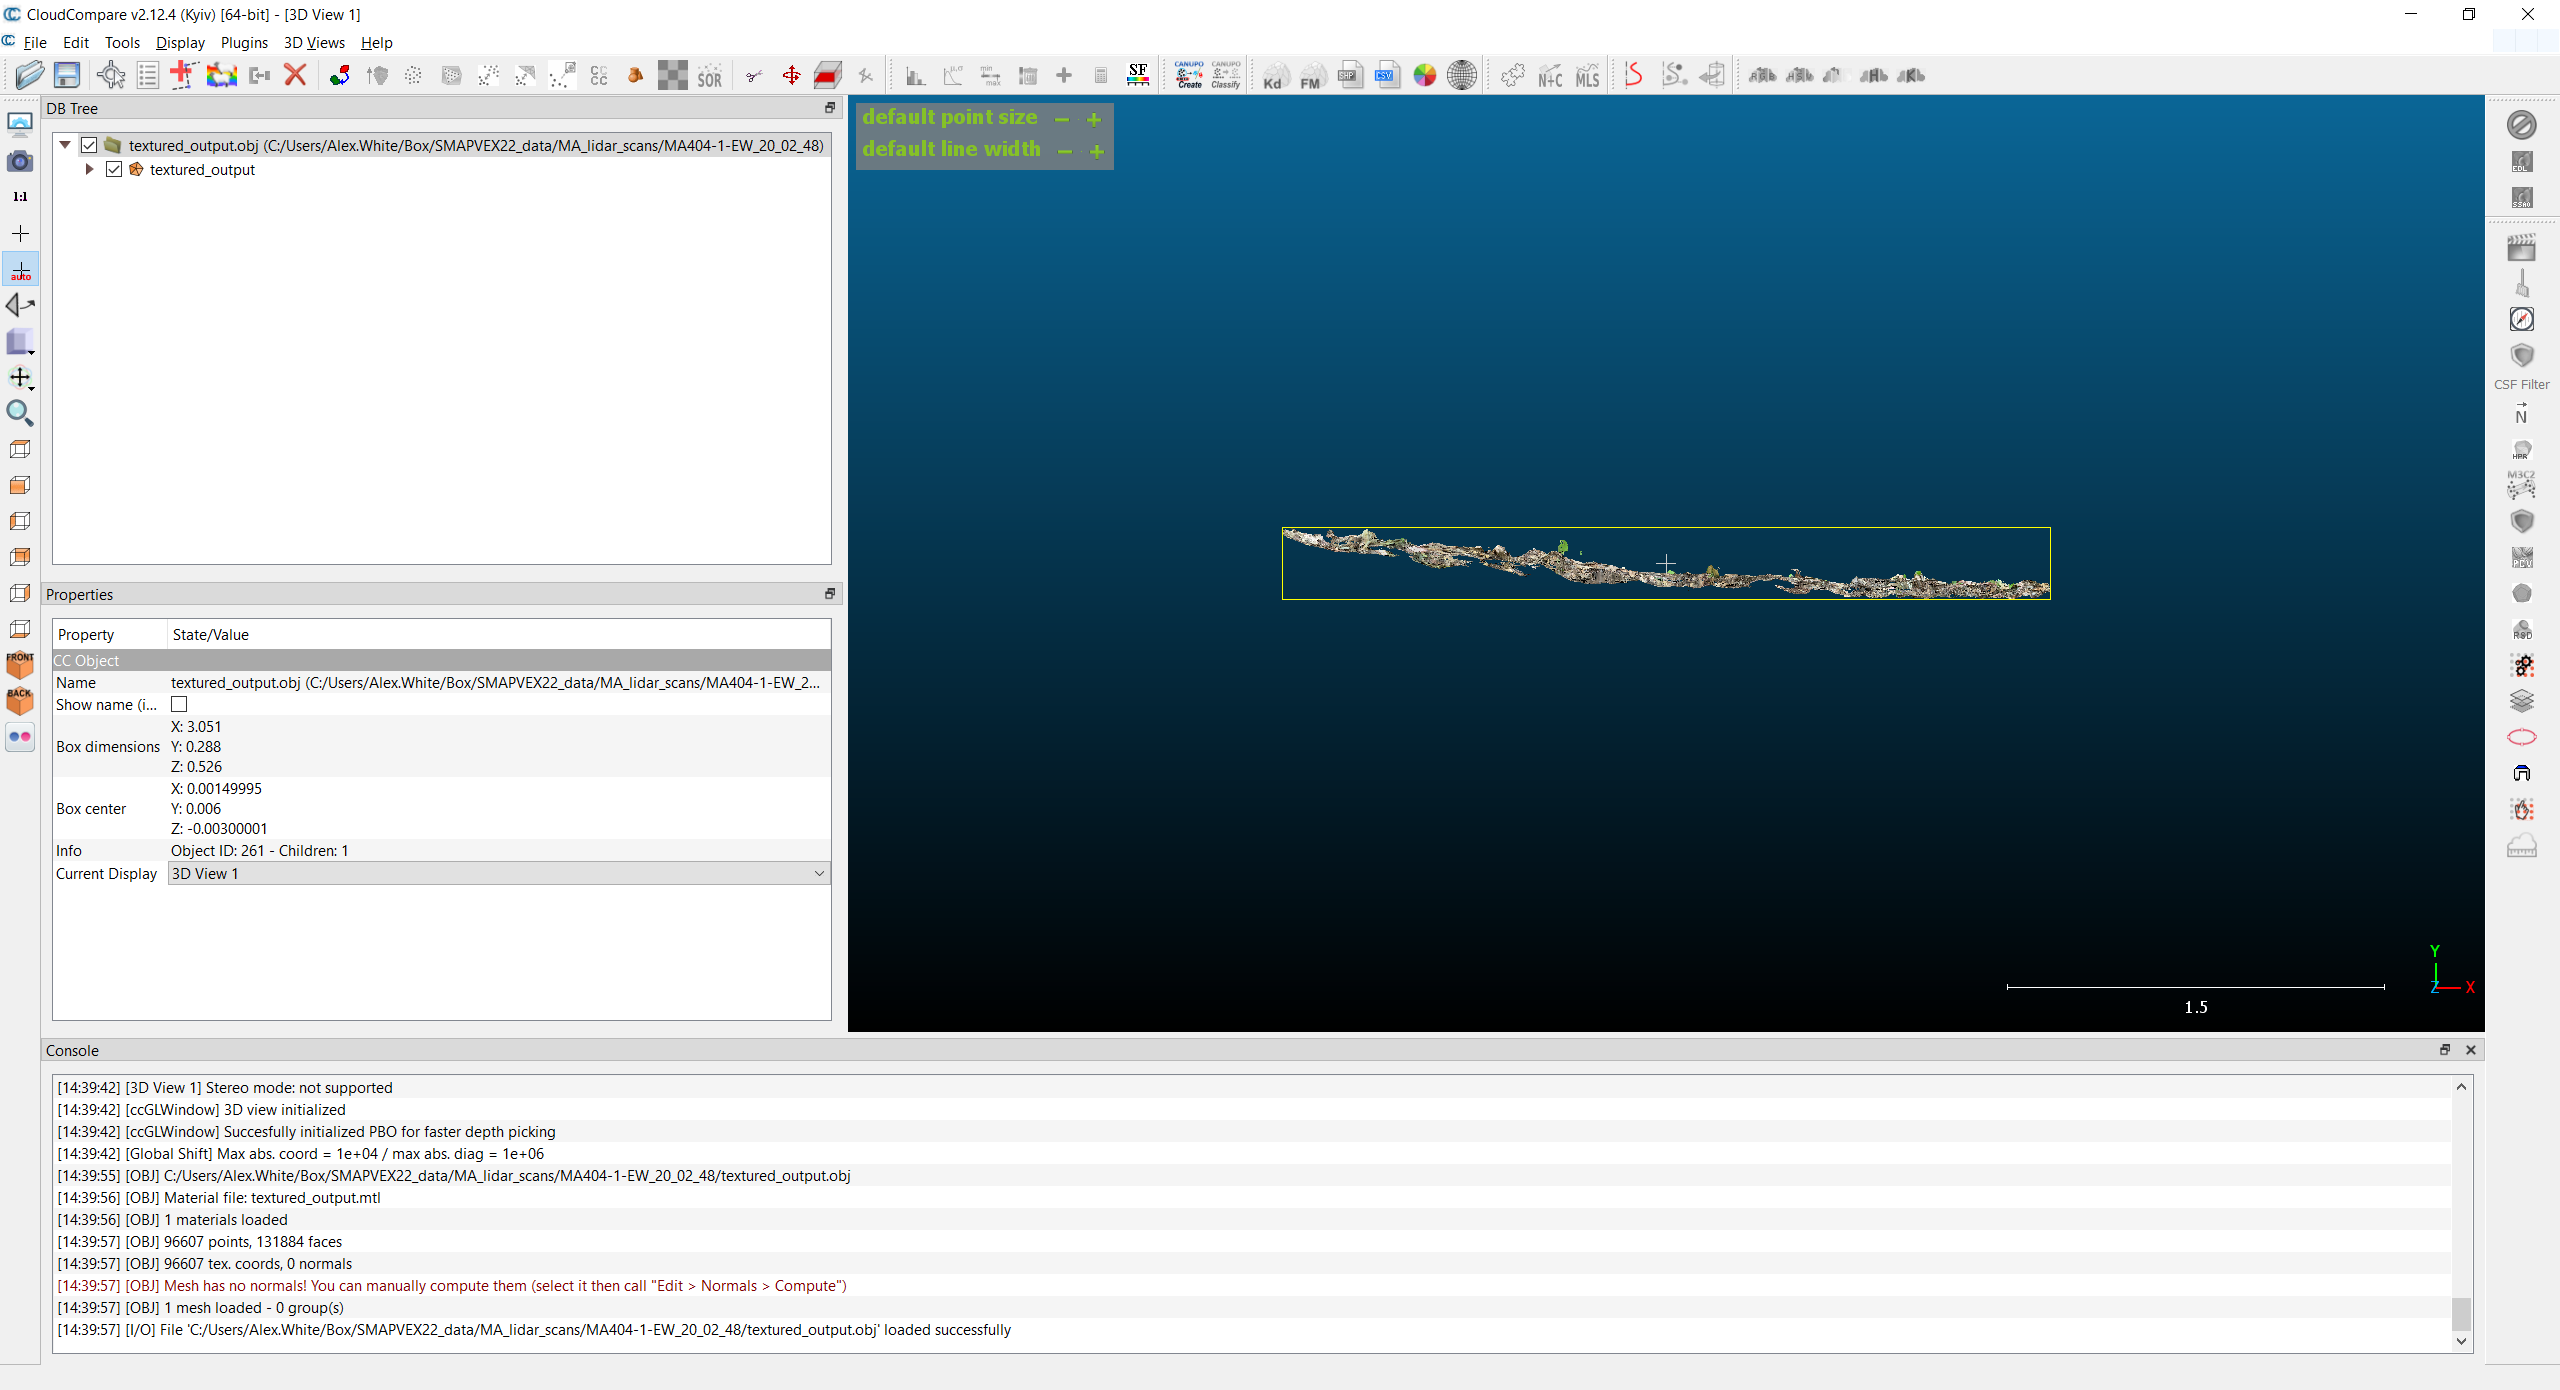
Open "textured_output.obj".
_The object will appear in the 3D view._
Select the file in the DB Tree on the left.
_A bounding box will appear around the mesh._
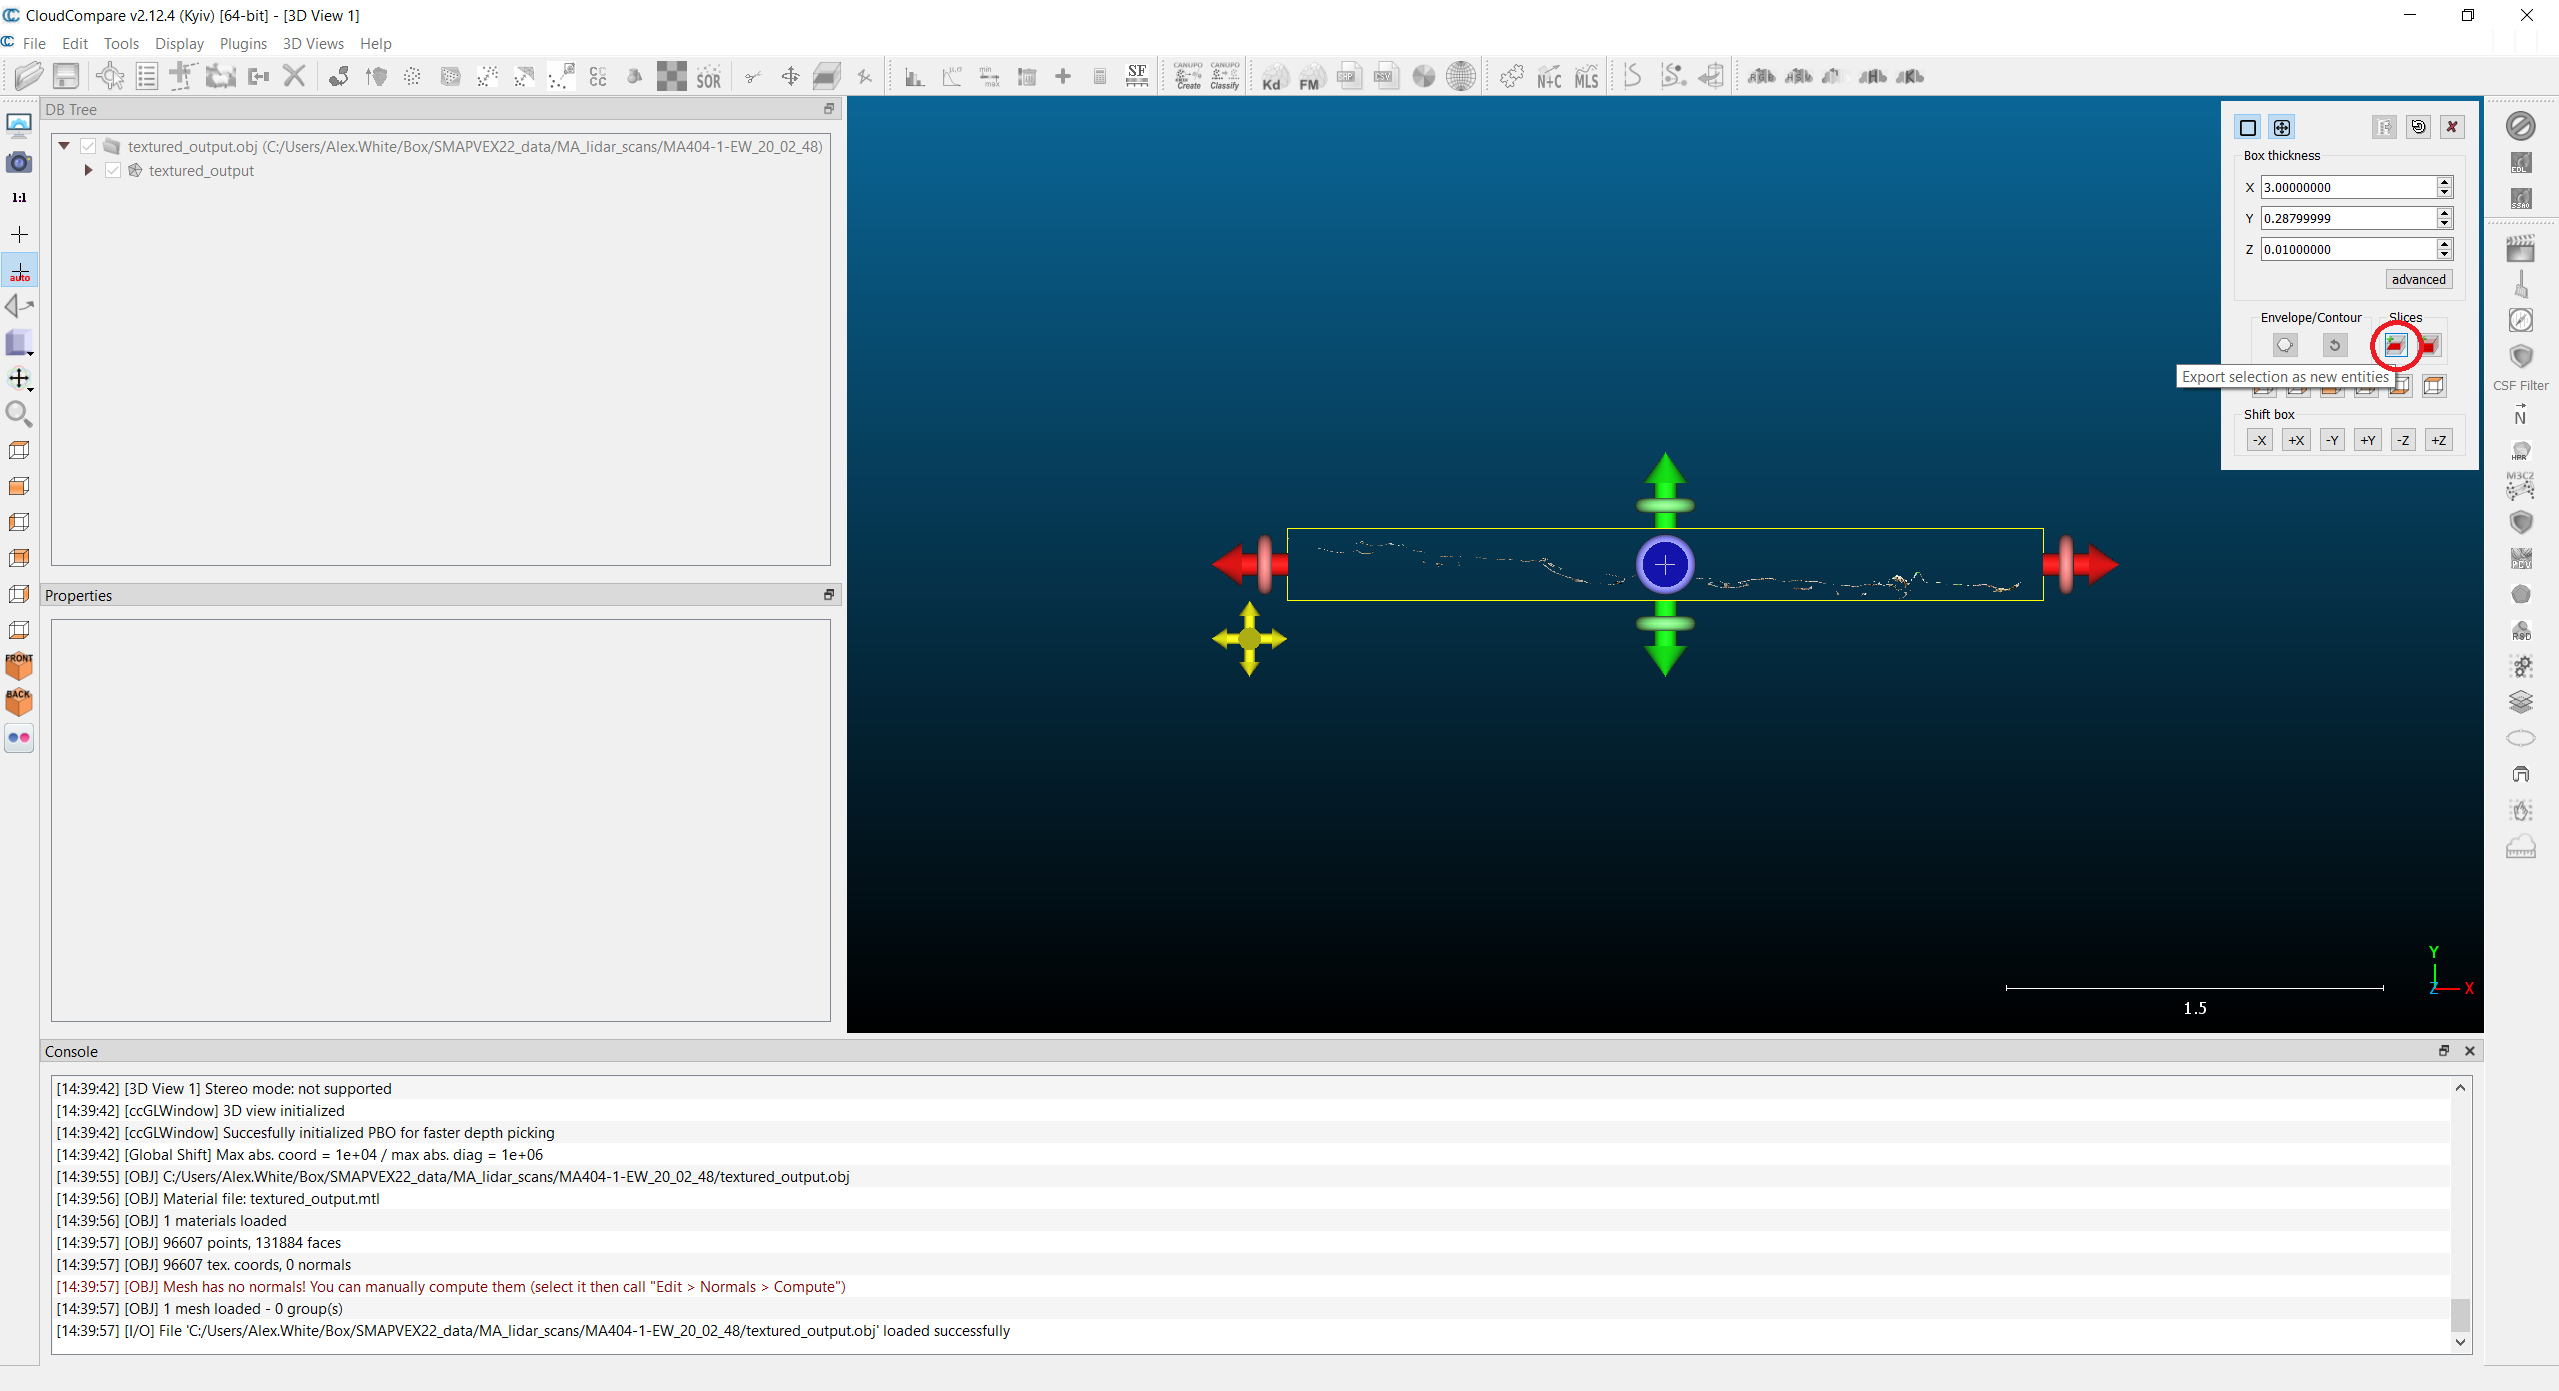
Click the Cross Section icon in the toolbar.

Set box thickness to length = 3.0, width = 0.01, and leave height unchanged.
X,Y,Z labeling differs between files. Compare the handle colors with the axis labels in the lower right corner of the 3D view to determine which is which.
Click left-hand icon under "Slices" to export selection as new entities, then close the toolbox.
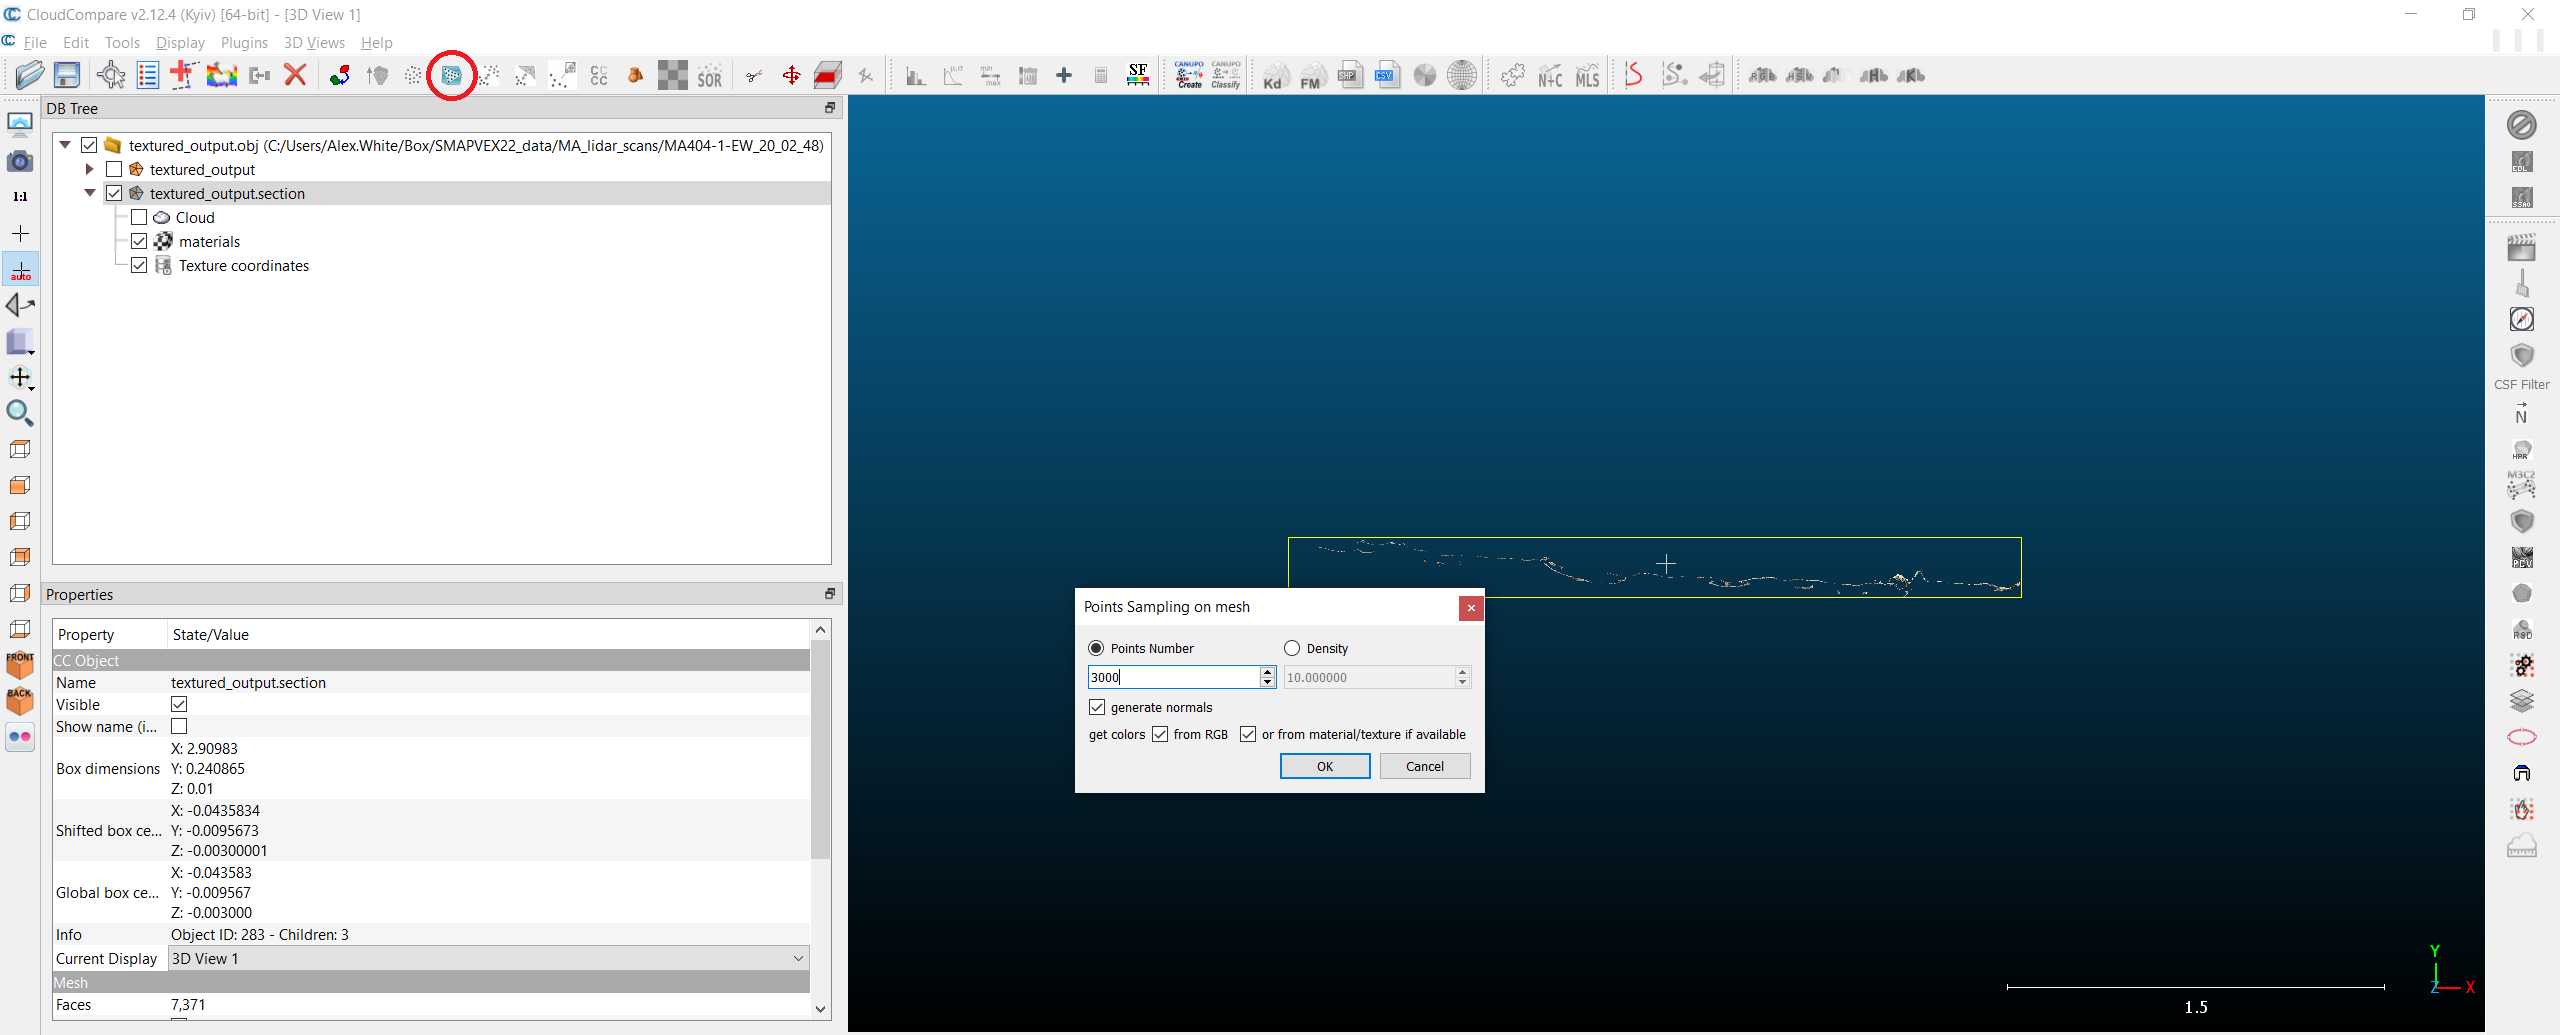
Uncheck the original "textured_output" file in the DB Tree to view the result.
Select the new object ("textured_output.section") in the DB Tree, click the Save icon in the toolbar, and save in the original folder as "textured_output_slice_3m_1cm.obj". File type should be OBJ.
Click the icon for "Sample points on a mesh" in the toolbar, enter 3000 for Points Number, and click OK.
Select the new object ("textured_output.section.sampled") in the DB Tree, click the Save icon in the toolbar, and save in the original folder as type ASCII:
MA###-*-??_textured_output_slice_3m_1cm_sampled_3K.txt * ### is site number, e.g. 404
-
- is plot number, e.g. 1
- ?? is transect orientation, e.g. EW (from folder name)
Use default settings for ASCII file.
