DNA/RNA extraction and qPCR protocol to assess bacterial abundance in the sponge Halichondria panicea
Lara Schmittmann, Lucia Pita
Abstract
This protocol summarizes experience and recommendations regarding DNA and RNA extractions from the sponge Halichondria panicea and qPCR to quantify bacterial abundance .
We have used both bacterial and sponge DNA and RNA for subsequent qPCR. Further, bacterial 16S rRNA amplicon sequencing was performed on DNA and sponge transcriptomes were sequenced successfully from extracted RNA.
Steps
DNA extraction
Extract DNA from samples fixed in RNAlater (stored at -80°C) or flash frozen (stored at -80°C)
Qiagen PowerSoil Kit
Input: 70-200 mg tissue
Process max.24 samples at a time, depending on experience
Follow manufacturers protocol (lysis in PowerBeadTubes and PowerLyzer Bead-Based Homogenizer at 3500 rpm, 2x 30 sec bead beating with 45 sec pause in between)
We recommend to immediately take a 5 µl aliquot for quality and quantity control (Nanodrop, Qbit, PCR to check contamination presence of 16S DNA). DNA extracts can be frozen at -20°C or for long-term storage at -80°C
Extract DNA from bacterial recolonization pellets flash frozen (stored at -80°C)
Qiagen Blood+Tissue kit
Input: cell pellet
Process max.24 samples at a time, depending on experience
Follow manufacturers protocol (incubation with proteinase K at 56°C for 30 min)
We recommend to immediately take a 5 µl aliquot for quality and quantity control (Nanodrop, Qbit, PCR to check contamination presence of 16S DNA). DNA extracts can be frozen at -20°C or for long-term storage at -80°C
Dilute DNA extracts for qPCR
Measure DNA extracts of all samples with qbit
Dilute each extract to a concentration of 6 ng/µl with DNase/RNase-free water. Per qPCR reaction we will use 5 µl template, so the total DNA used per qPCR reaction is 30 ng
RNA extraction
Extract RNA from sponge samples fixed in RNAlater (stored at -80°C)
- Clean all surfaces and instruments with ethanol and subsequently RNase-Away
- The manufacturers protocol for the RNeasy Mini Kit have been optimized for Halichondria tissue. For more details please refer to the manufacturers protocol
- Work clean and quickly to prevent RNA degradation due to long waiting times. We therefore recommend to not process more than 6-12 samples (depending on the experience of the person) at once
Safety information
beta-mercaptoethanol is highly toxic. Work under the fume-hood only and dispose contaminated material properly. Use nitril gloves.Prior to each extraction effort, prepare fresh aliquots from concentrated beta-mercaptoethanol stock (6 µl beta-mercaptoethanol + 594 µl RLT-buffer provided with the extraction kit)
Thaw tissue samples on ice and meanwhile label lysis tubes (label on the side, since during powerlysing step labelling on the lid might disappear!)
Add 500 µl RPE buffer and centrifuge for 30 sec at 10,000 rmp. Discard the flow-through
Add 500 µl RPE buffer and centrifuge for 2 min at 10,000 rpm. Carefully remove the spin column and place it in fresh 2 ml collection tube. Centrifuge for 1 min at max speed to remove any remaining buffer
Place the spin column in a fresh 1.5 ml Eppendorf tube and add 60 µl EB buffer. Take care to place it directly onto the spin column membrane. Close the lid and incubate for 10 min at RT. Centrifuge for 1 min at 10,000 rpm to elute RNA
Keep extracts always on ice! Proceed immediately with RNase inhibition and nuclease treatment.
Already preheat incubator or heating block to 37°C (incubator needs much longer to pre-heat than heating block)
Under the clean bench: add 3 µl SUPERase-IN (0.05 volume of RNA) to 60 µl RNA. Mix gently
Add 6 µl (0.1 volume of RNA) 10x DNAse I buffer and 1.2 µl DNAse and mix gently
Incubate for 20 min at 37°C, mix frequently
Add 6 µl resuspended DNAse I inactivation reagent and mix well
Incubate for 2-5 min at RT, mix every minute by shortly vortexing
Centrifuge for 1.5 min at 10,300 rpm and transfer supernatant (RNA) to a fresh tube. Take care to not transfer any inactivation reagent (white)
Remove first sample from the cryovial (leave others on ice) and cut on a sterile petri dish with sterile forceps into pieces
We recommend to immediately take a 5 µl aliquot and a 2 µl aliquot, and freeze all samples at -80°C.
Use the 5 µl aliquot to assess quality and quantity (Nanodrop, Qbit, PCR to check contamination with DNA) and the 2 µl aliquot for capillary electrophoresis (e.g. Experion). To avoid thaw-freeze cycles, the main RNA sample can be split in two equal parts, so that one sample can remain frozen until analysis at -80°C if it is intended for e.g. transcriptomics
Tare the lysis tube and load with ~80 mg tissue. Place tube on ice and proceed with the next sample (go back to step 4.2). Use a new petri dish and scalpel to prevent cross-contamination.
Add 600 µl beta-mercaptoethanol/RTL buffer under the hood and disrupt cells in homogenizer for 30 sec at a speed of 3000
Centrifuge for 10 min at maximum speed
Remove supernatant carefully without touching the pellet and transfer it to a 2 ml collection tube. From here on, work at RT
add 1 volume (~370 µl) of 70 % molecular grade ethanol and mix well by pipetting. Proceed immediately to next step
transfer up to 700 µl including any precipitate to RNeasy Spin column placed in a 2 ml collection tube (provided in kit). Close the lid and centrifuge for 30 sec at 10,000 rpm. Discard flow-through and re-use collection tube. Repeat this step if the sample exceeded 700 µl
Add 700 µl RW1 buffer and centrifuge for 30 sec at 10,000 rpm. Discard the flow-through
cDNA synthesis
cDNA synthesis
Use iScript kit and follow manufacturers guidelines. Only thaw reverse transcriptase directly before adding to master mix and keep on ice!
Use 500 ng RNA per reaction and random primers
Dilute cDNA 1:5 with TE buffer and use this dilution for qPCR
Store cDNA dilutions at -20°C
Primers and standard curves
Primers
| A | B | C | D | E |
|---|---|---|---|---|
| Specificity | Primer | Sequence | Fragment length (bp) | Reference |
| eubacterial 16S rRNA | E1052f | TGCATGGYTGTCGTCAGCTCG | 141 | Wang&Qian 2009 |
| E1193r | CGTCRTCCCCRCCTTCC | |||
| Ca. H. symbioticus specific 16S rRNA (DNA and cDNA) | Hal_sym F | CGCGGATGGTAGAGATACCG | 148 | this study |
| Hal_sym R | TGTCCCCAACTGAATGCTGG |
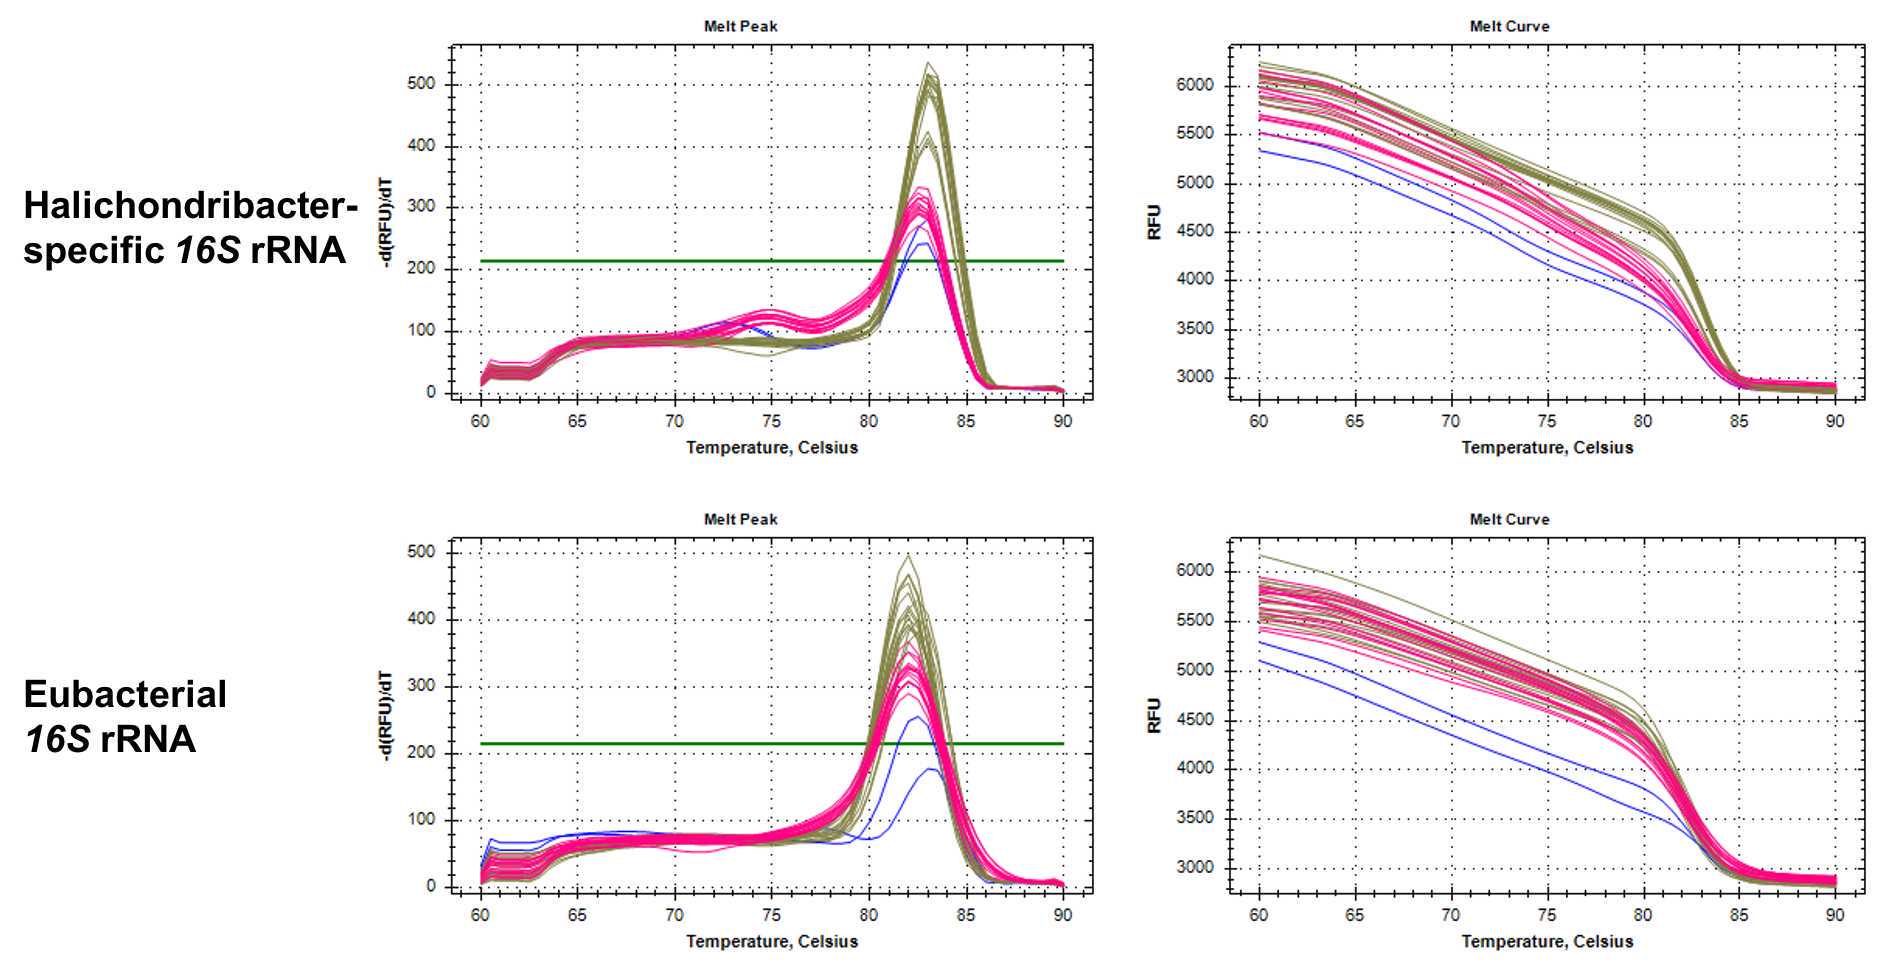
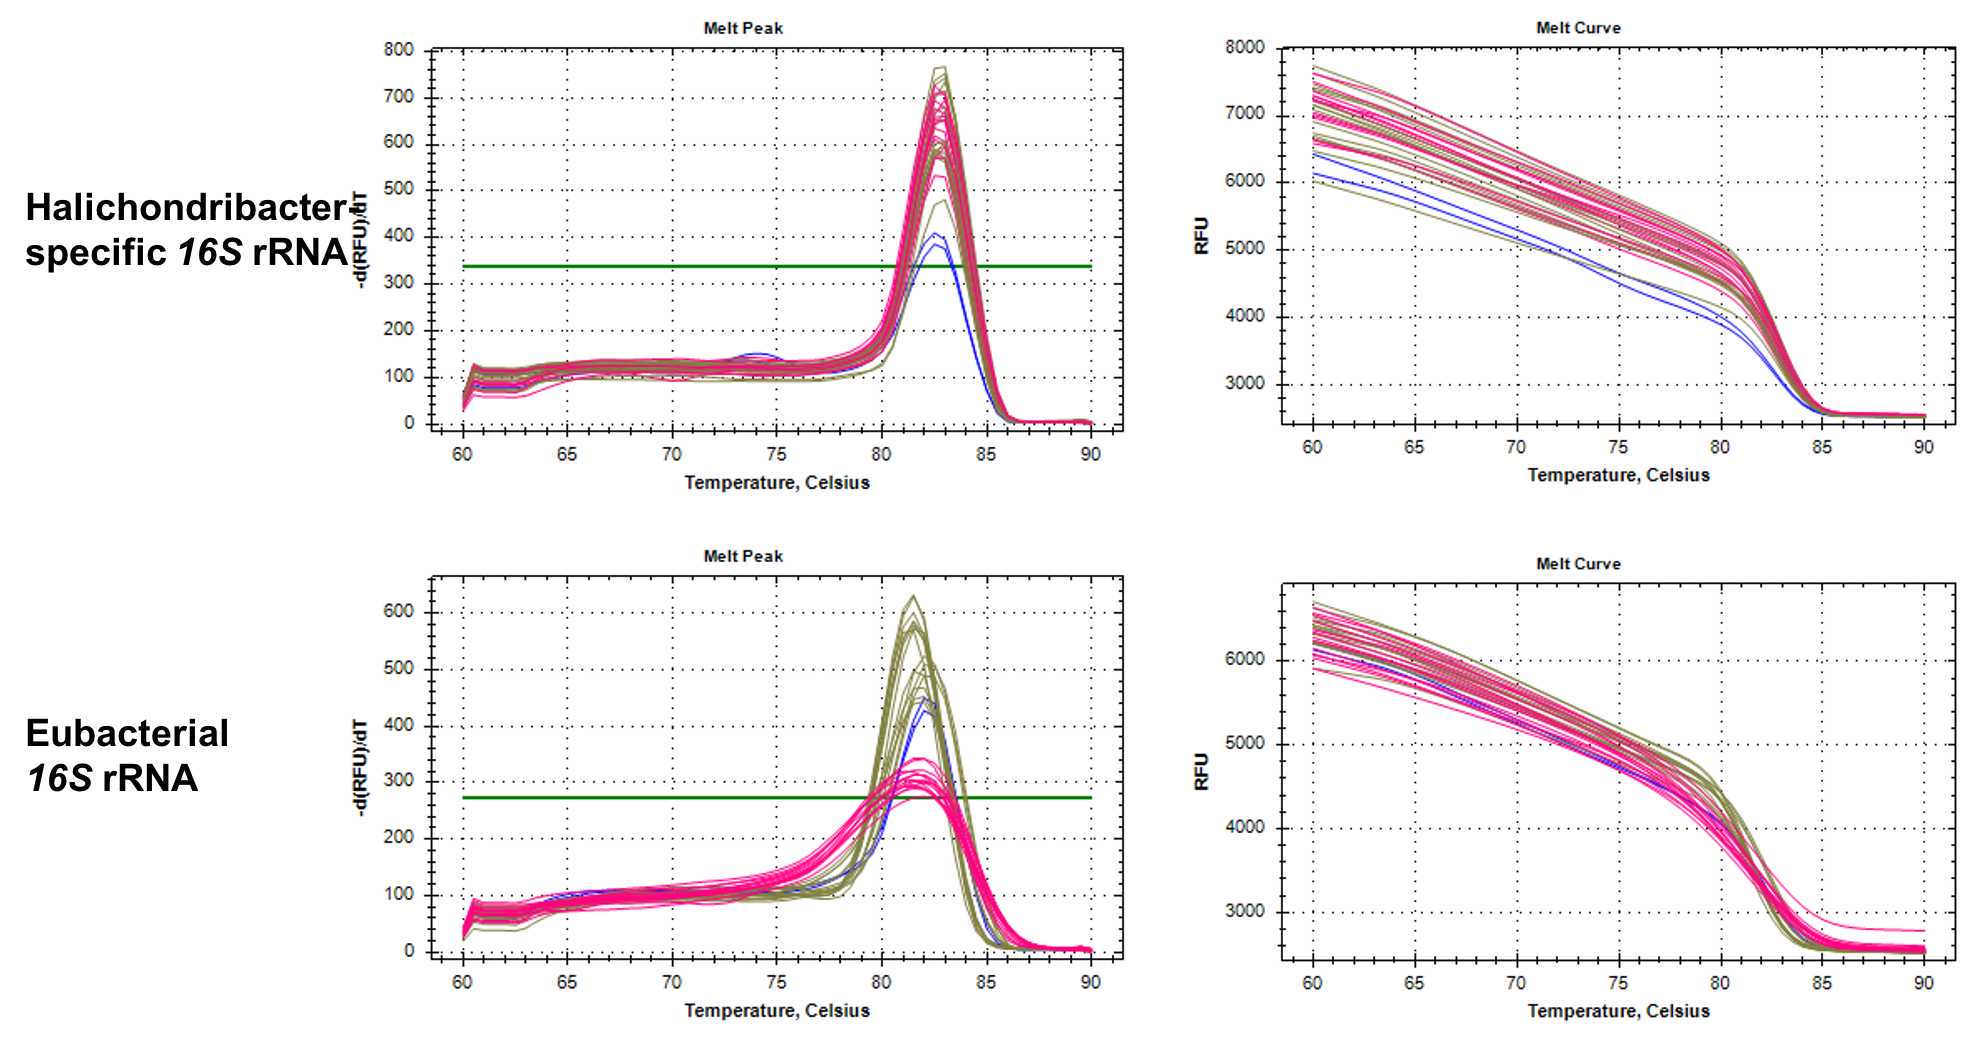
Table: qPCR primers to quantify total bacterial 16S rRNA and Ca. Halichondribacter symbioticus. The amplified gene products for the Ca. H. symbioticus primers have been sequenced to confirm specificity.
Standard curve preparation
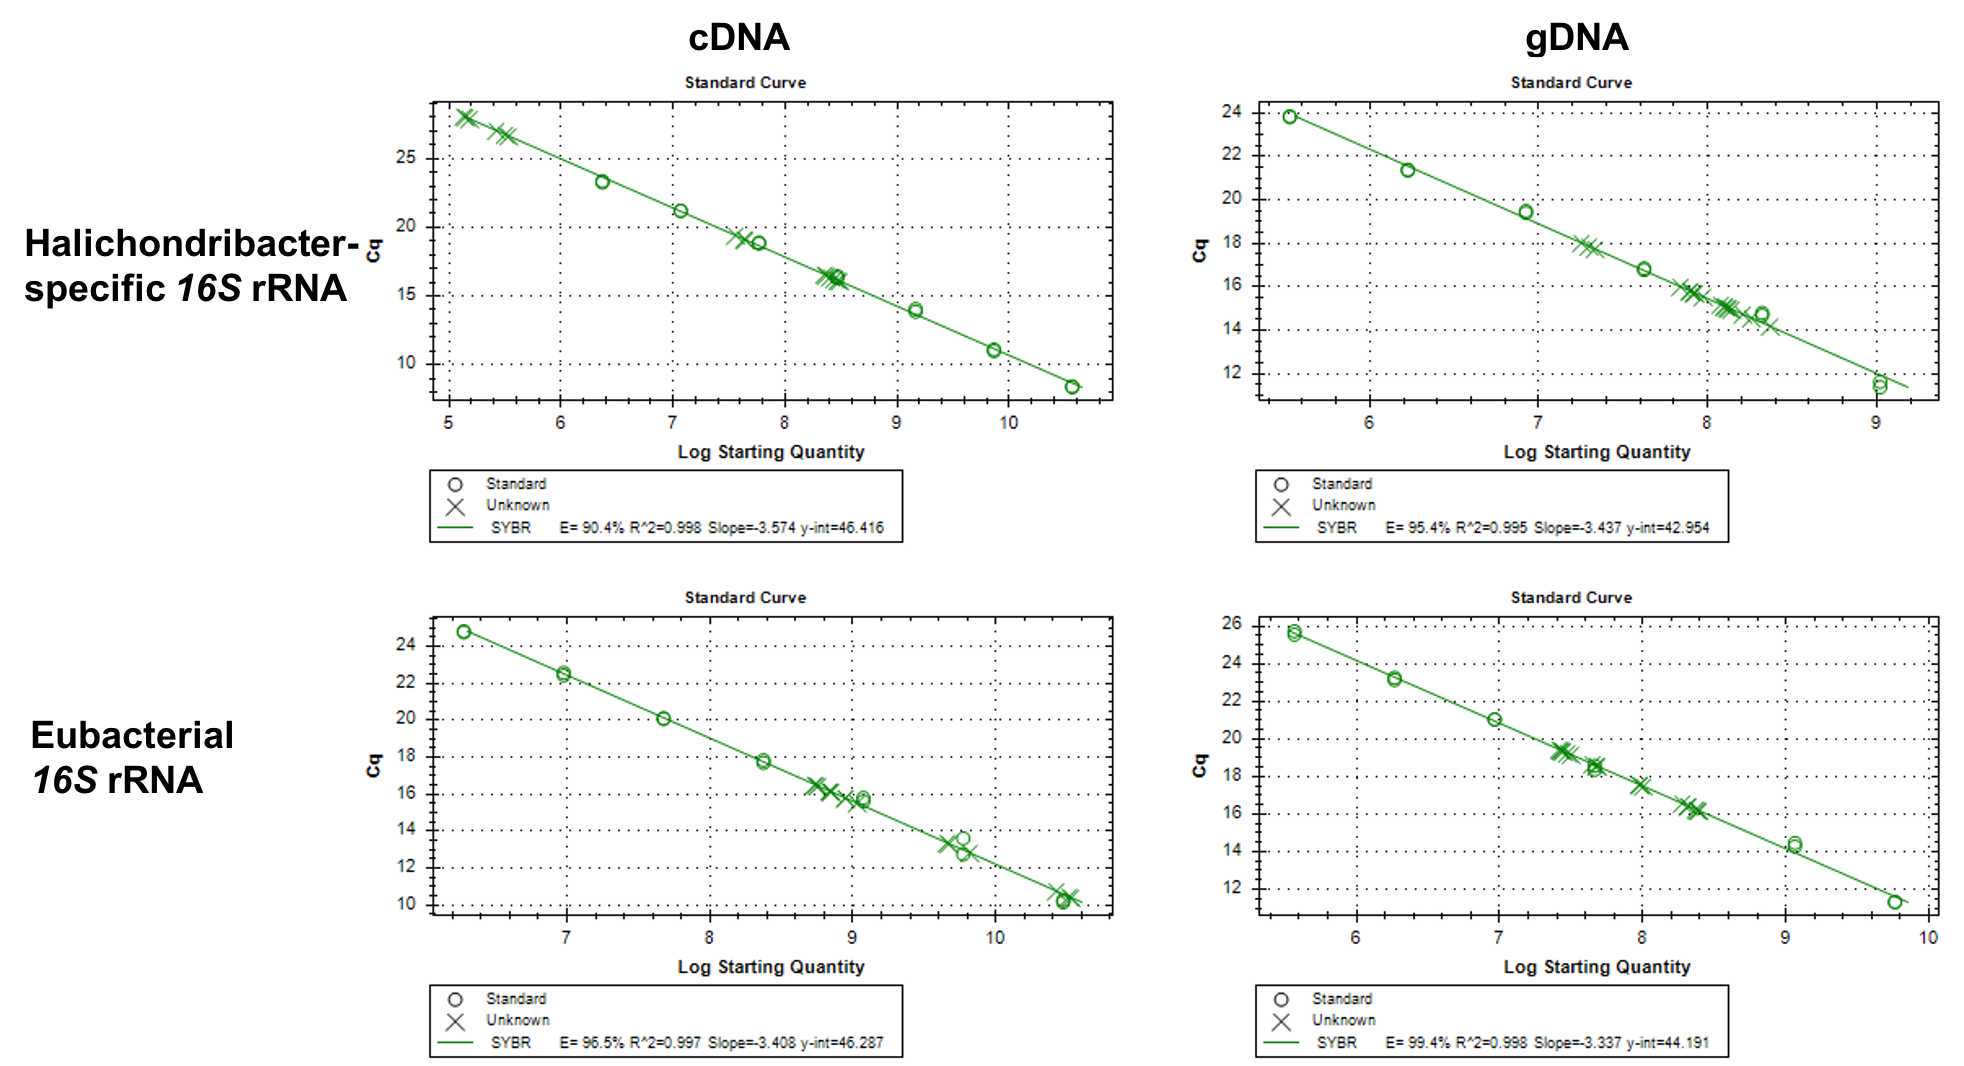
Prepare one DNA and one cDNA standard curve. It is recommended to prepare larger volumes in order to use the same standard curve for a complete experiment, or even several experiments
Run 50 µl PCRs with primer pair intended for qPCR with DNA from different sponge individuals, e.g. 8 x 50 µl
Prepare electrophoresis gel with nucleic acid stain (e.g. GelGreen) with large pockets to load 50 µl/well
Cut out gel bands under blue light table with sterile scalpel. Clean up gel bands (Marcherey Nagel Nucleo Spin Clean-up kit) according to the manufacturers protocol and pool PCR products
Prepare dilution series:
- Probably, the concentration of the PCR products is way too high for qPCR. Start by preparing a 1:10 dilution by adding 200 µl PCR product + 1800 µl tRNA water
- Then proceed with 1:10 (200+1800 µl) or 1:5 (400+1600 µl) dilutions
Measure highest standard in QBIT (high sensitivity kit) and calculate concentration for dilutions (~ 1-5 ng/µl)
calculate copy numbers http://cels.uri.edu/gsc/cndna.html
qPCR
Recommended plate set-up
qPCR preparation
Work under the clean bench.
Prepare master mix for each primer pair:
| A | B | C |
|---|---|---|
| Template | 5 µL | gDNA: Total 30 ng per reaction, cDNA: 1:5 dilution of cDNA from 500 ng RNA |
| Primer F (50 µM) | 0.16 µL | Total 400 nM per reaction |
| Primer R (50 µM) | 0.16 µL | Total 400 nM per reaction |
| qPCR mix (2x) | 10 µL | |
| H2O | 4.68 µL | |
| Total | 20 µL |
Table: qPCR master mix
Work in 96-well plate. Pipet 15 µl master mix per well
Add 5 µl template per well (use new pipet tip for each well)
Seal plate with optical adhesive foil (check which brand fits your plates and qPCR machine) and spin down plate briefly in plate centrifuge
Run plate immediately, or store plate at 4°C in the dark and run within 24 h
| A | B | C |
|---|---|---|
| 72°C | 1 min (plate read) | |
| 96°C | 2 min | 40x |
| 94°C | 30 sec | |
| 60°C | 30 sec (plate read) | |
| 60-90°C | 0.5 interval, 5 sec Melt curve |
Table: qPCR conditions
Run gel electrophoresis with some qPCR products to check for correct amplification (1 band of correct product length) at least once per experiment


