Building plan for a temperature-controlled multi-point stirring incubator
Marvin Rades, Patrick Schubert, Maren Ziegler, Martin Kröckel, Jessica Reichert
Disclaimer
No company received money for the brand names used, and there is no connection to the products’ manufacturers. The assembly and use of the device are at your own risk. Any liability is excluded.
Abstract
Multiple point stirrers are expensive lab equipment (usually €1,000–4,000) and are only offered by a handful of manufacturers. More importantly, the maximum volume per stirring point is minimal in multi-point stirrers and allows the use of small containers only (usually 0.25–0.6 L). However, for many applications, larger volumes per stirring point are needed. Here, we present a building plan to construct a multiple-point stirrer (with twelve stirring points) for larger container volumes (0.8–3 L) for a fraction of the cost of a commercial device. The overall material cost for a 12-point stirrer is around ca. €280. The stirrer is built with axial flow fans equipped with cuboid magnets and controlled via a programmable power supply. In addition, a water bath (ca. €50) can be placed above the stirring points to allow controlled temperature regulation and to complement the function of an incubator.
Before start
The multiple point stirrer works with axial flow fans, is equipped with cuboid magnets, and is controlled via a programmable power supply. The materials refer to a 12-point stirring incubator but can be adjusted to fit a different number of stirring points (see Modifications). The used power supply can simultaneously operate up to five incubators (operating at 5 V). We found the size and weight of the 12-point stirring system suitable for handling and transport in the lab.
In order to determine accurate flow rates in the containers, flow velocity measurements are required because the device does not read the fan speed signal. The manufacturer’s specifications for fan speeds can be used as a rough guide but should be taken with caution since a lower number of revolutions must be assumed because the friction resistance of the magnetic stir fish in the water might slow down the fan’s rotation. In addition, since the flow velocity of the fluid heavily depends on the used container size and the fluid characteristics, flow velocity measurements are preferable. This device adjusts the flow velocity through voltage regulation of the fan’s speed. Therefore, the fan model should have a broad working voltage range (e.g., 5–12 V) and especially a low initial starting voltage (e.g., 2.6–3.4 V) to use a broad rpm range if needed.
Required Skills
The construction requires basic knowledge of electronics assembly. Basic craft skills and equipment are also required.
Time required for assembly
Once all parts are in hand, the assembly should take a total of 2 to 3 hours. The plywood panel and wooden slat must be cut in advance. They can be bought in the desired dimensions.
Cost
We constructed the multi-point stirrer (with 12 stirring points) for an overall cost of about €280 and added the water bath (ca. €50).
Steps
Wooden construction
The plywood panel and the wooden slats can be bought with the desired dimensions according to the number of stir points (e.g., 65 x 50 x 1.2 cm for 12 stir points)
The wooden slats are mounted on the edge of the coated side of the plywood panel with wood screws. Drill an opening for the electric cable to a wooden slat before screwing it down (see 3f).
Fan assambly
Remove the sticker on the bearing housing of each fan with label remover.
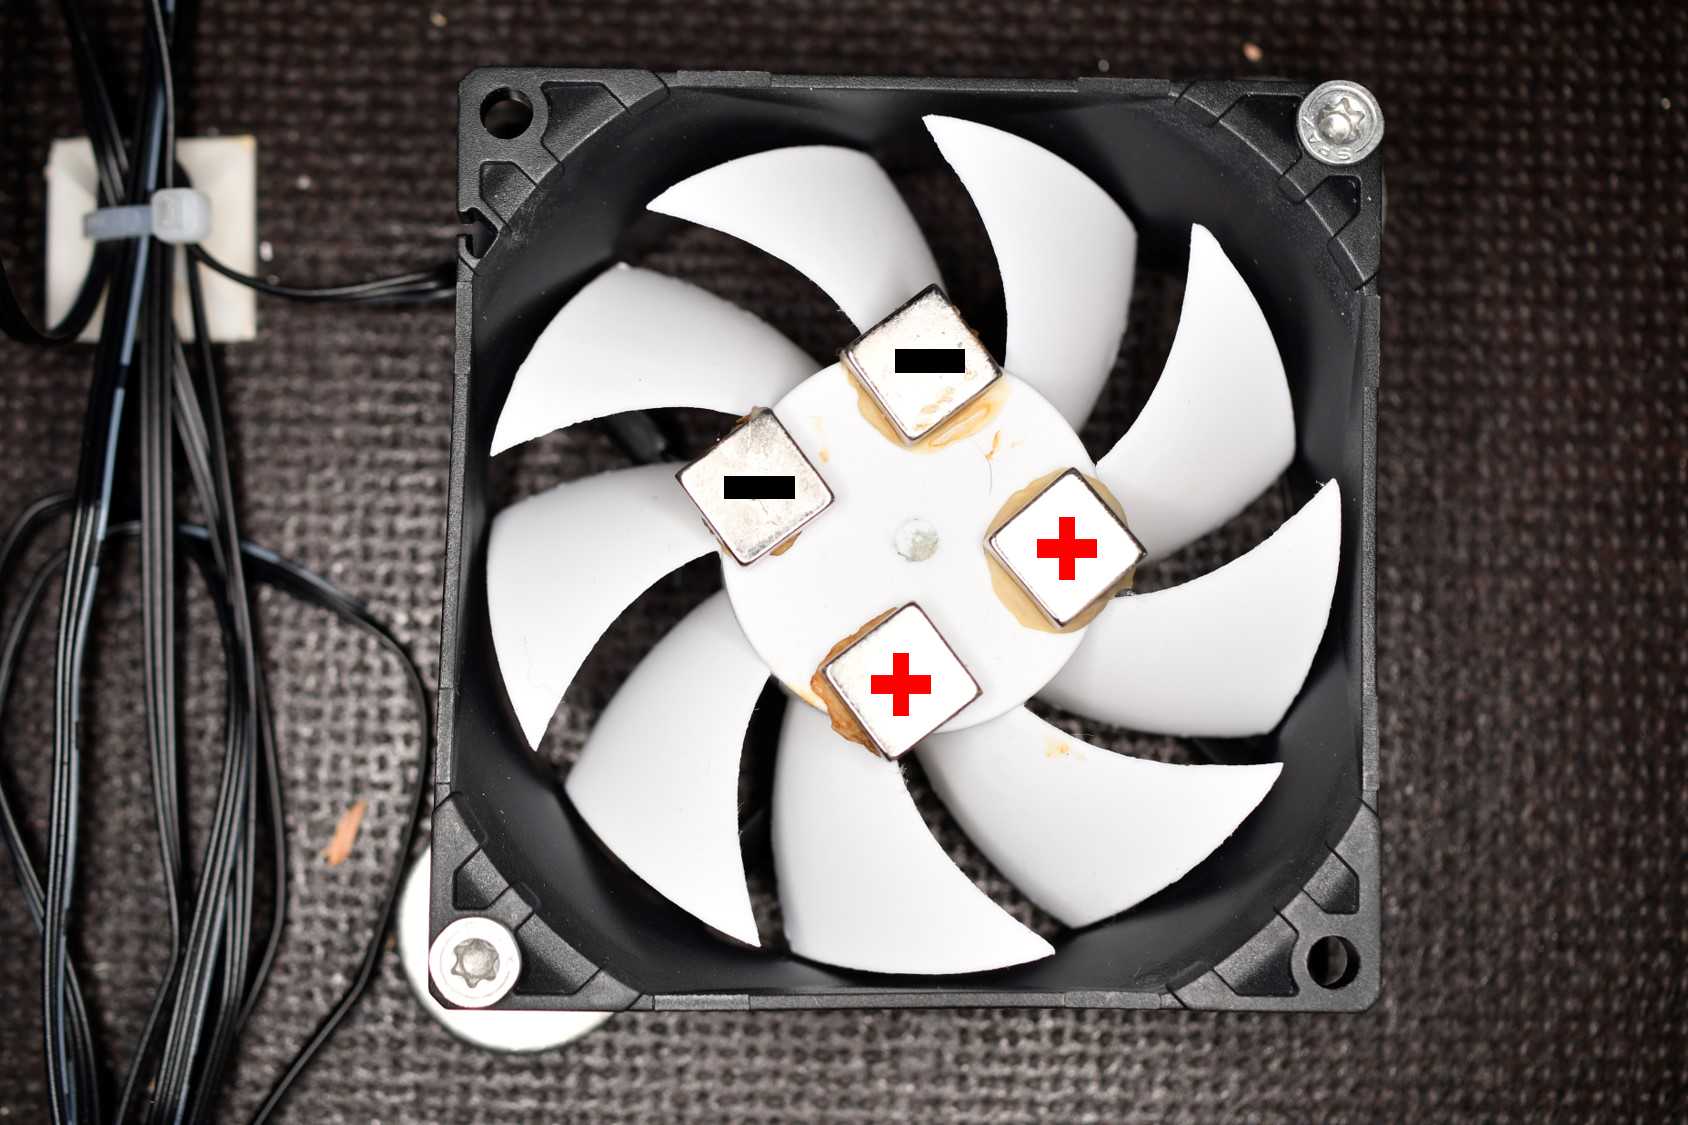
Four magnets are firmly glued (with two-component adhesive) to the edge of the bearing housing of each fan. Polarity: Two positive and two negative magnets side by side (Fig. 1). To prevent the magnets from moving while the glue is not yet dry, place a spacer (e.g., a piece of wood) between the magnets.
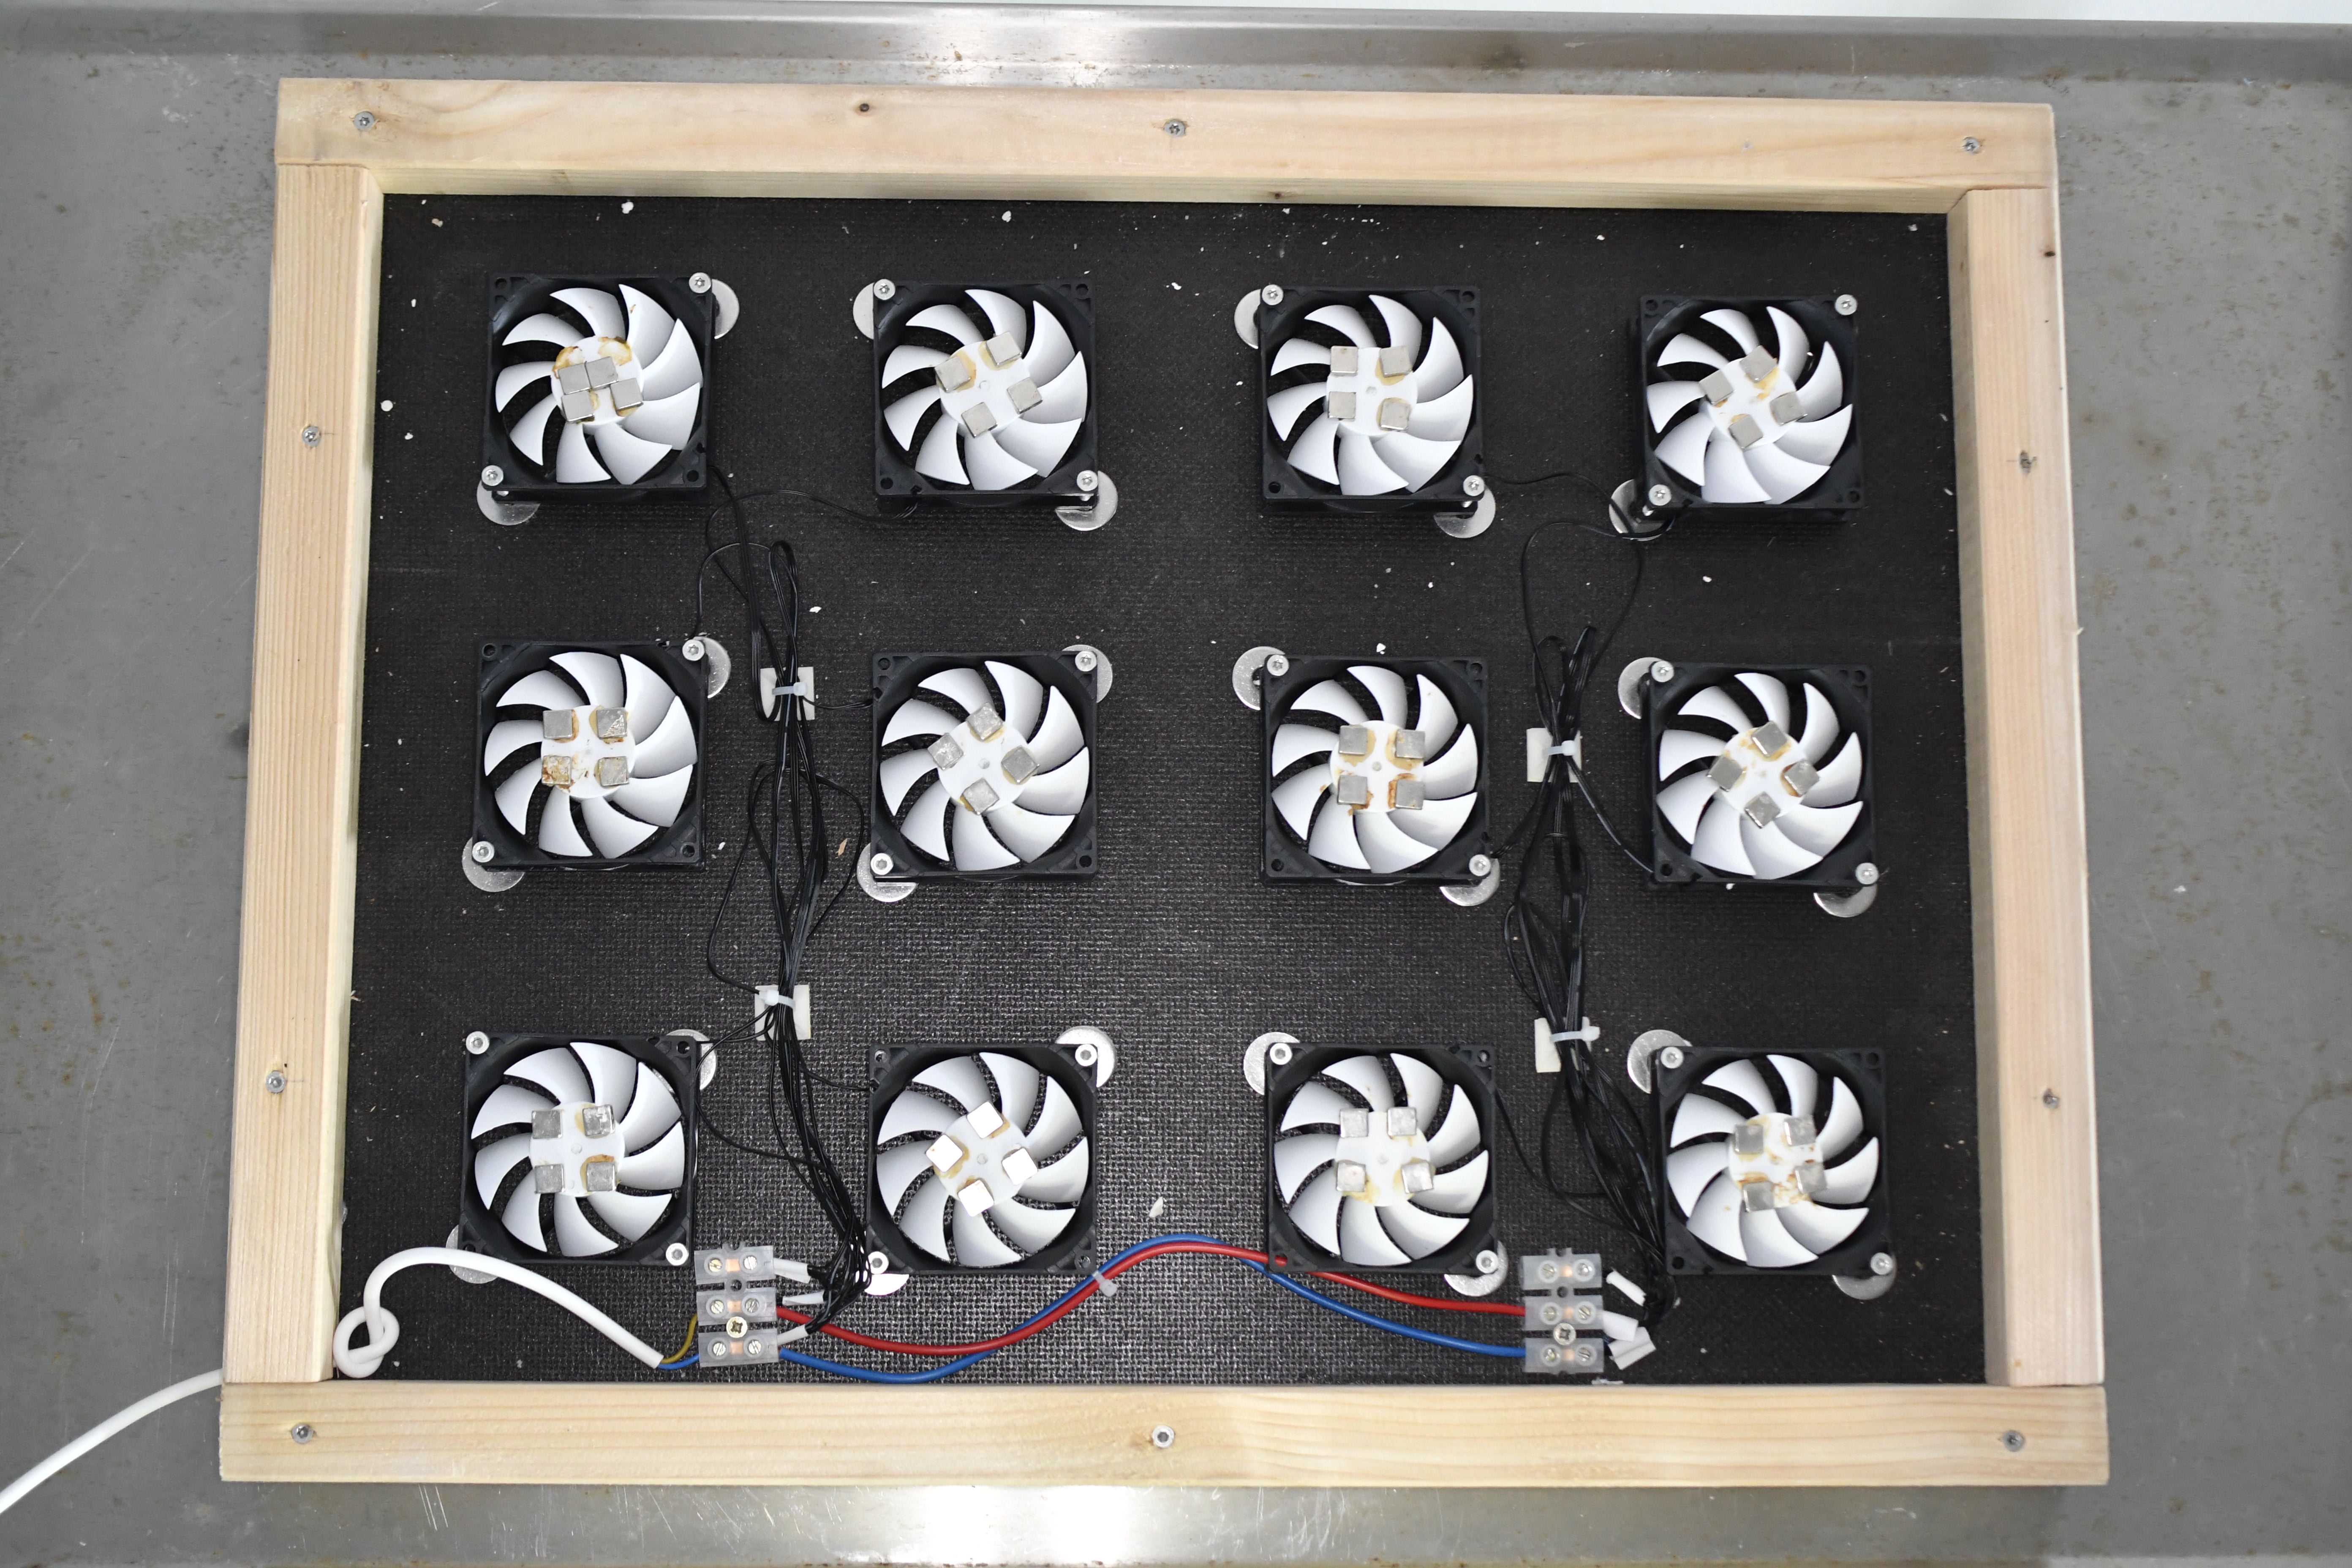
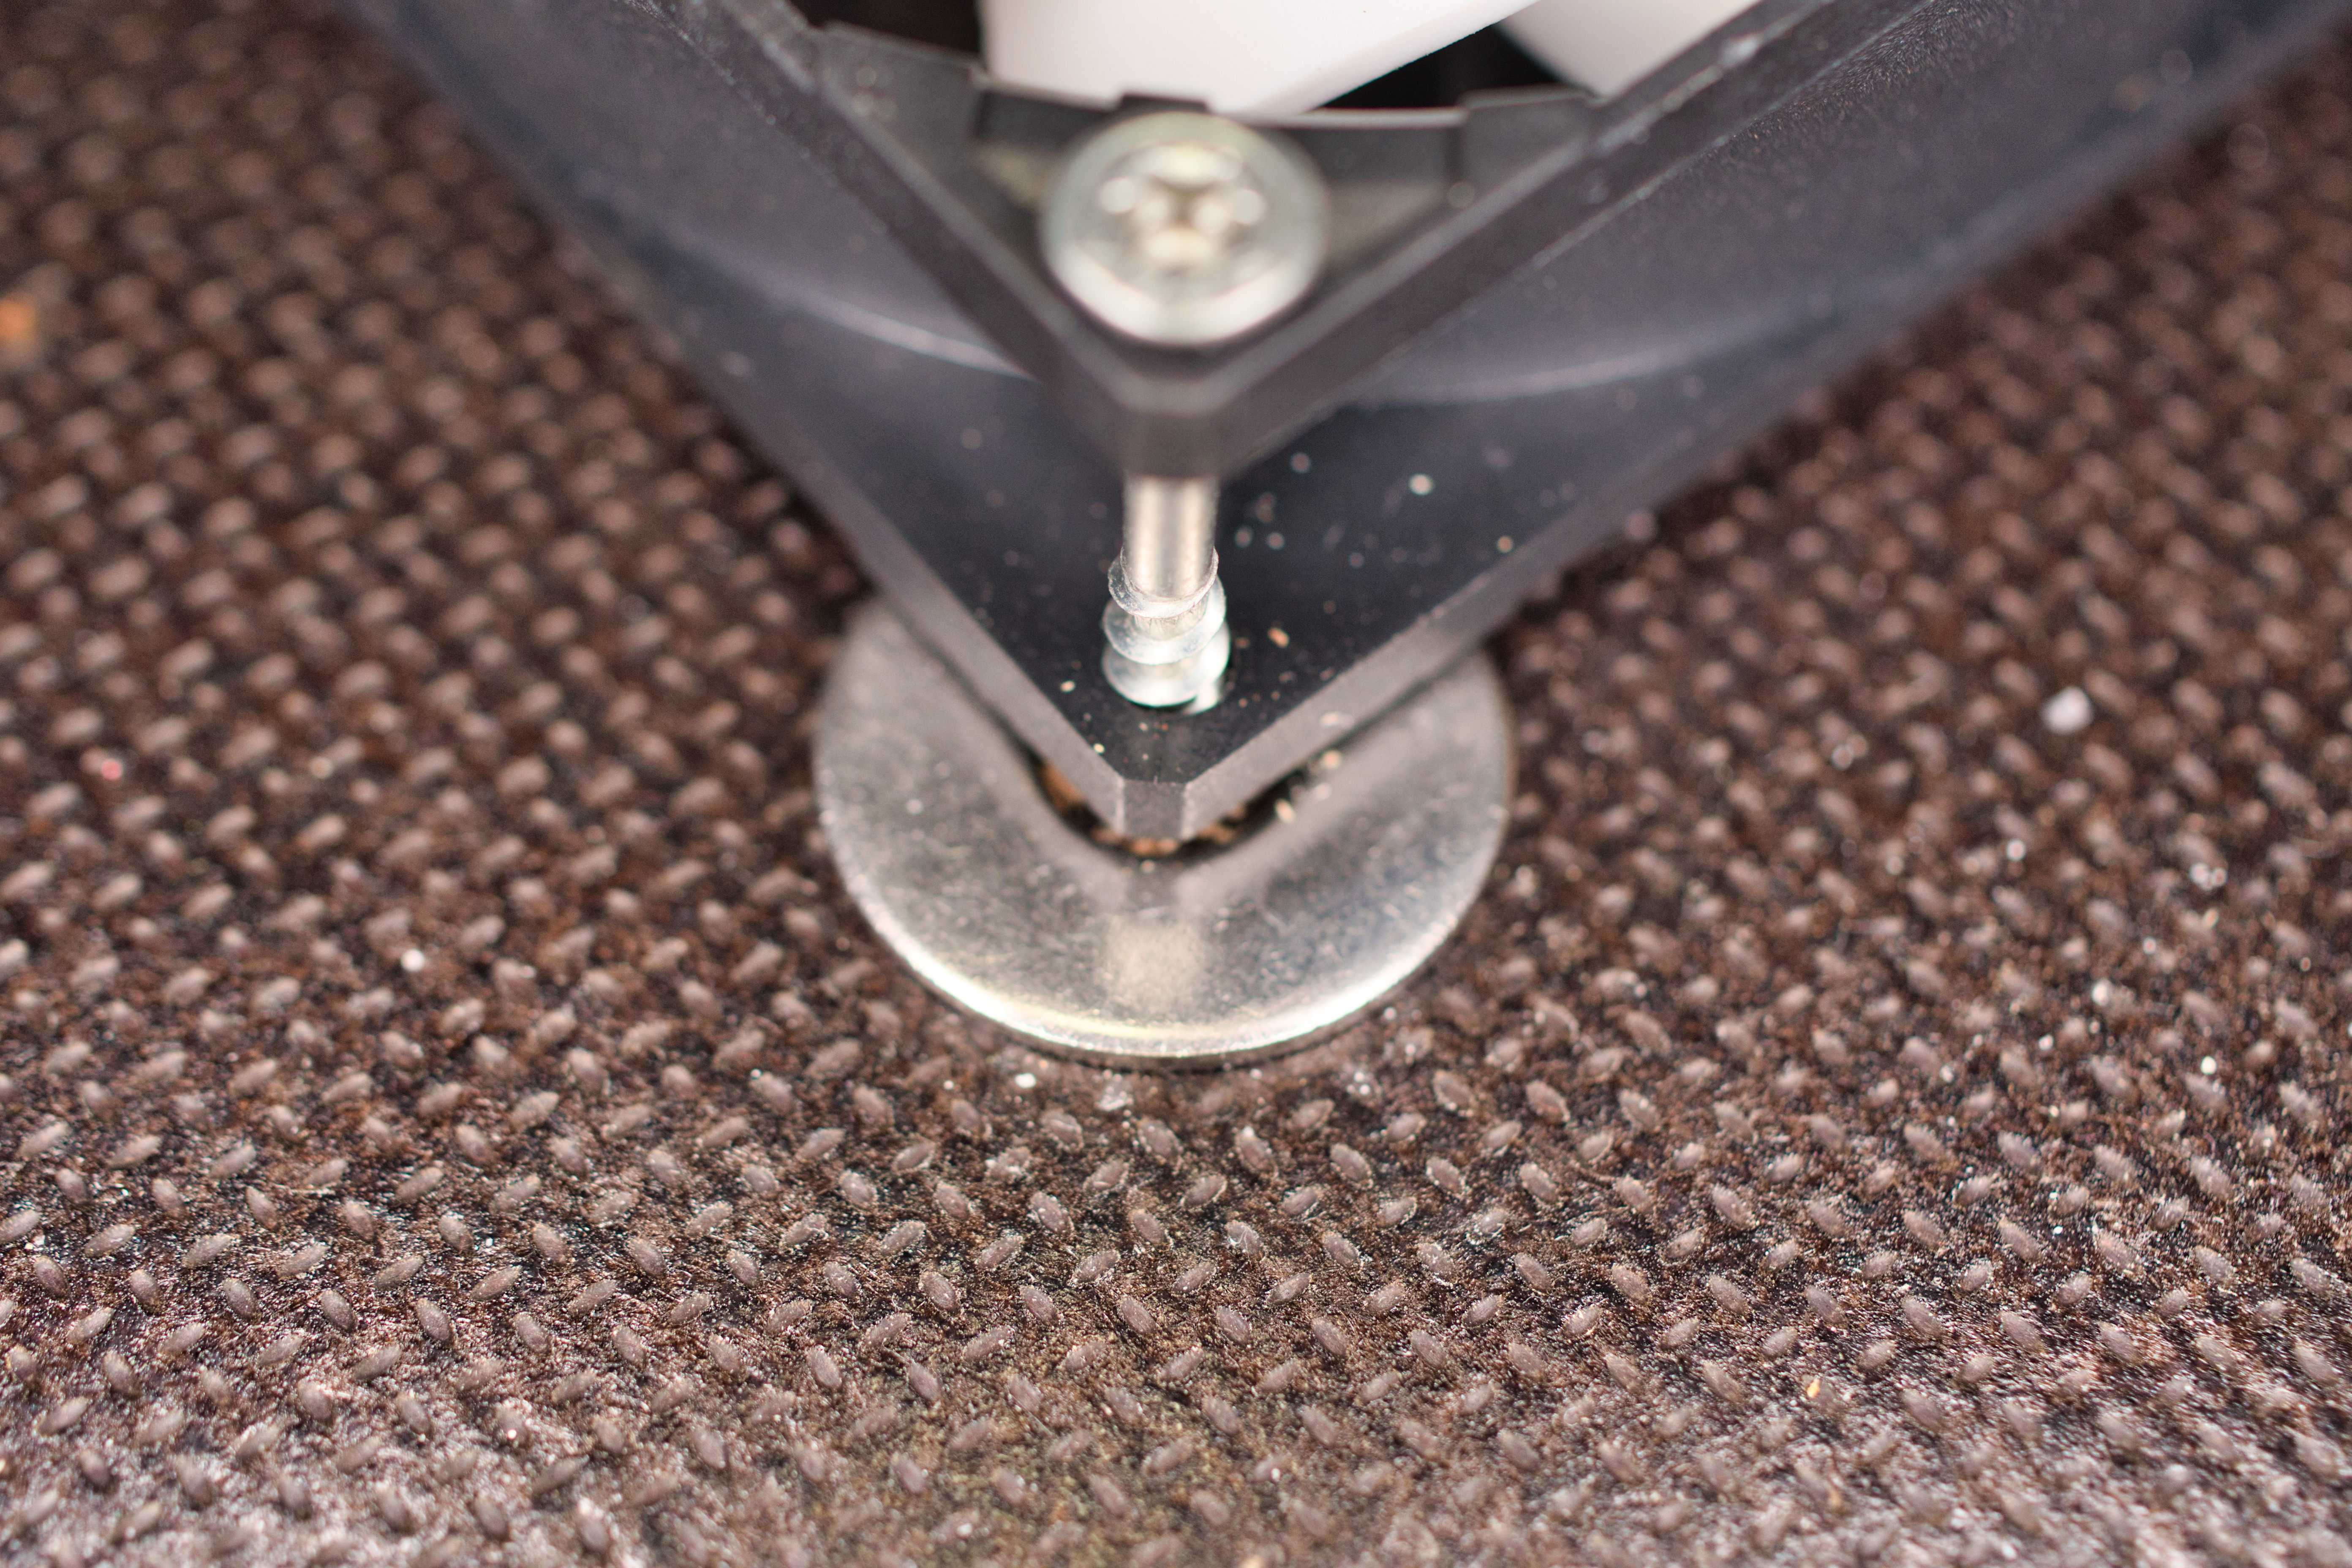
The axial flow fans are positioned on the coated side of the plywood panel orientated to blow upwards. The distances between the fans allow up to 3 L containers (e.g., for 1 L containers, ca. 5.8 cm distance between the fans and at least ca. 3.8 cm distance to the outer wooden frame). The spacing of fans can be adjusted to accommodate larger containers. Put washers between the fan and the plywood panel. The fans are mounted with screws (Fig. 2).
The spacing of fans can be adjusted to accommodate different containers sizes. It is vital to construct the distance so that some space remains between containers for the temperature control to work efficiently (Fig. 6). The minimum space from the center of a fan to the next in the row here is 13.5 cm for use with containers of 10.7 cm diameter.
Wiring
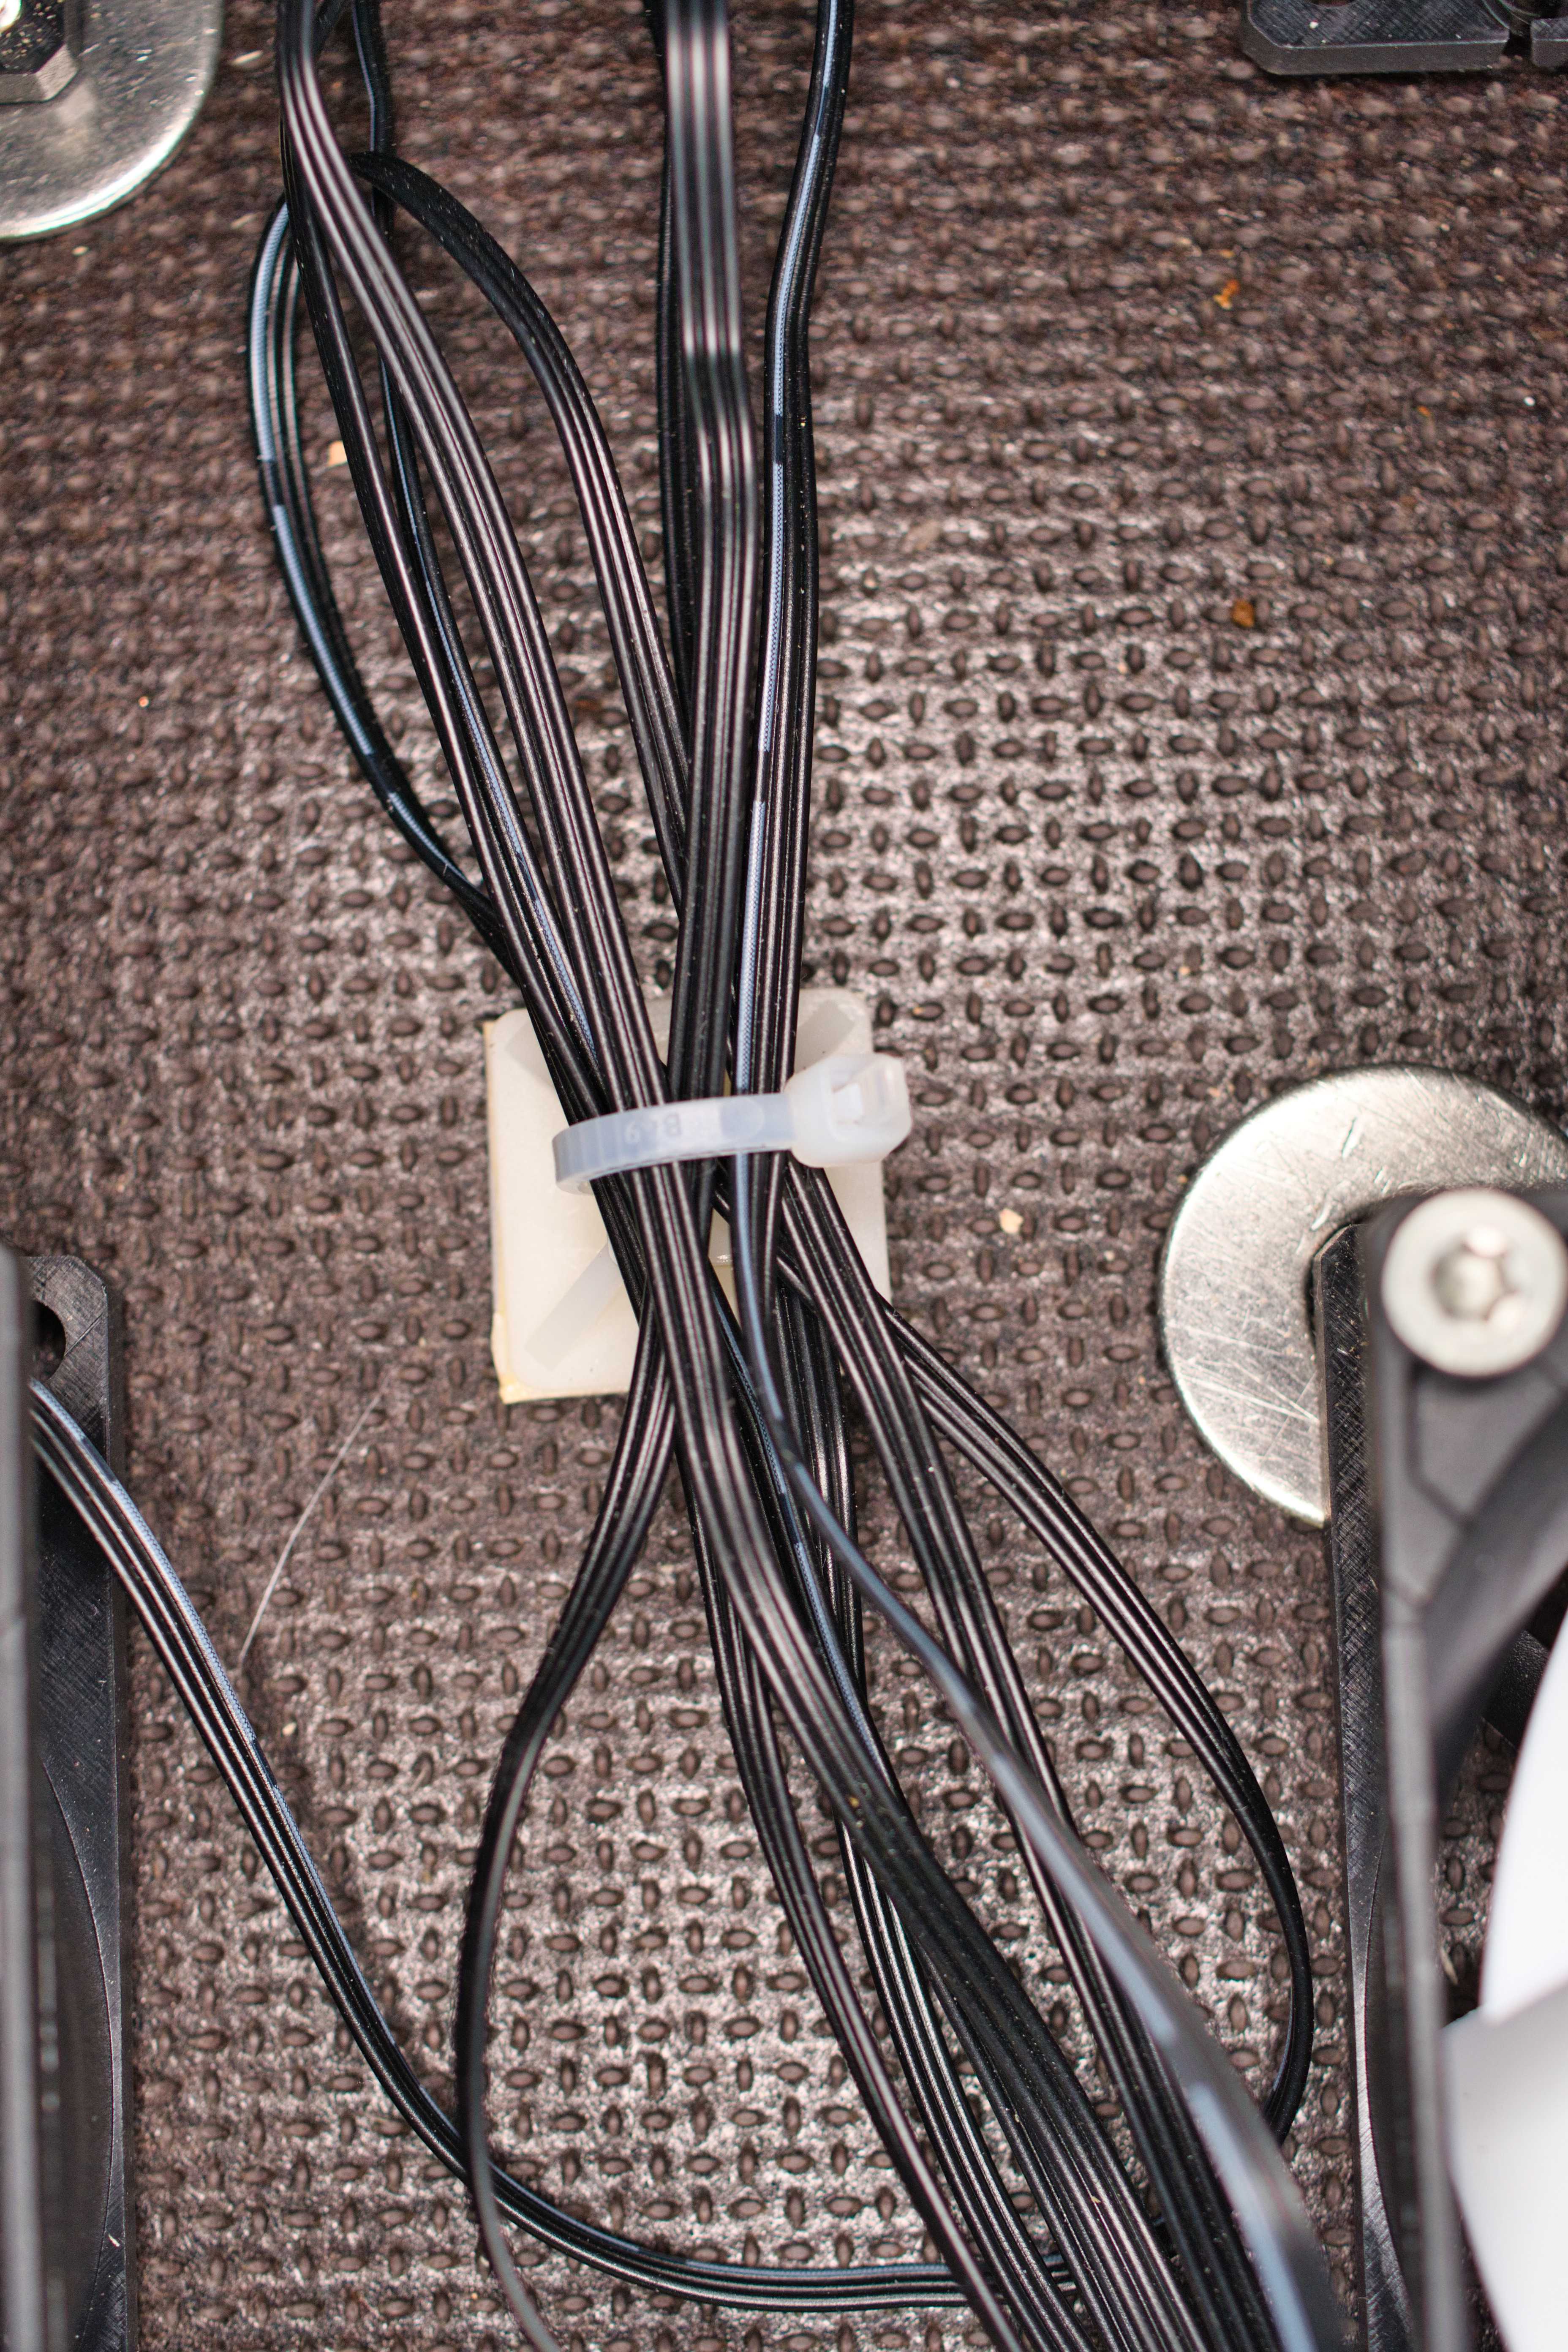
Each axial flow fan has three cables and a three-pin connector (Note: The electronic color code of the pinout of such connectors (black = ground (GND), red = supply voltage, yellow = rpm speed signal) is not used here as all cables are black. The connector can be used to identify the different wires.). The speed signal is not used in the setup. The three-pin connector will be cut off, and the cable ends will be stripped (with the wire stripper; ca. 1.5 cm).
Use the crimping plier to put ferrules on the ends of the pooled cables.
Fix the ferrules to a (screw) terminal.
The combined cable harness of the black wires is connected to the black (-) squeeze connector of the programmable power supply.
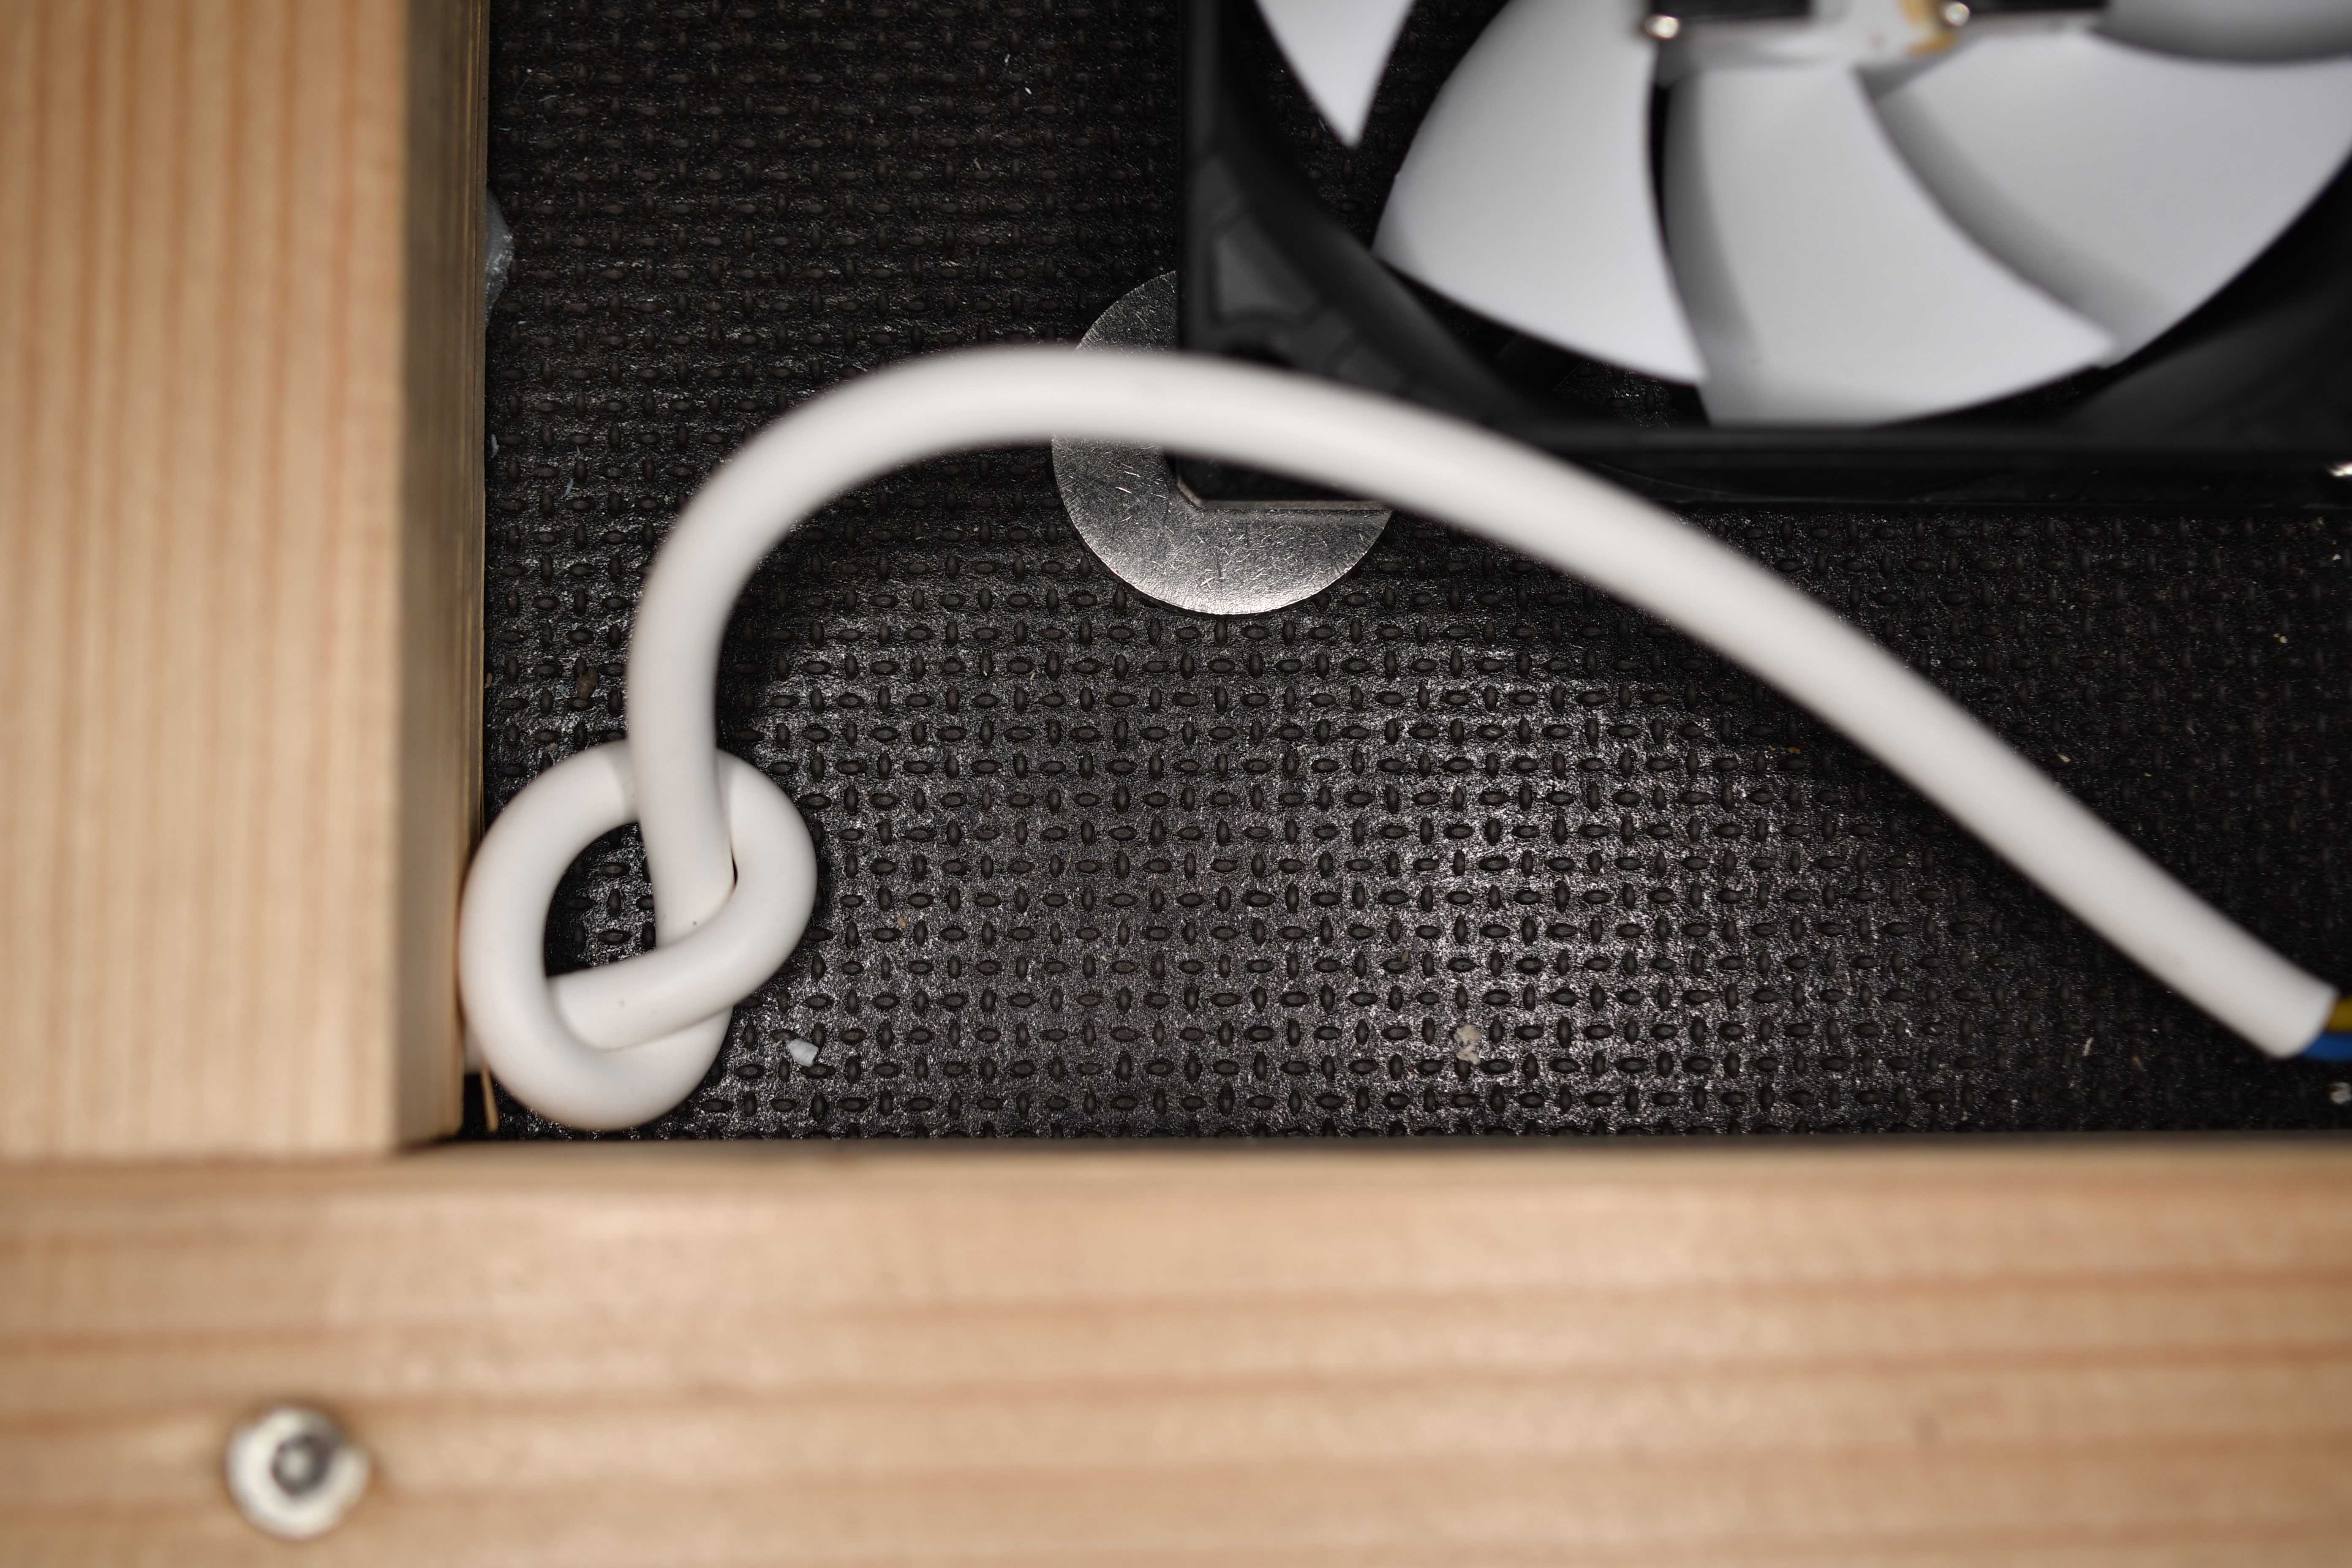
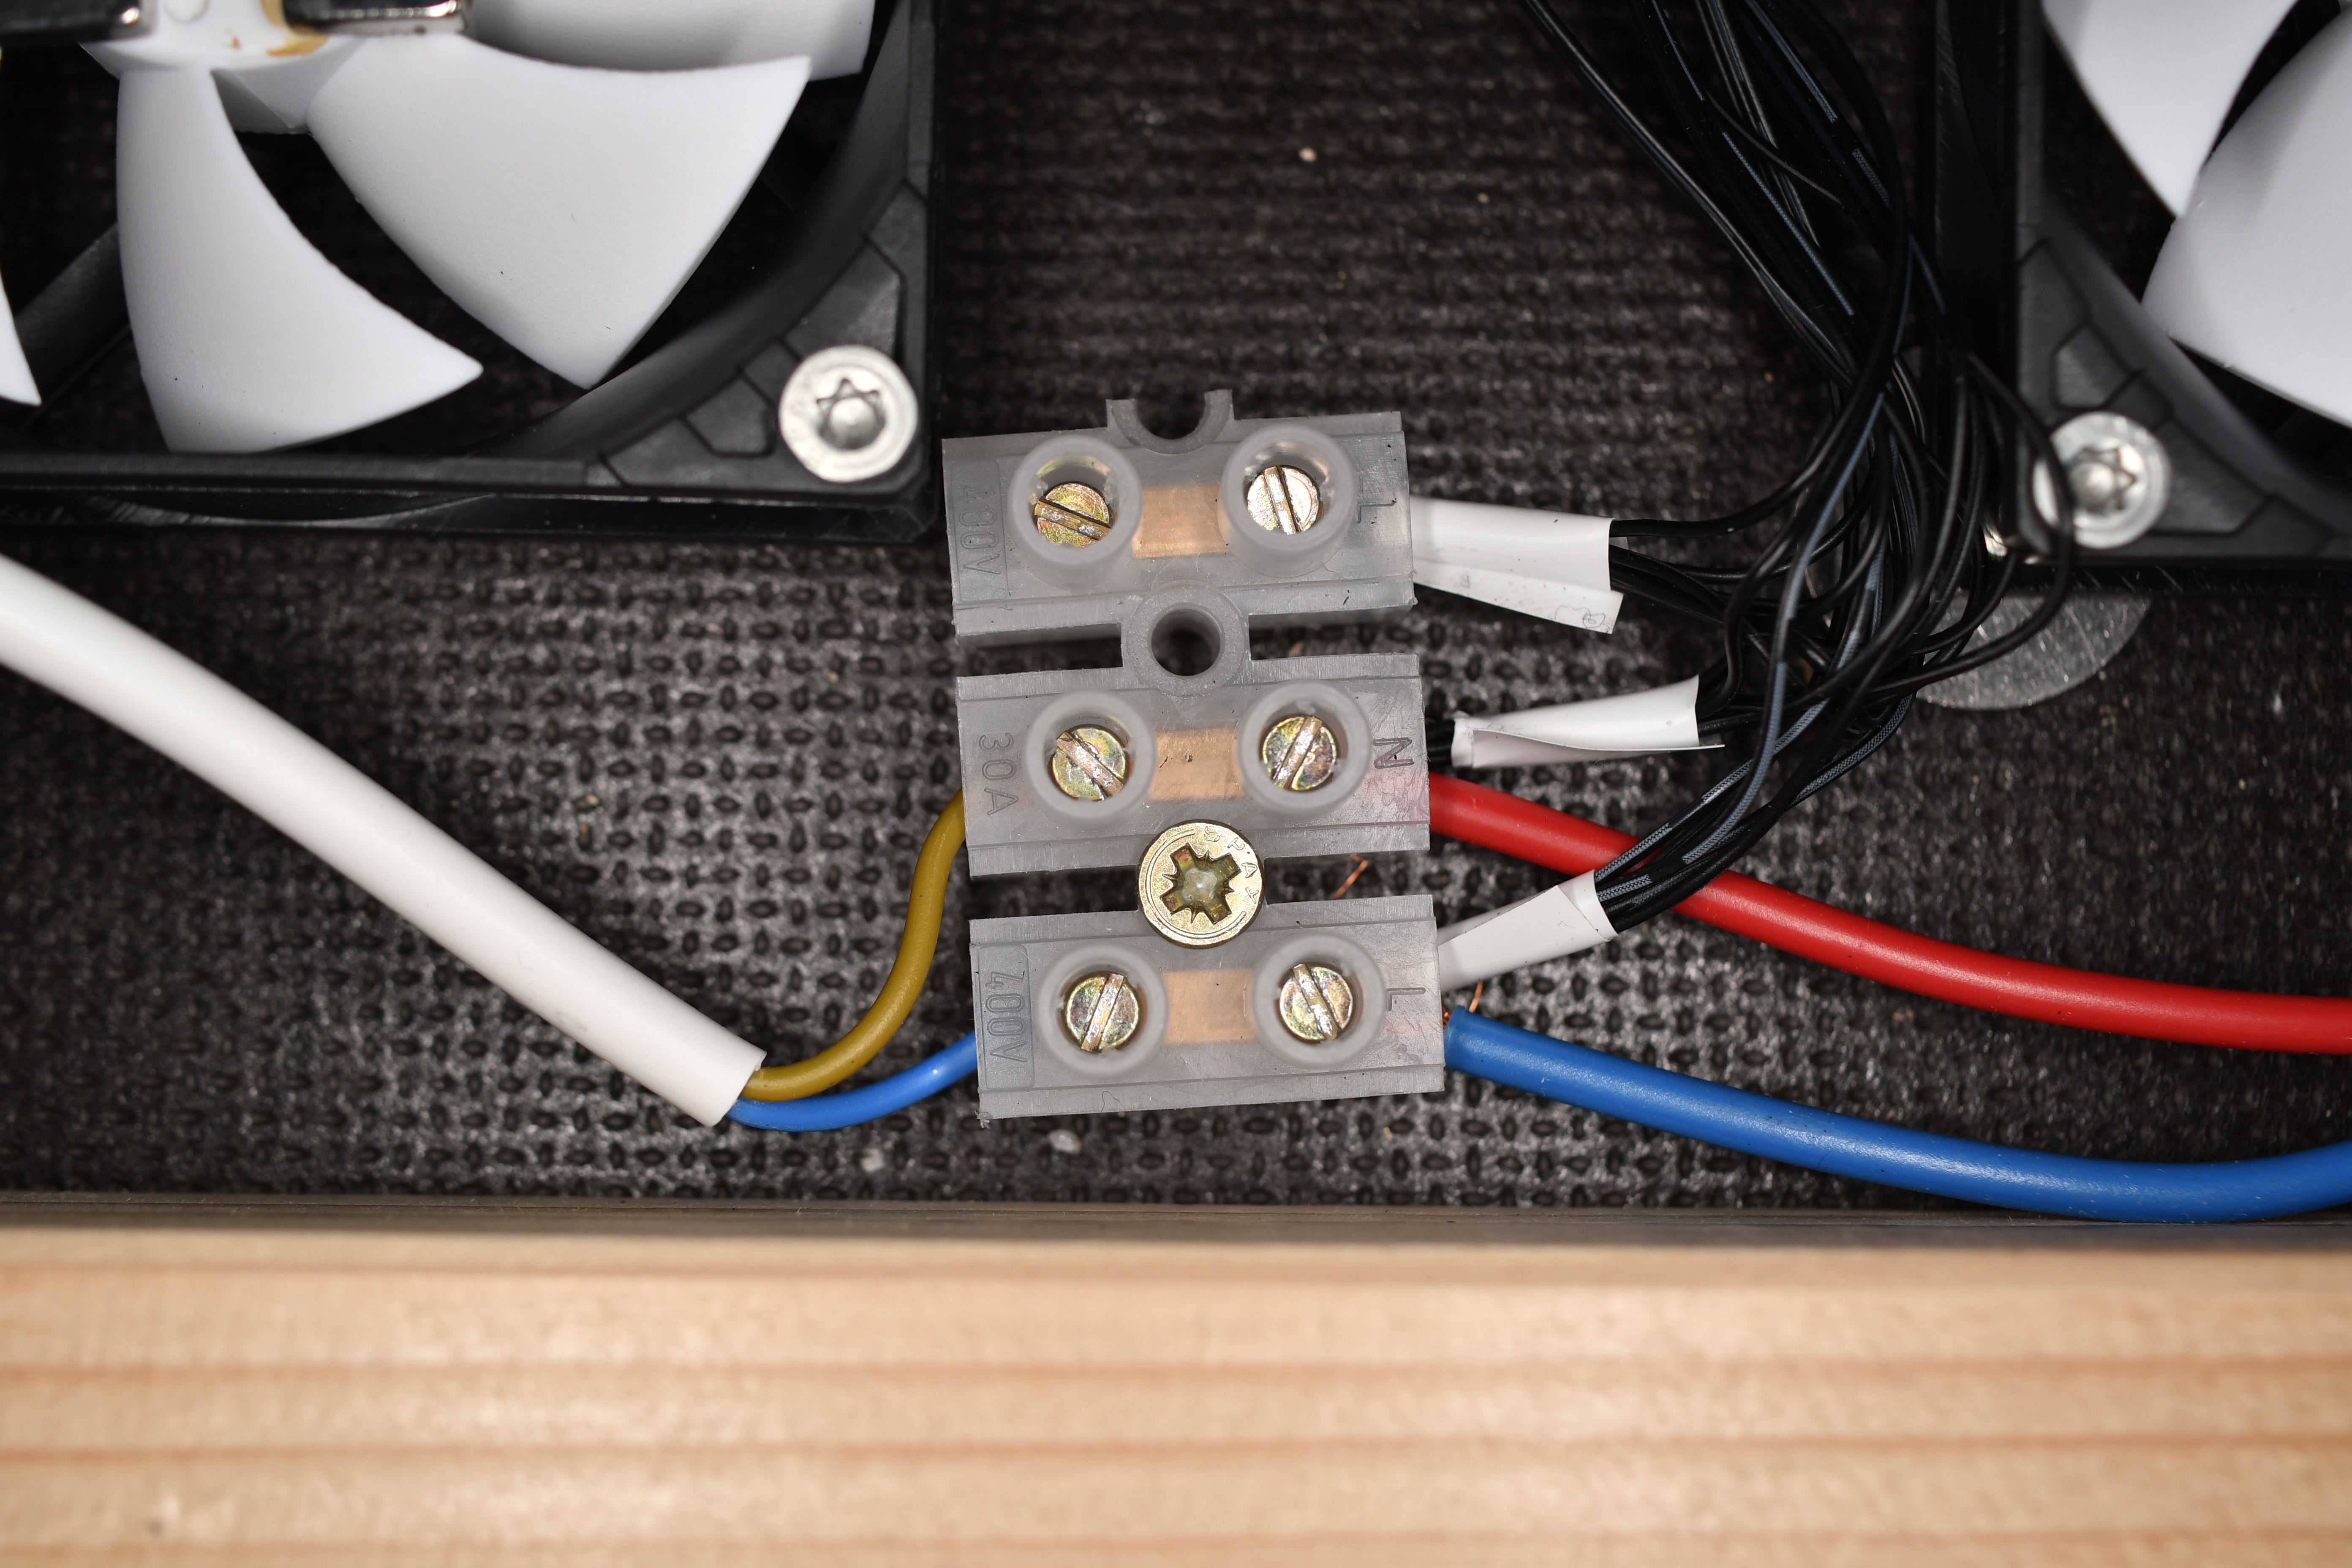
The combined cable harness of the red wires (= supply voltage) is connected to the red (+) squeeze connector of the programmable power supply (Note on steps 11 and 12: In this case, the white extension cable connected to the power supply has yellow and blue cable cores (Fig. 4)).
Water bath and commissining
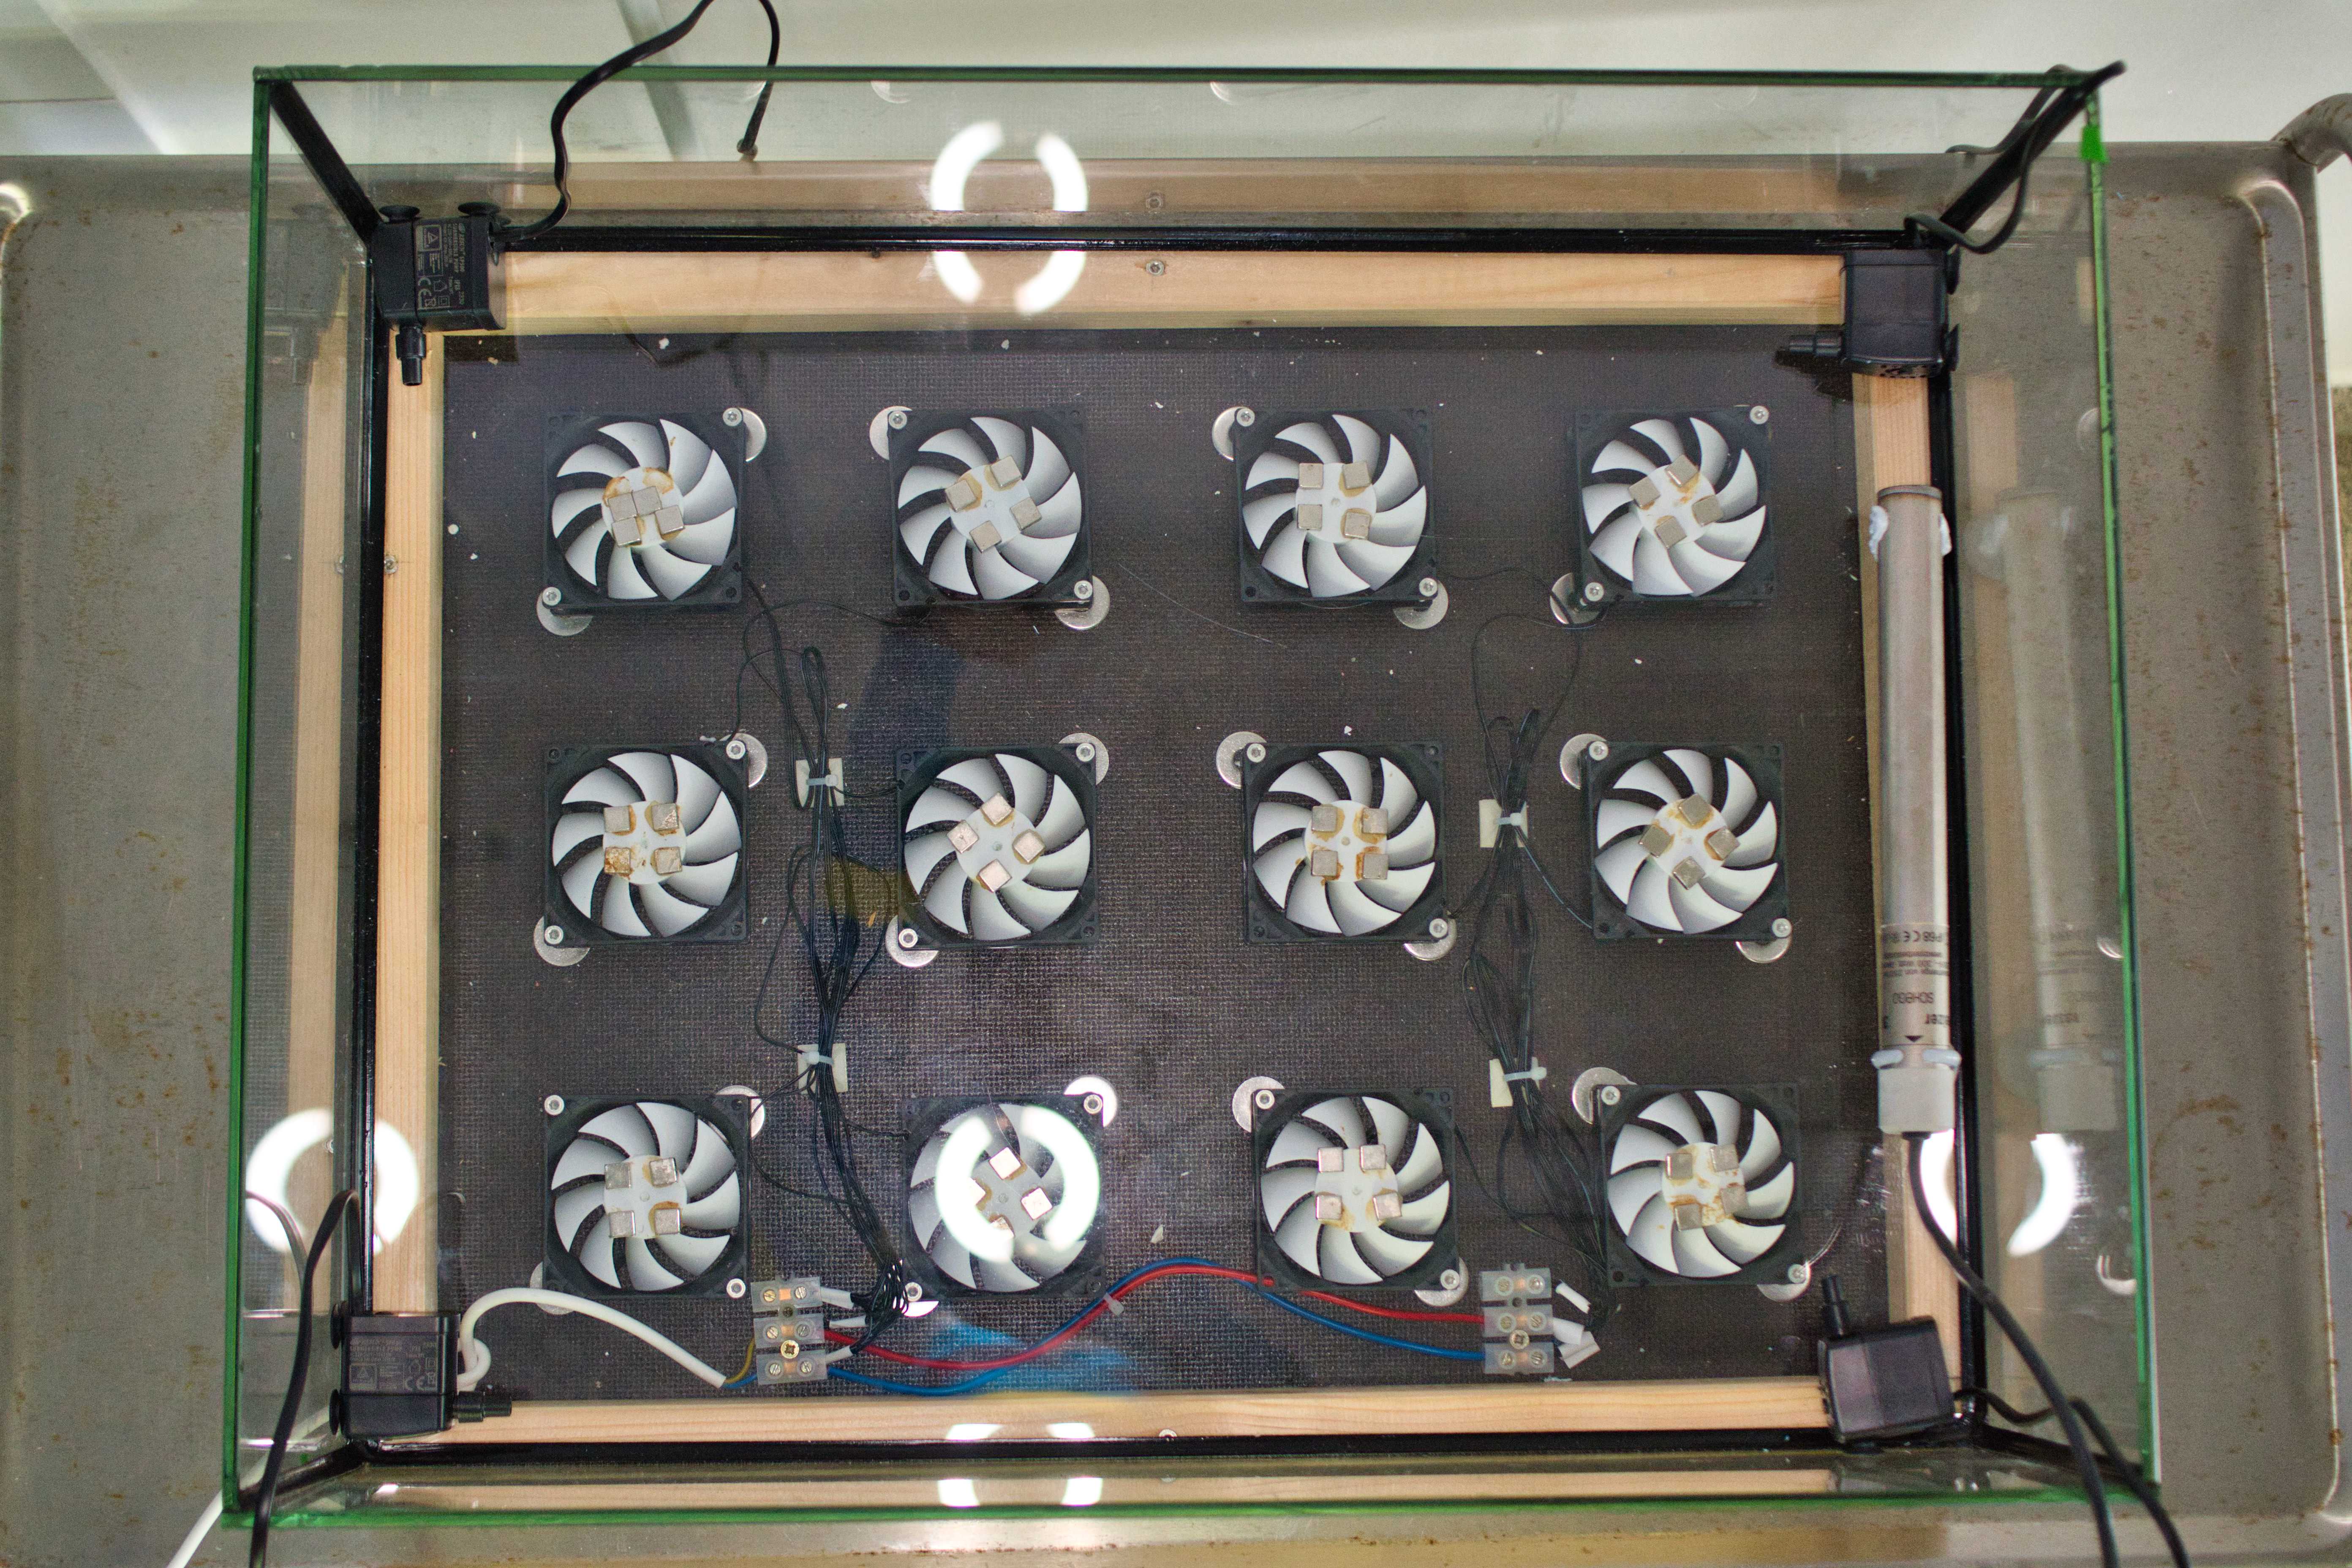
Place an aquarium heater rod and at least one flow pump for water and heat circulation inside the water bath (Attention: Do not plug these devices into the socket without water inside the basin!) (Fig. 7). Fill the basin with (preferably deionized) water up to the desired height.
Troubleshooting (optional)
If a fan does not start rotating, the voltage can be temporarily increased (e.g., to 5 V), or the rotation can be started by using a long magnetic stir bar remover to initiate fan rotation.
In order to create a liquid flow in the containers, magnetic stir bars are used. The stirring function was validated with bars of 20 mm length and 8 mm width (neoLab Migge, Germany).
The containers should have a thin and flat bottom and be cylindrical. It is mandatory to keep the distance between the fan-mounted magnets and the magnetic stir bars as close as possible. Therefore, laboratory beakers or "Weck" jars are recommended glassware for open or sealed applications, respectively.
Modifications (optional)
The building plan can be adjusted to fit a different number of stir points by adjusting the number of fans if required. Prior reconstruction, materials and dimensions must be adjusted. According to the datasheet, the programmable power supply can theoretically operate up to 31 fans at 12 V, 50 fans at 7 V, or 62 fans at 5 V (using Arctic F8 fans with 0.16 A at 12 V direct current (DC), 0.1 V at 7 V DC, or 0.08 A electric current at 5 V DC per fan). If it is desired to use other fans, note that in different fan sizes (e.g., 80 mm, 92 mm, or 120 mm), the same voltage may cause different revolutions per minute (rpm). To simplify the wiring, the connectors can be pooled to a computer fan hub instead of cutting the three-pin fan connectors (see step 7).
