BTI plant phenotyping system: Raspi computer and image collection
Li'ang Yu
Abstract
Instructions on how to set up automated synching between Raspberry Pi operated PhenoRig and the server through WiFi connections
Steps
Installation RaspiOS on Raspi Computer
Raspi Computer setup

If this is a new device, please use a monitor (or screen) to connect the Raspi computer and finish up the initial setup as follows:
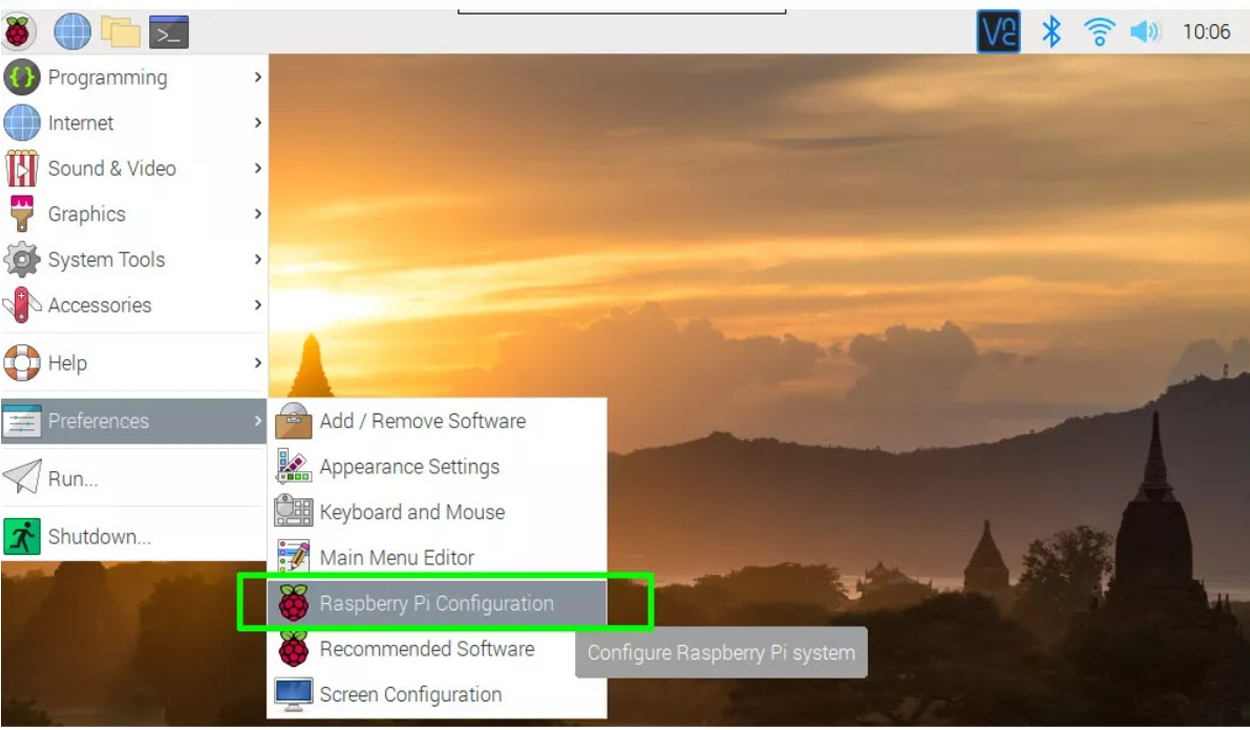
Enter a new name in the hostname field and click Ok. For lab internal use, please set up the "Hostname" using the raspi device number and the same password for each device.
For example:
Hostname: RaspiR
Password: ******
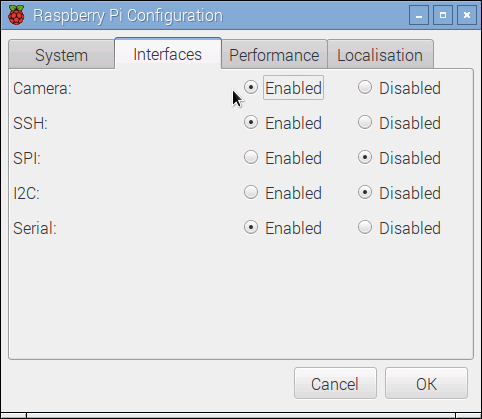
Remember to enable the camera under the Raspberry Pi Configuration panel, as well as SSH transfer and I2C function :
Internet connection setup
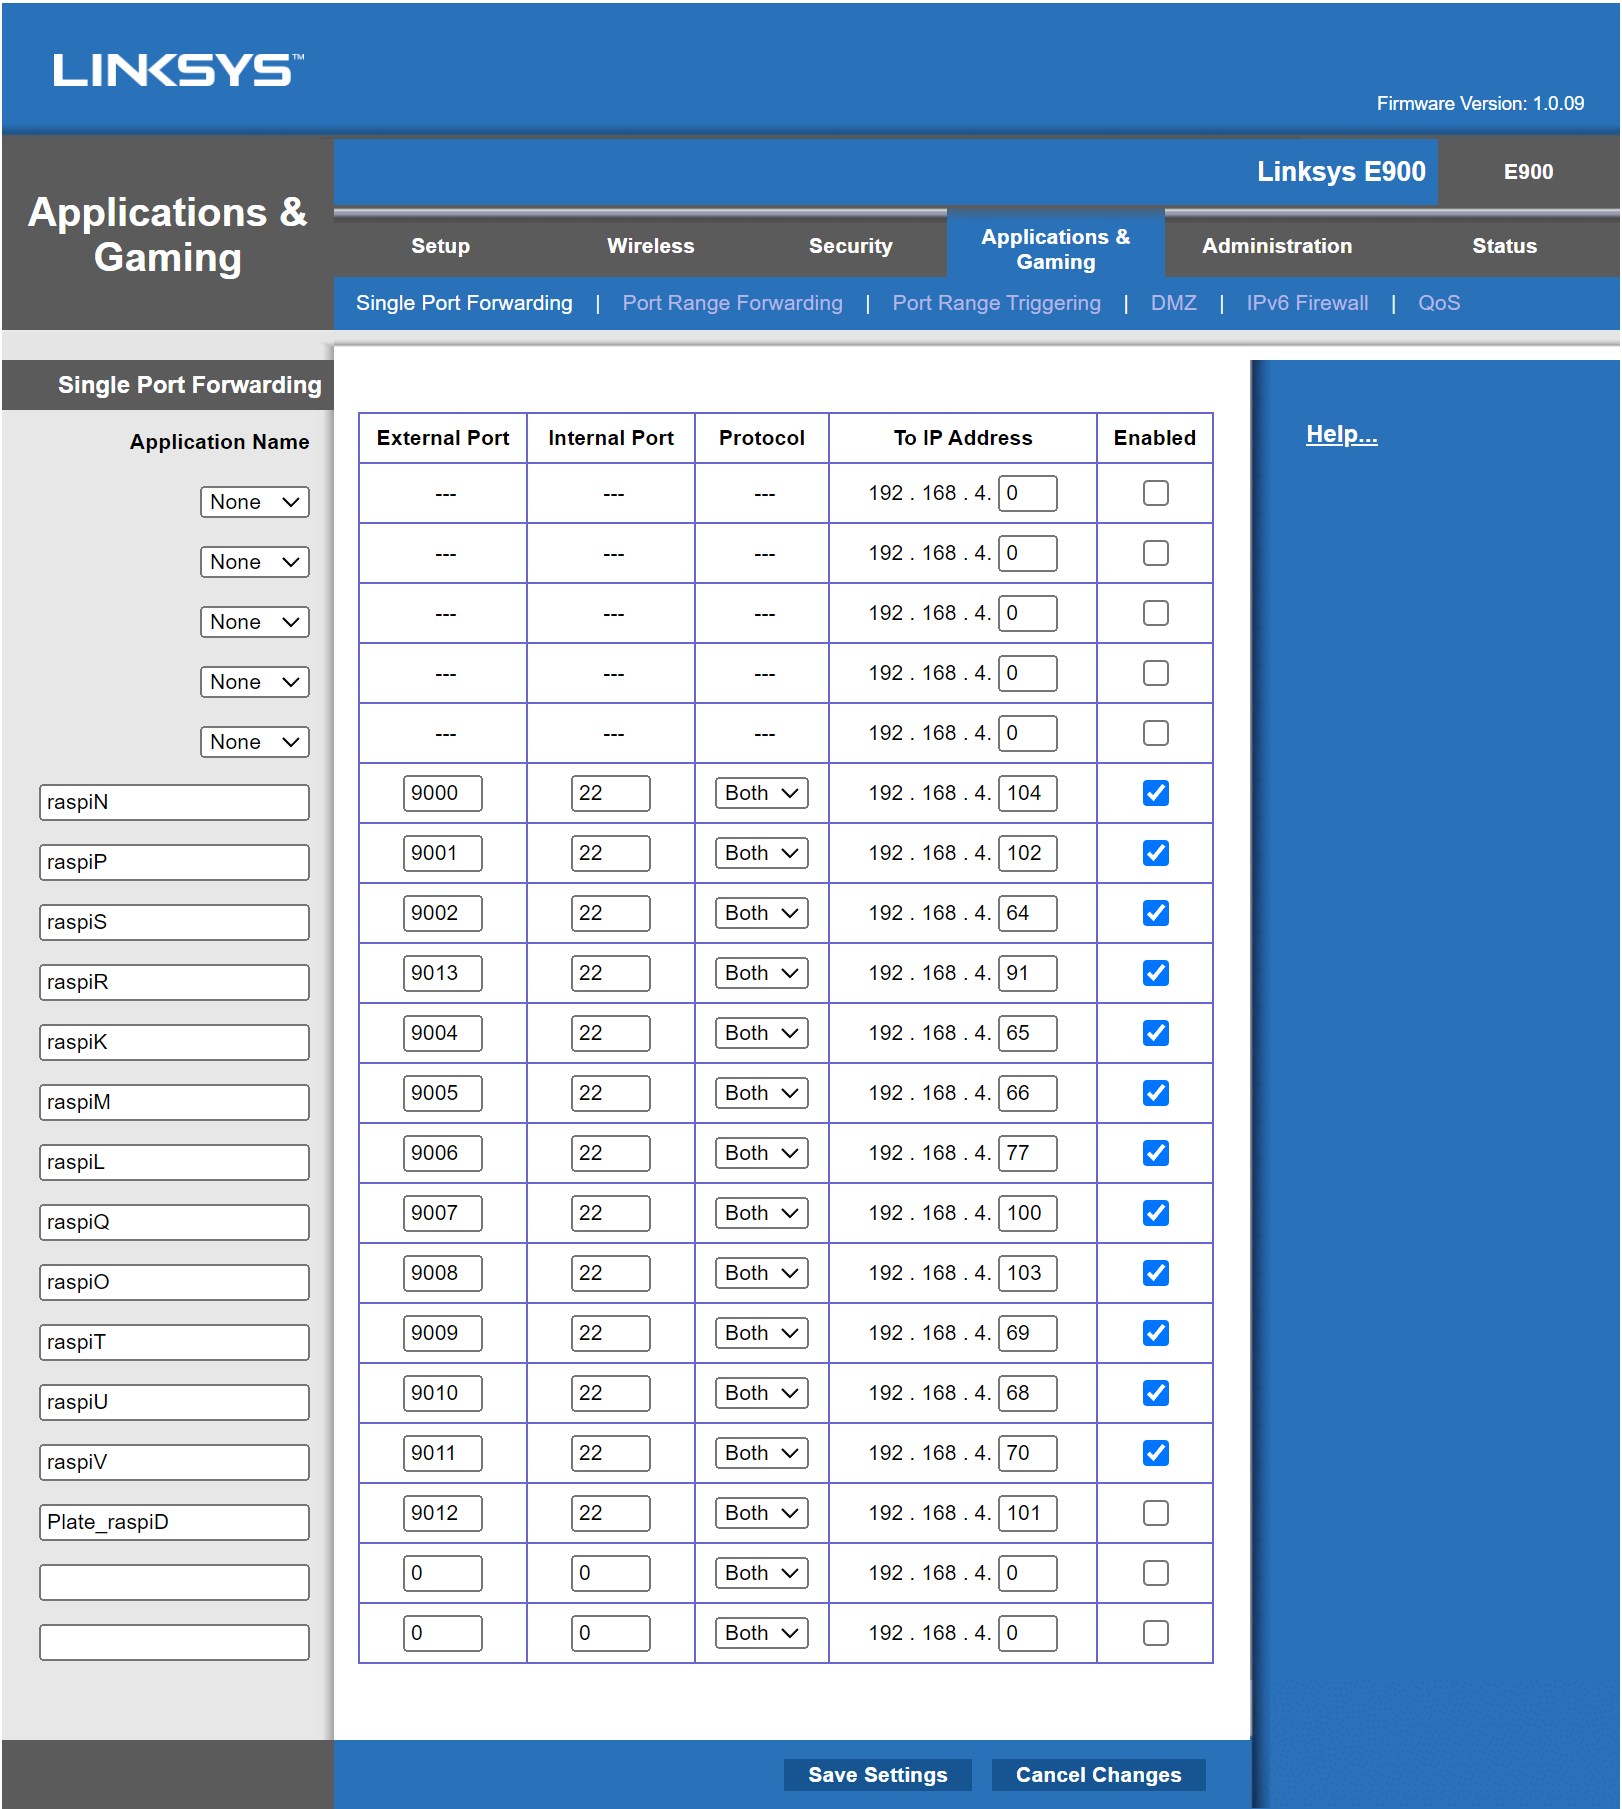
Please use a router to set up the internet (WIFI). Here we use the LINKSYS app as an example to show the necessary configuration :
For example :
Log in to the system using the following ID and password:

Check the devices connected to the internet by checking the " Local Network " icon under the " Status " tab. Further, click the " DHCP Client Table" to check each device.

NOTE:
Please make sure that the " Client name" on LINKSYS matched the "HostName" of Raspi computer.

Match the "IPv4 address" of the connected devices to the port setup page. For instance, the "To IP address" of "raspiN" should be manually updated as same as the IPv4 address" listed in step above.

Connect raspi computer by server and PCs
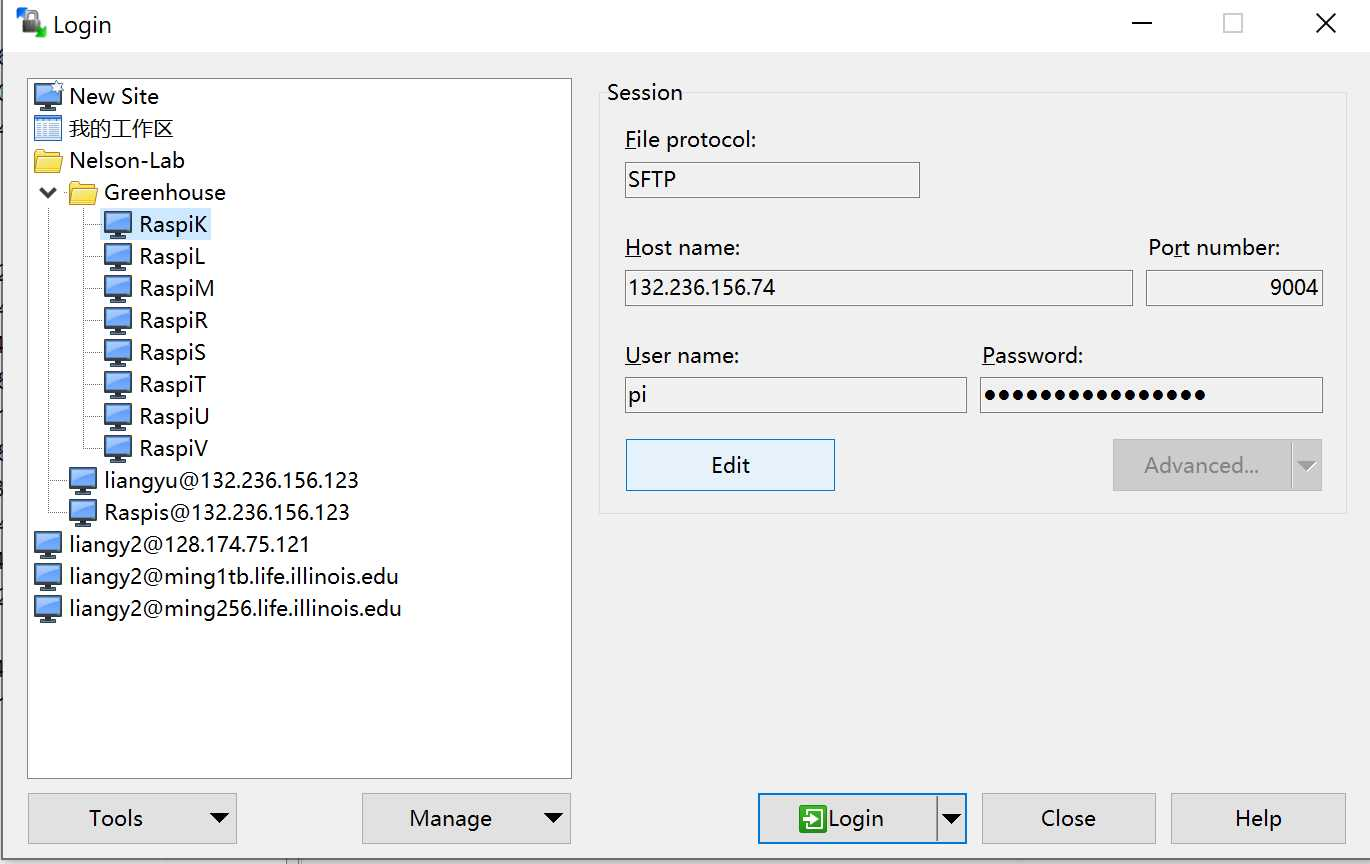
To provide easy access to check information on each raspi. Please use ssh proxy to connect each raspi computer to your PC and working server. Here, we use the WinSCP to connect the device.
Download the WinSCP: https://winscp.net/eng/index.php
Connect Raspi to PC
Click "New Sites" and manually create the address as follows. Please make sure the Host Name and Port Number match the record from the step above and click Login to reach the connection.
Connect Raspi to the SERVER
Using any existing users of SERVER in lab to login first. For example, use the Raspis user ID to log in. ( If using SSH command: ssh -p 12345 Raspis@..*.)
To log in to specific Raspi, use the ssh command to log in as same as the IP address and port number above. For instance, to connect RaspiR with SERVER
ssh -p 9005 pi@***.***.***.**
Using ssh command to transfer files by crontab
Please install "sshpass" first using the following link:
https://gist.github.com/arunoda/7790979
IMPORTANT!: Please use the ssh command to connect from host to client, as well as the client to host from two sides (As known as a handshake). Otherwise, the " sshpass " fails to transfer files. Using RaspiR as an example:
Login to VAHS first and type in:
ssh -p 9005 pi@.***.**.**

Login to raspiR then and type in:
ssh -p 14817 Raspis@***.***.***.***
Using Crontab to initiate the experiment
The code is used to launch each new experiment and realize the data transfer from each Raspi Computer to VASH server for storage.
Config the raspi computer file and folder (For example):
### Create an image factory for each Raspi (Using R as example)
mkdir /home/pi/Documents/raspiR_image_factory

### Create a text file with raspi password included
nano /home/pi/Documents/raspiR_image_factory
Log in to vash and launch the setup code:
### Reach the setup code:
bash /mnt/Knives/image_factory/new_experiment.sh
