Non-destructively barcoding hundreds of freshwater macroinvertebrates with a MinION

Elise C. Knobloch, Ray C Schmidt

Published: 2022-07-15 DOI: 10.17504/protocols.io.rm7vzy974lx1/v1

Abstract

This project aimed to optimize protocols needed to produce CO1 barcodes for 1000s of African freshwater macroinvertebrates, from many different orders, in the most cost-efficient way possible. Since many of these specimens represent undescribed or poorly-known taxa we also wanted to utilize a non-destructive method of DNA extraction. To do so, we modified the methods detailed by Srivathsan et al. (2021). Here we present the protocol from specimen preparation and DNA extraction to sequence generation. In addition to the methods outlined by Srivathsan et al. (2021) we also pulled together the protocols from Oxford Nanopore Technologies and other vendors. We have added some tips and comments to these procedures that we found helpful in the process. We used these protocols to produce barcodes for hundreds of freshwater macroinvertebrates that were collected in Gabon. This project was funded by the National Science Foundation's Research Experience for Post-Baccalaureate Students (REPS) program (DEB #1920116).

Citation
Srivathsan A, Lee L, Katoh K, Hartop E, Kutty SN, Wong J, Yeo D, Meier R 2021 ONTbarcoder and MinION barcodes aid biodiversity discovery and identification by everyone, for everyone. BMC biology https://doi.org/10.1186/s12915-021-01141-x

Before start

Steps

Specimen preparation and DNA extraction

1.

Specimen preparation and DNA extraction

Specimen preparation

1.1.

Fill two Petri dishes with ddH2O

1.10.

After heating, remove the from each well and transfer to a clean 96-well plate

Note
Be very careful to not touch specimens when removing QuickExtract DNA Extraction Solution from the wells containing the specimens. Some soft-bodied specimens may disintegrate and others may be very fragile and should not be touchedSome hard-bodied specimens tend to soak up the QuickExtract DNA Extraction Solution. If you go to remove the QuickExtract DNA Extraction Solution from that well and there isn’t any liquid in the well, add 10µL of ddH2O, pipette up and down, and remove this as your extract. Move slowly when doing this, it is easy to get mixed up on which well you are on when dealing with a full 96 well plate

DNA Dilution

1.11.

Put 10µL of ddH2O in each well of a 96-well plate

1.12.

Put 1µL of DNA extraction in each coinciding well

Note
We have found that the concentration of the quick extract DNA extract can range anywhere between about 1ng/mL to about 50ng/mL. Diluting the DNA 1:10 has been the most successful generalized protocol (about 75% PCR success) Seal the dilution plates well when storing, they will evaporate if not

1.2.

Remove specimen/s from ethanol and place in one dish of ddH2O for0h 10m 0s

Note
You may need to work under a microscope depending on what type of specimens you are working with.

Note
If you are removing specimens from a jar, be sure to top off that jar with ethanol when you are finished.

1.3.

Remove specimen/s from water, and rinse again in the second dish for 0h 5m 0s

1.4.

Place specimen/s on a paper towel to dry for about 0h 5m 0s

Note
Arranging the specimens in rows of eight makes the next steps easier.

DNA extraction

1.5.

Put 10µL in each well of a 96-well plate

Note
I have found that working in rows of three is the most effective and reduces the likelihood to make mistakes

1.6.

Place one rinsed and dried specimen in each well head-first

Note
Be sure the head is fully submerged. If the specimen is too large to fit in the well, remove a leg and place that in the quick extract.

Note
When working with legs, be sure to keep one side of the specimen intact

Note
This was the work flow I found to be most effective: remove 24 specimens at a time and place them in the water to soak. Fill three rows of the plate with QuickExtract DNA Extraction Solution. Remove specimens individually from the water and place in 3 rows of 8 to dry out (they do not need to dry for long). Place each specimen in a well. Put clean water in both dishes (trying to prevent ethanol from being a PCR inhibitor). Repeat this process until the plate is full.

1.7.

Cover with TempPlate sealing foil or reusable TempPlate pressure-fit sealing mat

1.8.

Place the covered 96-well plate in the thermal cycler

Note
Seal plate as well as you can when heating, QuickExtract DNA Extraction Solution will start to evaporate.

1.9.

Heat at 65°C for 0h 18m 0s ,98°C for 0h 2m 0s

PCR Amplification

2.

PCR Amplification

PCR Setup

2.1.

Combine ddH2O, , and forward primer in a tube

AB
Per 20µL Reaction
ddH207
2x Buffer-APEX red10
Primer F0.5
Primer R0.5-not in master mix
DNA Template2-not in master mix

Note
We have 12 forward primers and 24 reverse primers (purchased from Integrated DNA Technologies, Inc.) so I typically work with 24 wells at a time. I make the master mix for 25x to make sure I have enough master mix to distribute into each tube. 25x H20 175 2x Buffer-APEX red 250 Primer F 12.5 Primer R 0.5-not in mastermix DNA Template 2-not in mastermix

Primer List.xlsx

2.2.

Distribute 17.5µL of master mix into each tube of a strip tube

Note
Work on an ice block because this setup takes anywhere from 0h 10m 0s to 0h 20m 0s

2.3.

Distribute DNA template and reverse primer into each tube

Note
Workflow: in a 1.5 ml tube, combine the 25x amount of the water, 2.0X Taq RED Master Mix, and forward primer that you are using. Vortex and spin down. In three 8-tube strip tubes, distribute 17.5µLof the mastermix. Each separate tube gets 0.5µL of a unique reverse primer. Each separate tube gets 2µL of a unique specimen’s diluted DNA. Add the DNA and reverse primers in order to be able to keep track more easily.

2.4.

Thermal Cycler Protocol:94°C for 0h 1m 0s, then 94°C for 0h 0m 30s, 42°C for 0h 1m 0s, 72°C for 0h 1m 30s, go back to step 2 39x, 72°C for 0h 7m 0s, infinite hold at 10°C

Equipment

ValueLabel
T100 Thermal CyclerNAME
Thermal CyclerTYPE
BioRadBRAND
1861096SKU
http://www.bio-rad.com/LINK

Gel Electrophoresis

2.5.

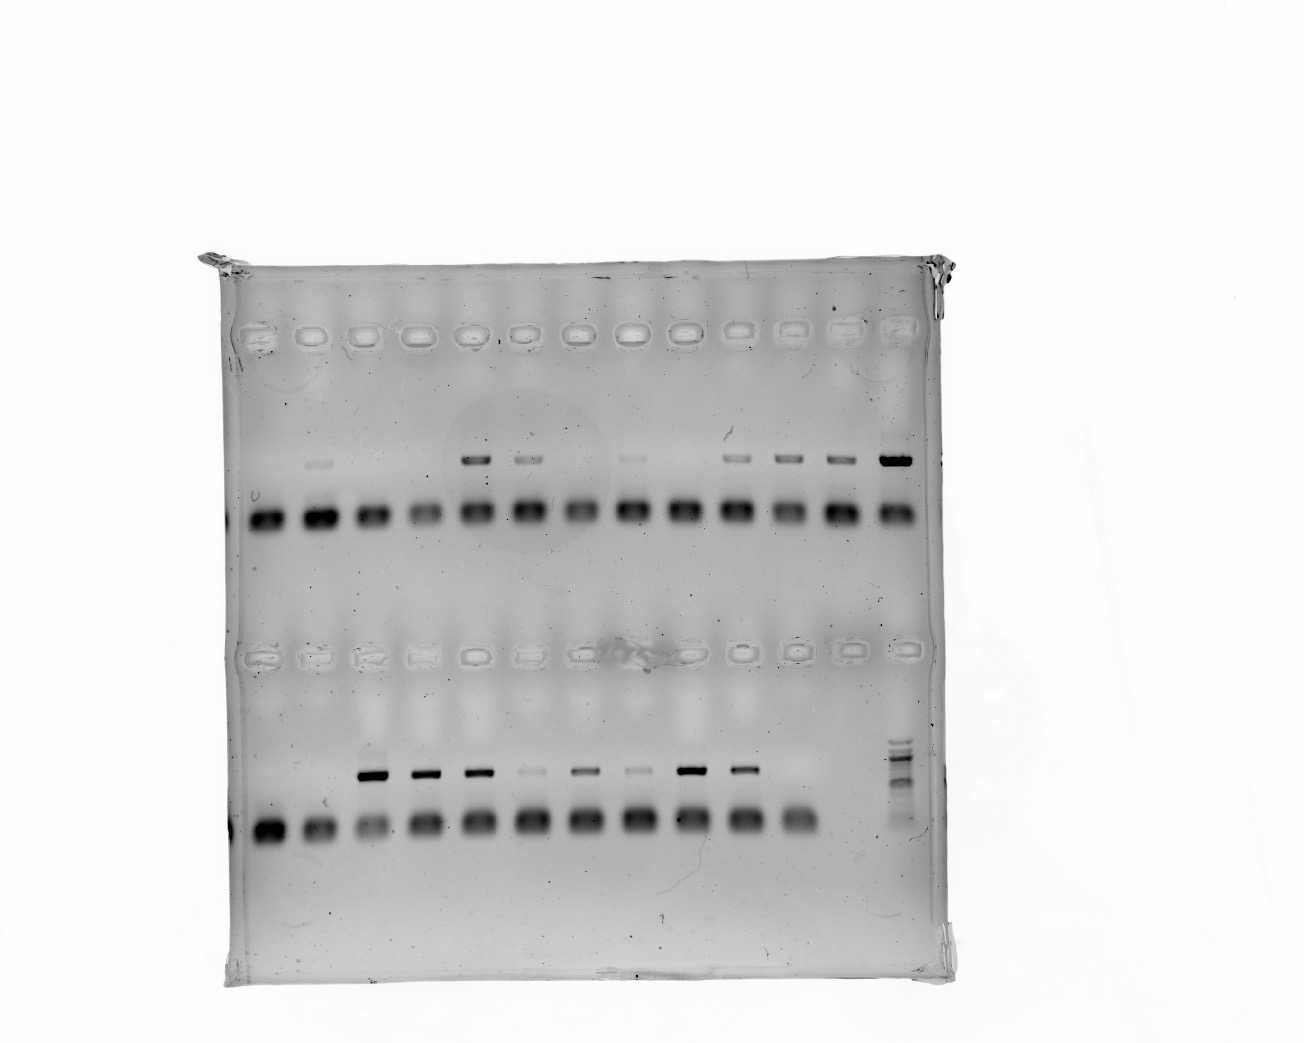
Run a gel on at least 6 specimens from each master mix batch. Including a subset of the reaction on the gel allows you to confirm that there were no issues with the PCR master mix and also estimates how many reactions were successful.

Citation
Running a subset of reaction on a gel to confirm successful amplification, allows estimation of success rate (e.g. ~66%)

Pooling and Cleaning

3.

Pooling and cleaning

3.1.

Take 4µL from each PCR-This will yield approximately 1.152mL of PCR product

3.10.

Add another 250µL of 70% ethanol and let sit for 0h 0m 30s

3.11.

Remove all ethanol

3.12.

Let dry for 0h 5m 0s to0h 10m 0s with the cap open so the ethanol can evaporate

3.13.

Add 40µL of ddH2O and elute the pellet (remove from the rack)

3.14.

Let sit for 0h 2m 0s

3.15.

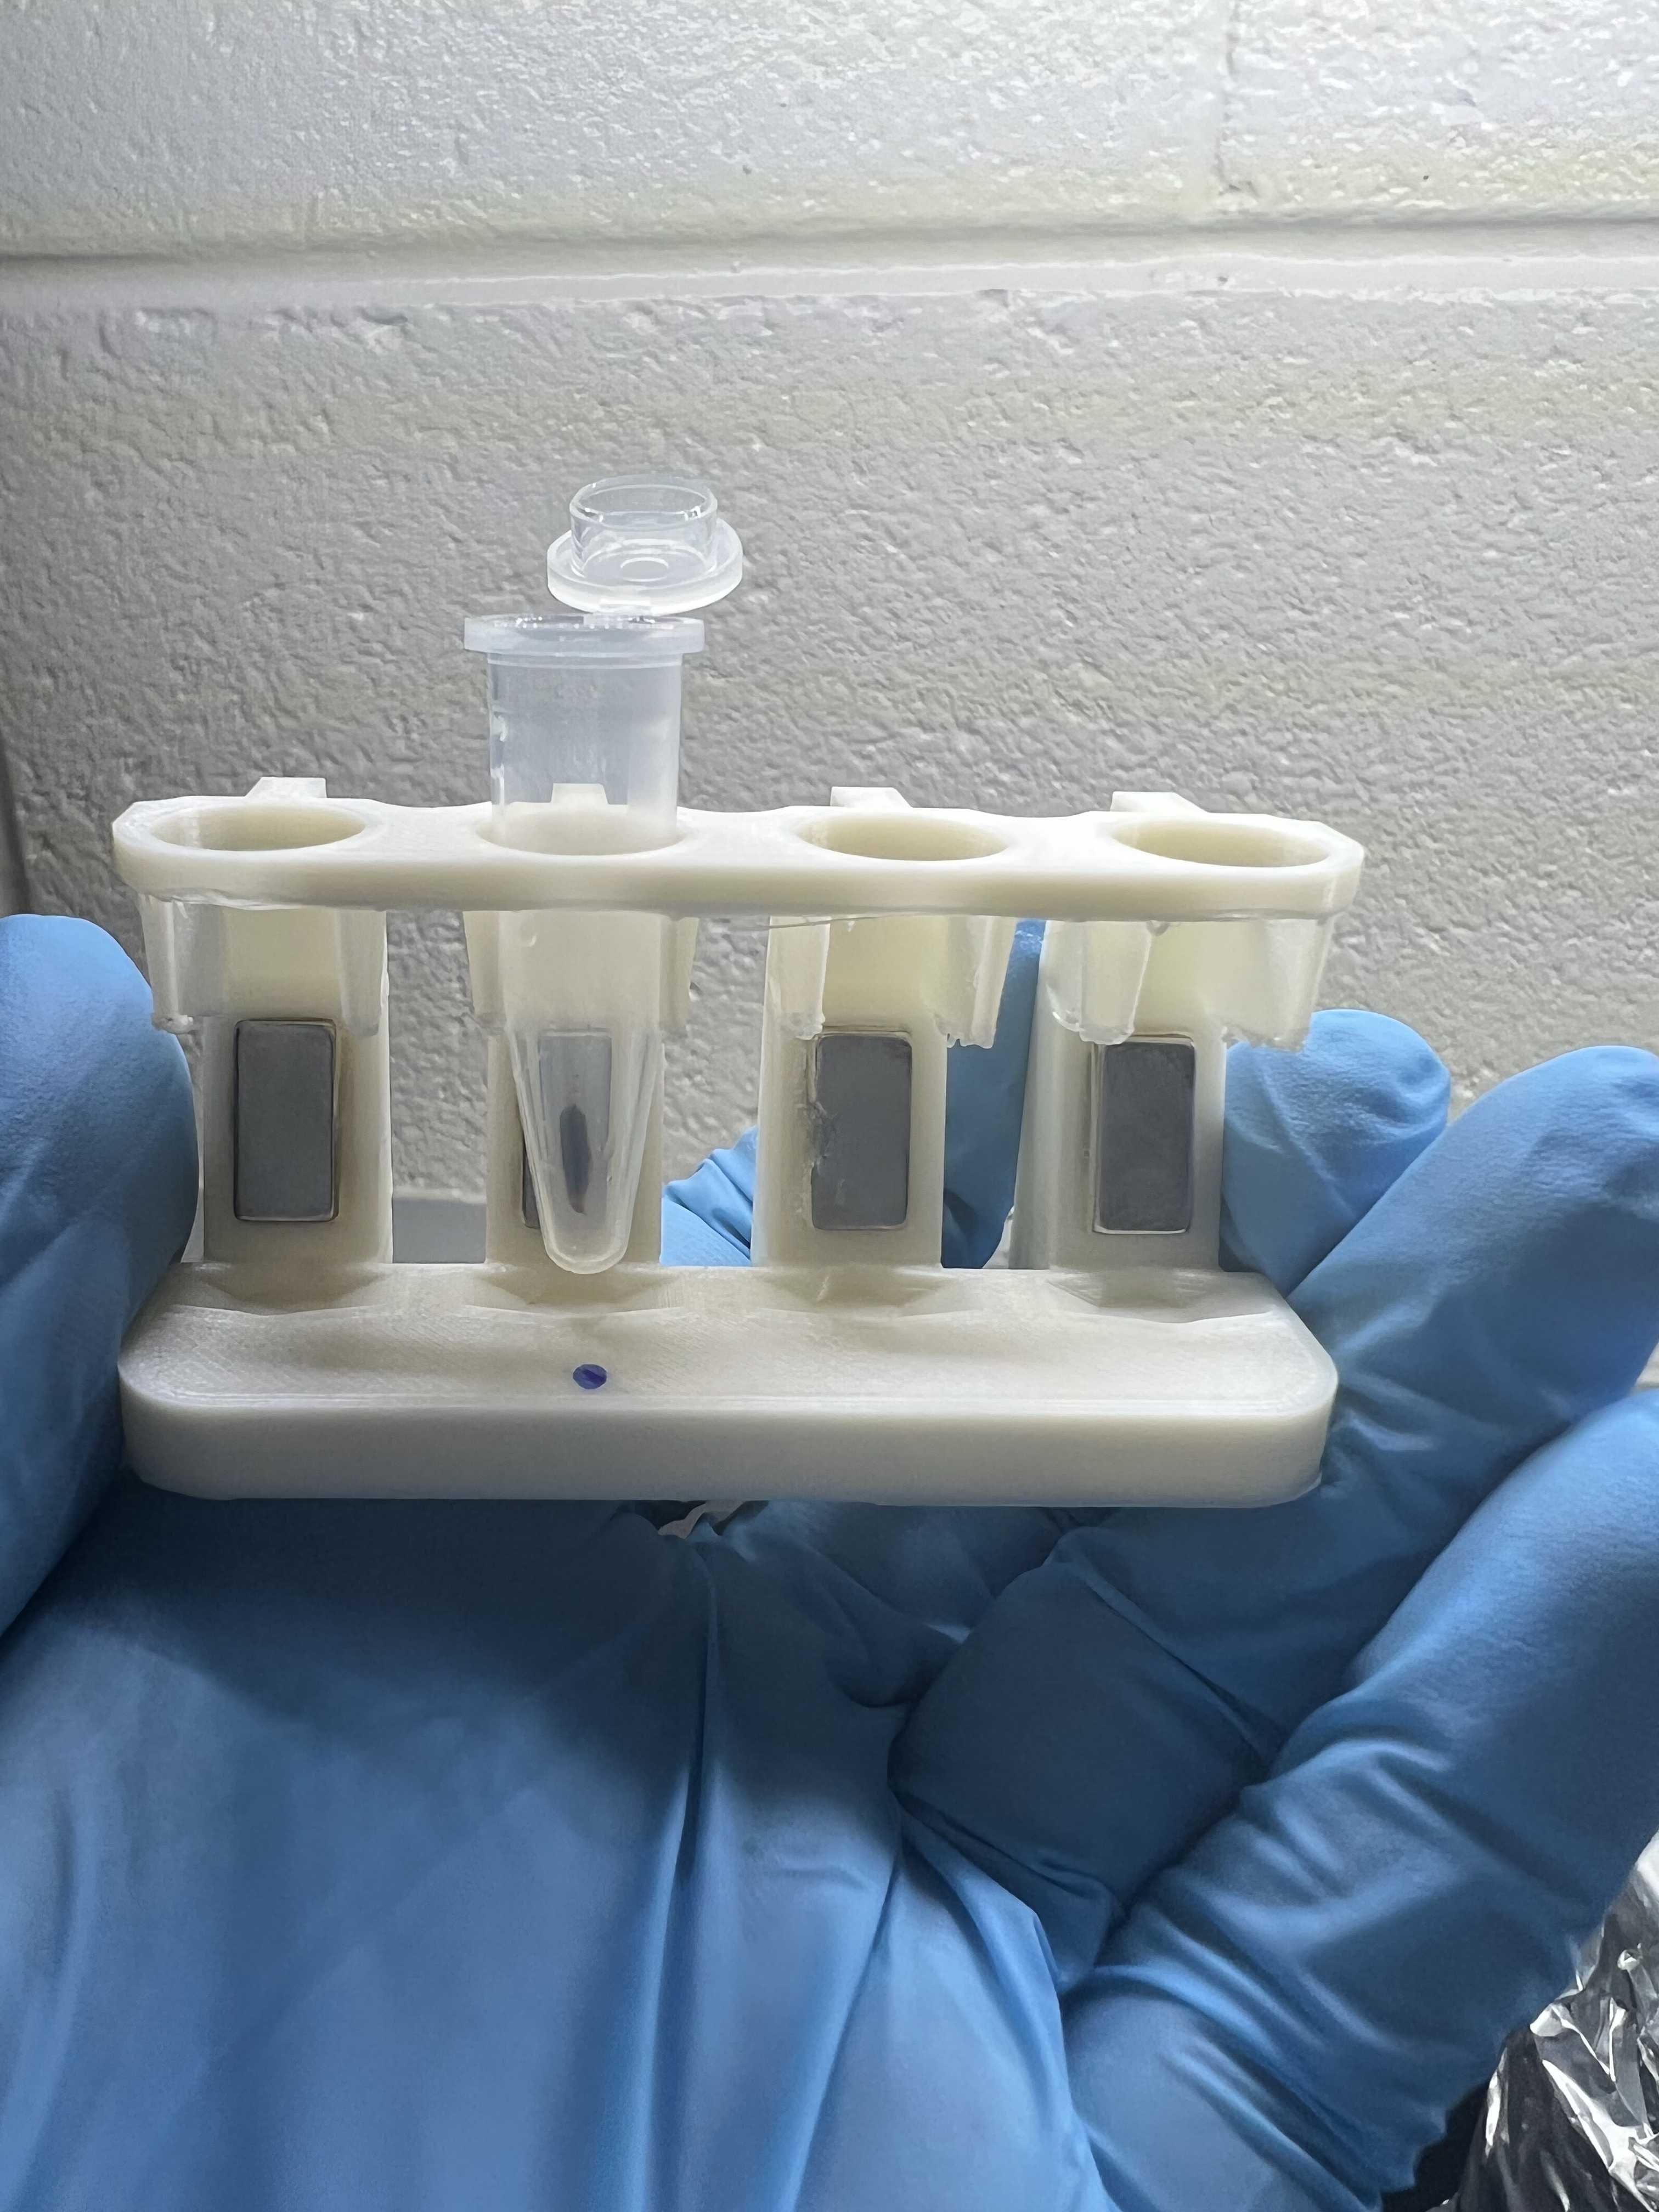
Put back on the rack and let pellet form

Citation
pelleted PCR product

3.16.

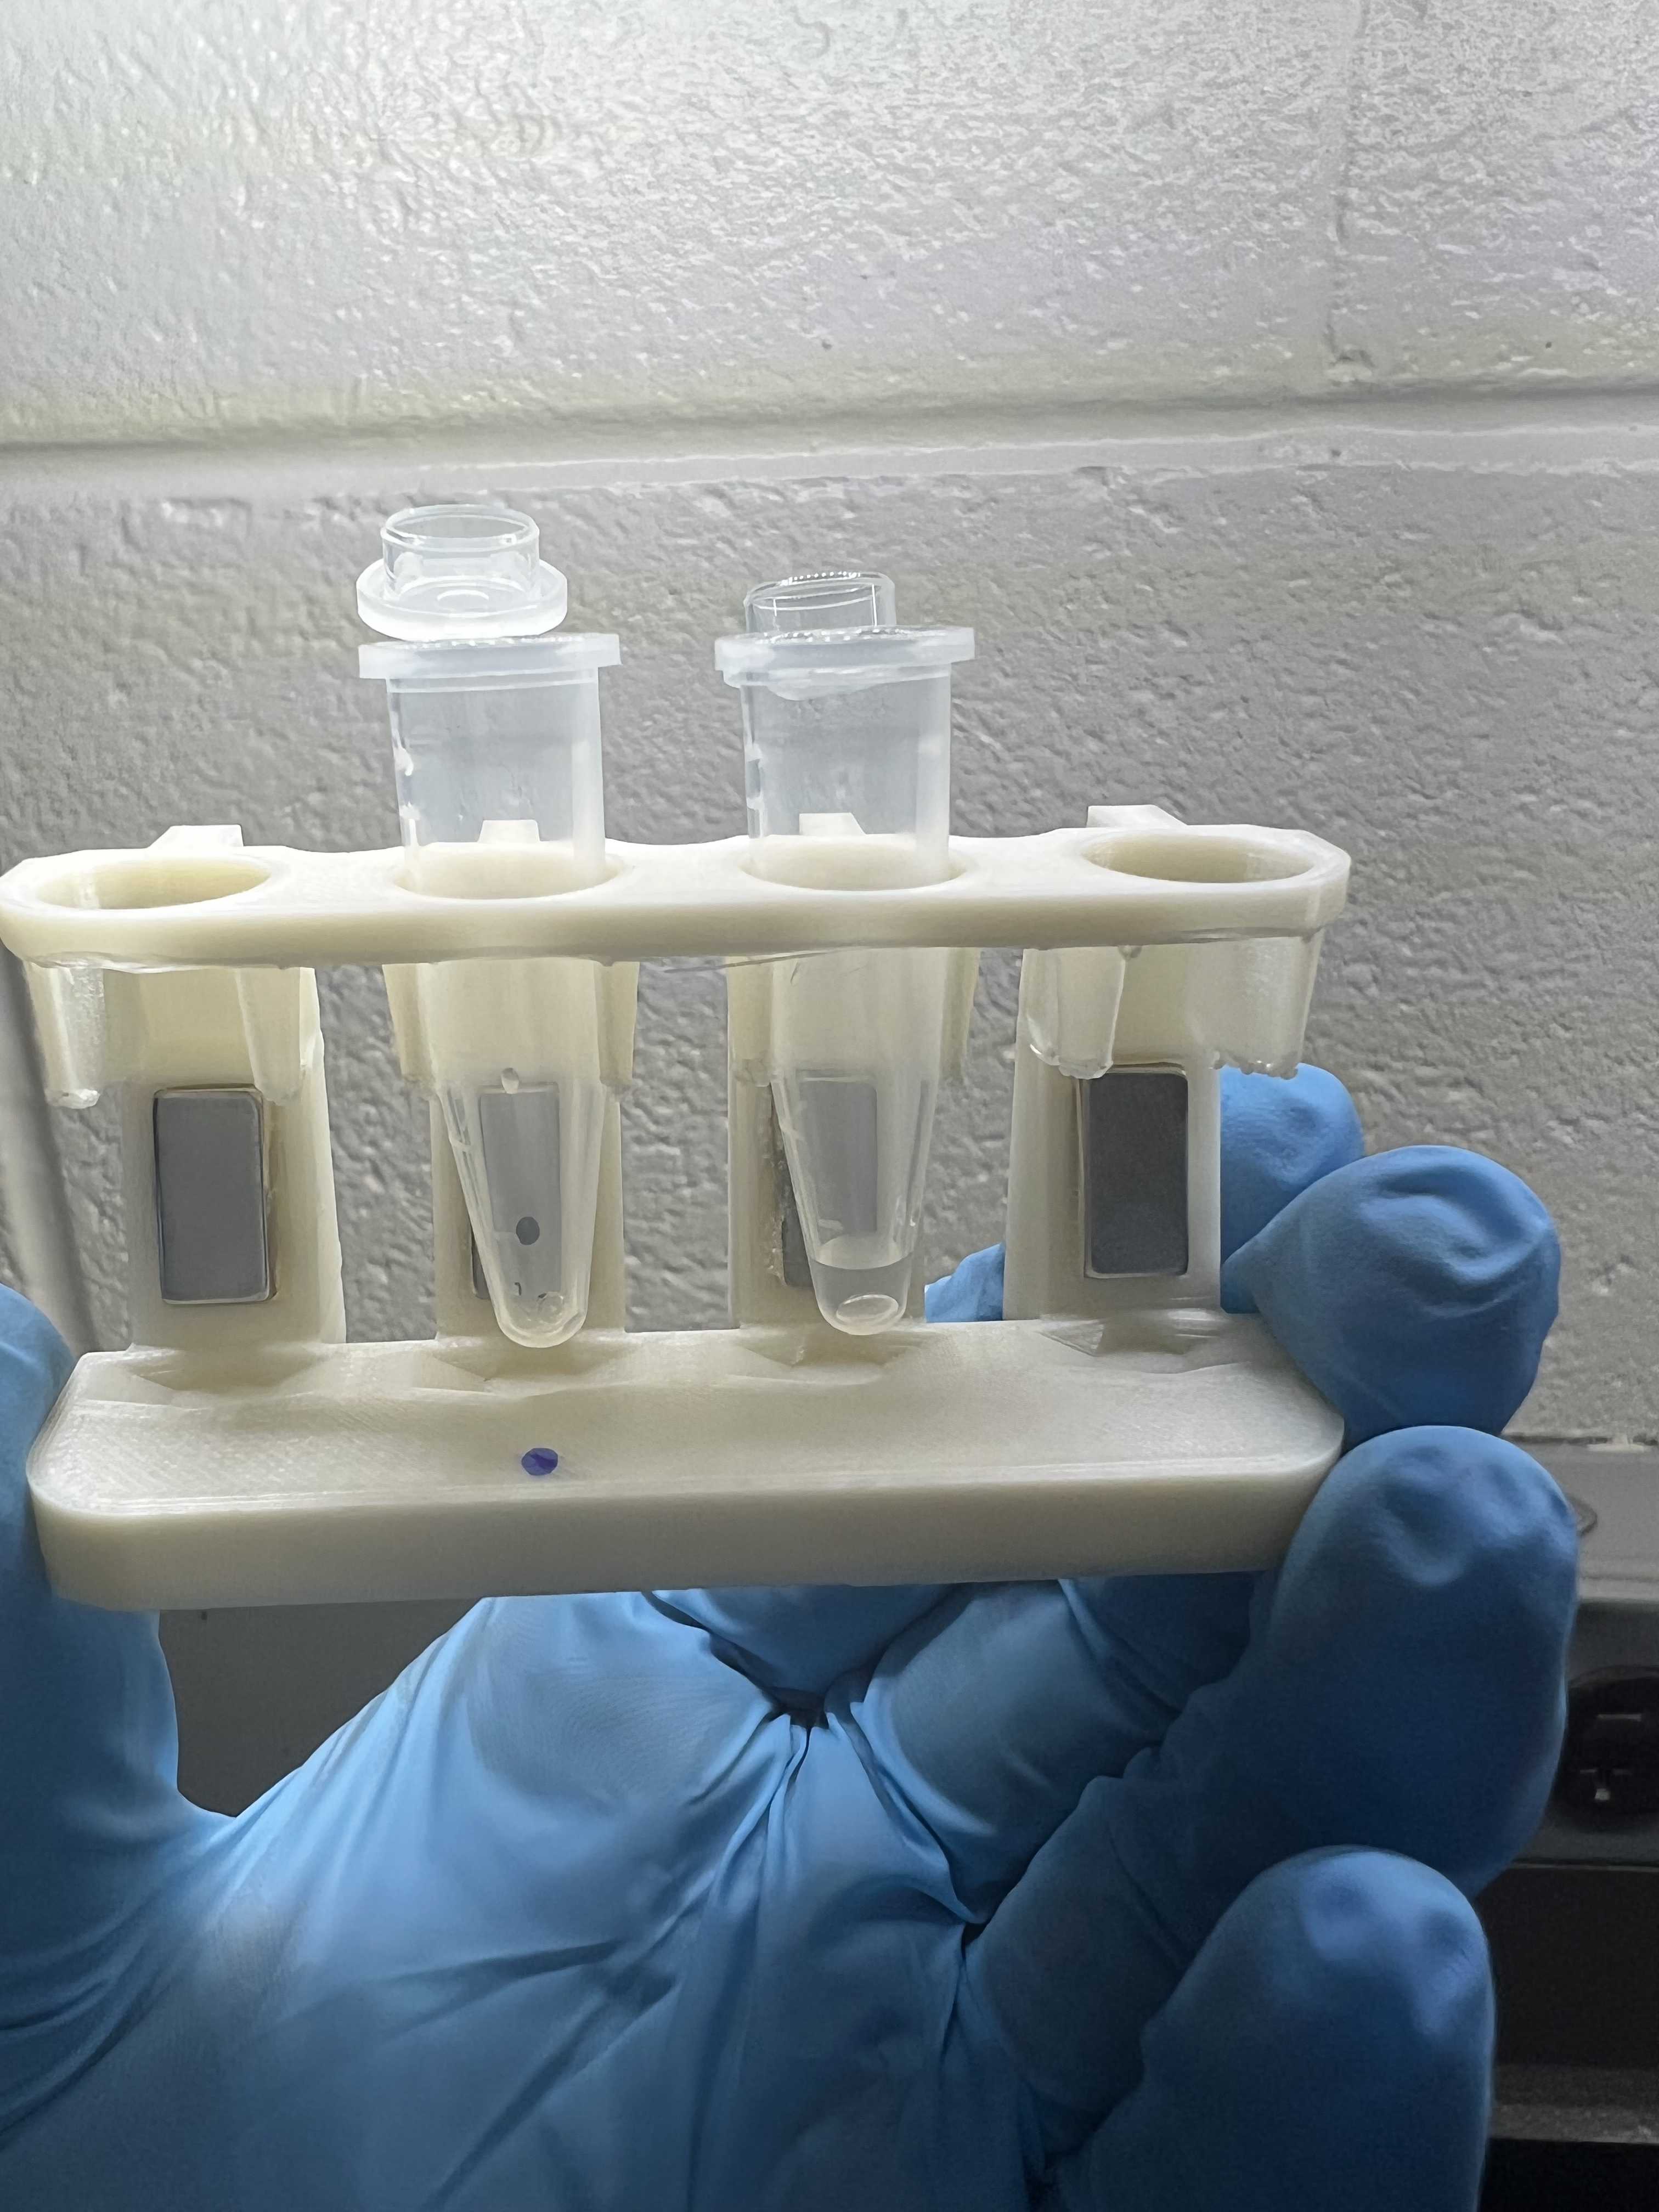
Remove liquid away from pellet-->this is our cleaned product

Citation
purified PCR product on right

3.17.

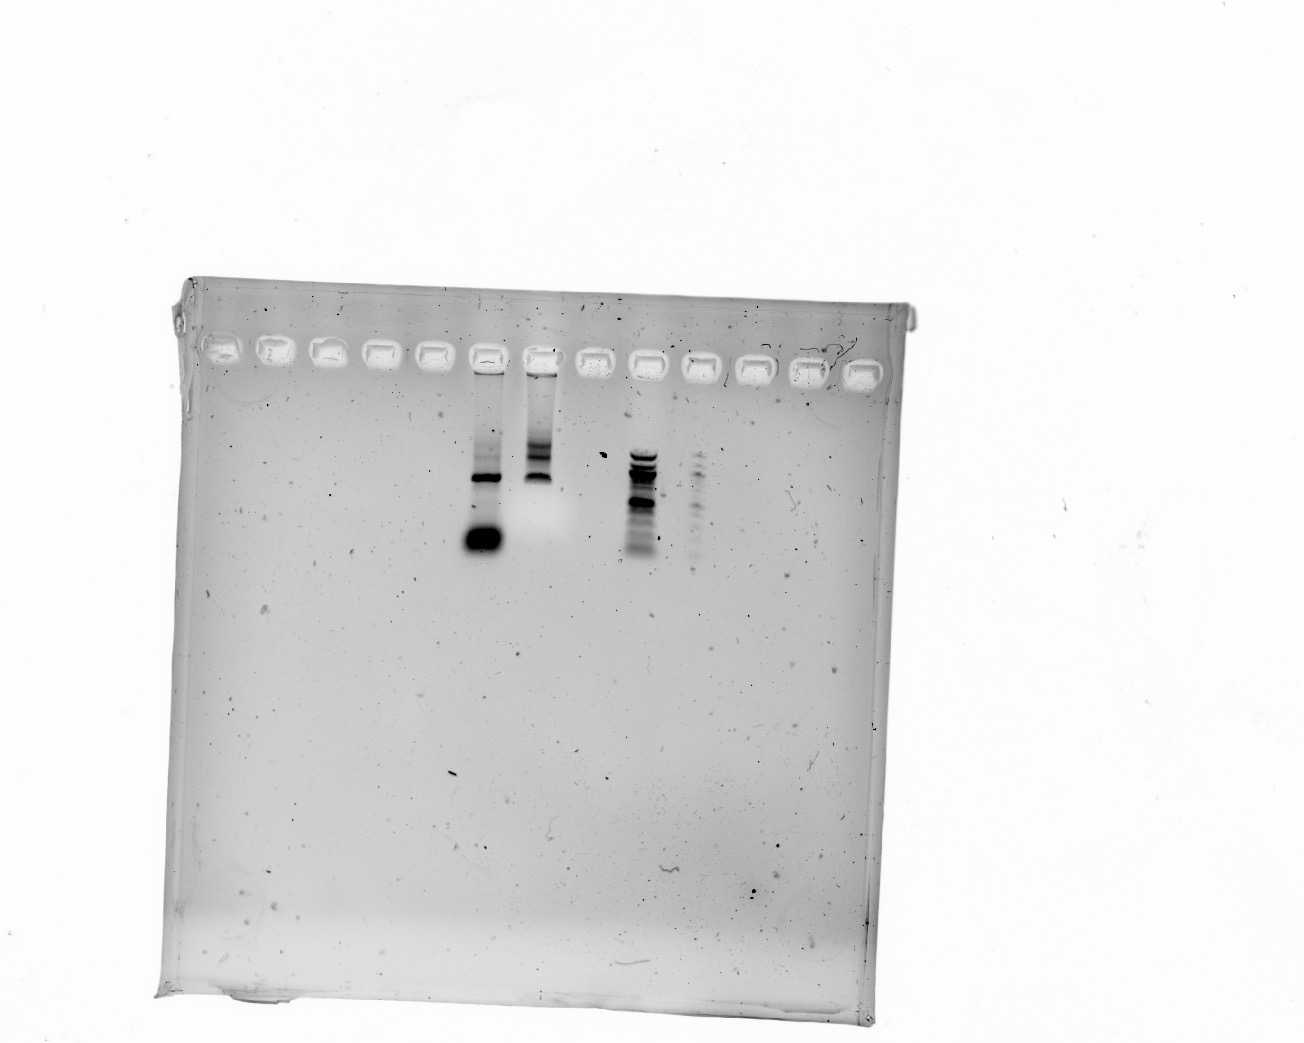
Run in a gel compared to uncleaned product to evaluate success

Citation
First column is uncleaned product, second column is cleaned product, third column is 100bp ladder
·The clean was successful if the cleaned product does not have any bands below the Co1 band

3.18.

Quantify cleaned PCR with

Equipment

ValueLabel
Quantas FluorometerNAME
FluorometerTYPE
PromegaBRAND
E6150SKU
http://www.promega.comLINK

Qubit Fluorometer (QuantasTMFluorometer protocol listed below)

  1. Mix 1µL of DNA sample with 200µL of in a 0.5ml PCR tube.

  2. Vortex

  3. Place tube into the tube holder and close the lid

  4. Vortex sample again and repeat to be sure you got an accurate reading

3.2.

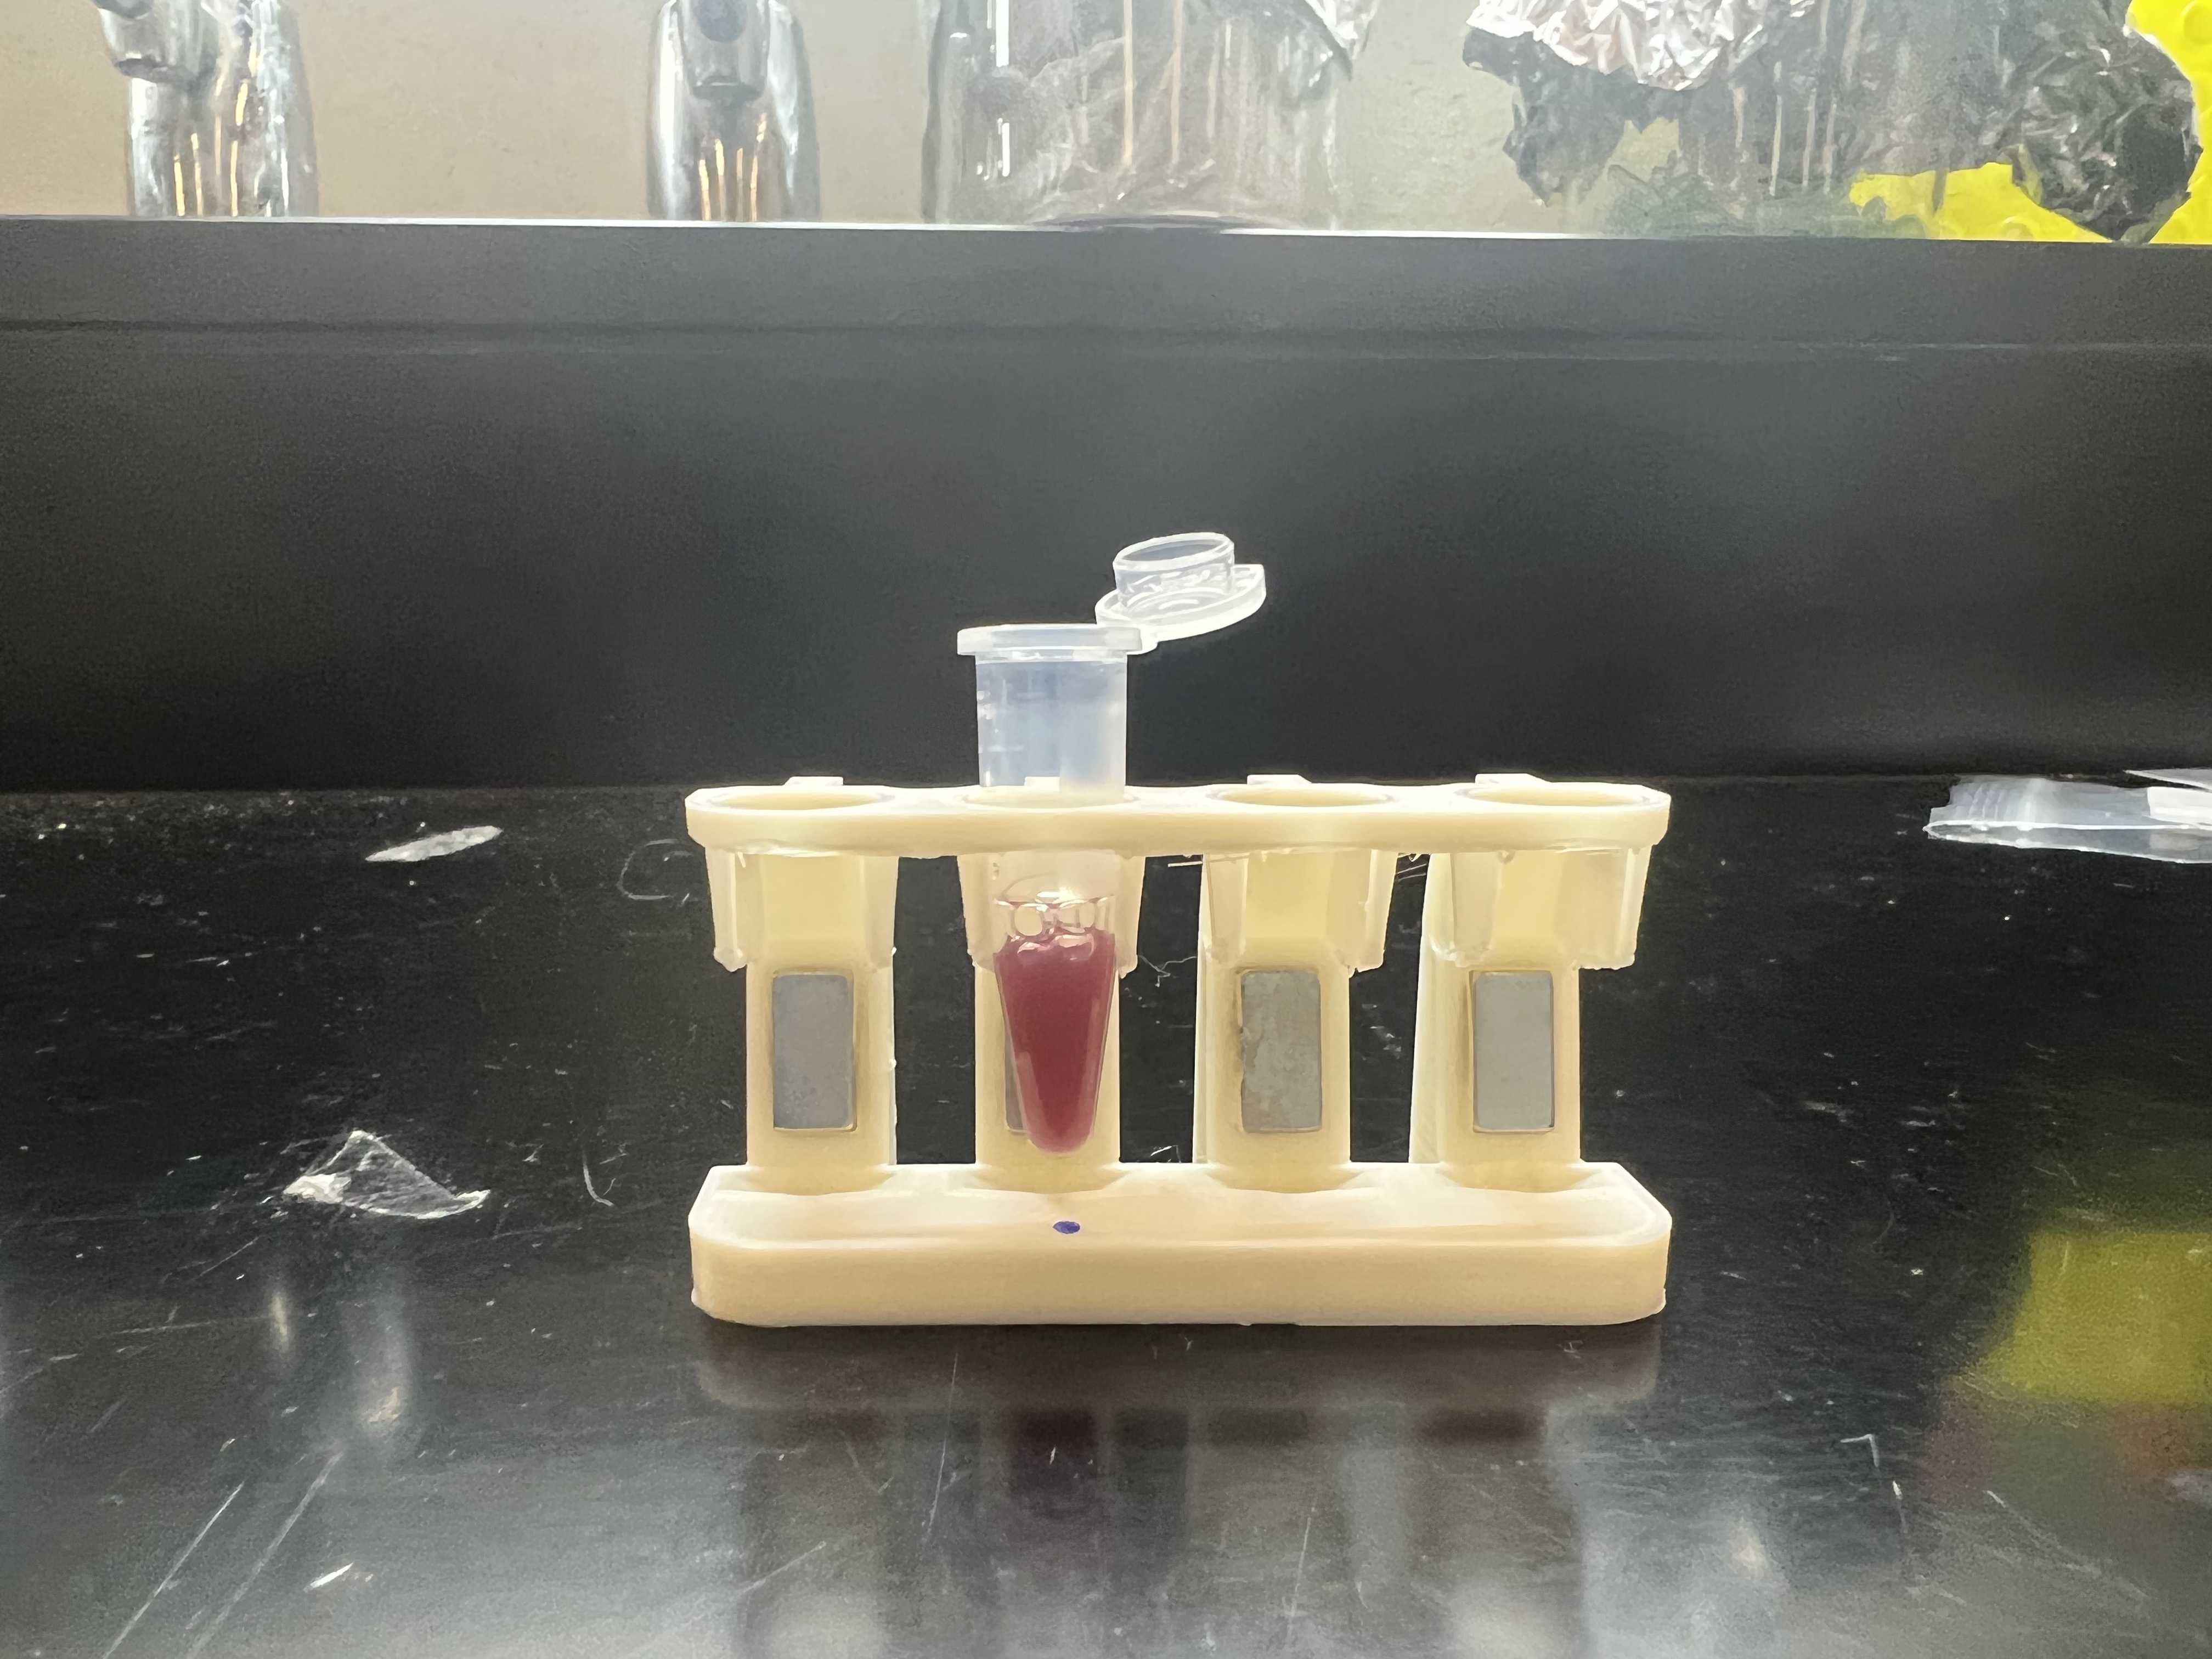
Take 250µL from the pooled PCR

Citation
Unpurified pooled PCR reactions

3.3.

Add 125µL of and pipette up and down to mix (Followed manufacturer protocol but listed here).

Note
We used 0.5 X AMPure beads

3.4.

Let sit for 0h 10m 0s at room temperature

3.5.

Let sit on magnetic rack for 0h 2m 0s

Note
Keep the tube open, jolting the tube when closing and opening the lid can disturb the pellet

3.6.

Remove supernatant, leaving about 5µL on the bottom of the tube

3.7.

Add 250µL of freshly made 70% ethanol and pipette gently up and down

3.8.

Let sit on rack for 0h 0m 30s

3.9.

Remove all ethanol

Library preparation

4.

Library preparation

Note
Make sure to check flow cells before starting this step. There is a two-week lead time for Flongle flow cells so plan accordingly.

4.1.

Dilute DNA-->concentration of DNA should be 100-200fmol amplicon DNA

Note
The protocol listed below is provided by Oxford Nanopore Technologies, modified based on the recommendations given in Srivathsan et al. 2021.
Citation
Srivathsan A, Lee L, Katoh K, Hartop E, Kutty SN, Wong J, Yeo D, Meier R 2021 ONTbarcoder and MinION barcodes aid biodiversity discovery and identification by everyone, for everyone. BMC biology https://doi.org/10.1186/s12915-021-01141-x

Note
·When the concentration of our pooled and cleaned product was 41ng/µL, we did 21µL of water and 1.5µL of DNA.·When the concentration of the pooled and cleaned product was about 80ng/µL and about 94ng/µL, we did 21.5µL of water, 1µL of DNA

4.10.

Add 100µLof 70% ethanol (do not touch pellet)

4.11.

Remove ethanol

4.12.

Add 100µL of 70% ethanol, take off magnet rack and spin down, put back on magnetic rack

4.13.

Remove ethanol, allow to dry for about 0h 0m 30s

4.14.

Add 30.5µL of ddH2), remove from magnetic rack and resuspend pellet

4.15.

Incubate off rack for 0h 2m 0s

4.16.

Place back on magnetic rack until clear

4.17.

Remove liquid and put in clean tube

4.2.

Combine in a strip-tube: 22.5µL of diluted DNA, 3.5µL of , 1.5µL of , and 2.5µL of H2O

4.3.

Heat at 20°C for 0h 5m 0s, 65°C for 0h 5m 0s

4.4.

Transfer mix into new 1.5 ml tube

4.5.

Vortex

4.6.

Add 30µL of to the mixture

4.7.

Incubate on Hula mixer for 0h 5m 0s

4.8.

Spin down, place on magnet until clear

4.9.

Keeping the tube on the magnet, pipette off supernatant

Library preparation: Ligation

5.

Ligation

5.1.

Spin down and and put on ice. Thaw and vortex and put on ice, thaw and mix (EB)and put on ice, thaw (SFB), vortex, put on ice

5.10.

Allow to dry for about 0h 0m 30s

5.11.

Add 15µL of, spin down and resuspend, incubate at room temp for 0h 10m 0s

5.12.

Place on magnetic rack and allow pellet to form, remove liquid and transfer to a clean tube

Note
·I repeat this step twice to be sure it is fully cleaned

5.13.

Quantify

Note
Following same quantifying protocol as previously listed

5.14.

Dilute so the concentration of the DNA library is 3-20fmol

Note
·When the concentration of the DNA library was 1.2ng/µL, we diluted 3µLDNA: 2µL Elution Buffer (EB)·When the concentration of the DNA library was 1.4ng/µL, we diluted 2.9µL DNA: 2.2µL Elution Buffer (EB)

5.2.

Combine in a new tube in this order: 30µL of DNA from previous step, 12.5µL of LNB, 5µL of , and 2.5µL of AMX

5.3.

Flick and spin mixture, incubate at room temp for 0h 10m 0s

5.4.

Vortex

5.5.

Add 20µL of to mixture and flick tube

5.6.

Incubate at room temp on Hula mixer for 0h 5m 0s

5.7.

Spin sample, put on magnetic rack, let pellet form, pipette of supernatant

5.8.

Add 125µL of , flick tube to resuspend, spin down, return tube to magnetic rack, let pellet form, remove supernatant

5.9.

Add 125µL of , flick tube to resuspend, spin down, return tube to magnetic rack, let pellet form, remove supernatant

Note
·I have found that the pellet does not stick to the magnet as strongly during this step as it does in previous steps, making it harder to pipette off the supernatant. Pushing the tube as close to the magnet as you can and tilting the rack while pipetting the supernatant off helps.

Setting Nanopore Parameters

6.

Setting Nanopore Sequencing Parameters

6.1.

We largely followed the default settings for the sequencing run. W set the sequencing kit to SQK-LSK-109, run time of 17 hours, and changed the FastQ so that it didn't compress the files.

Loading flow cell

7.1.

Priming buffer: mix 117µL of and 3µL of in a tube

7.2.

Mix 15µL of 10µL of and 5µL of DNA library in a separate tube

7.3.

.Insert 120µL of the priming buffer into the flow cell

7.4.

Insert 30µL of prepped DNA library into flow cell

Demultiplexing

8.

Demultiplexing

Note
Full description of these procedures and the different options can be found here: Full description of these procedures and the different options can be found here: https://github.com/asrivathsan/ONTbarcoder

Creating Demultiplexing file

8.1.

Create an excel sheet with 5 columns* First column: sample/specimen ID

  • Second column: forward tag
  • Third column: reverse tag
  • Fourth column: forward primer sequence

Note
When filling in sheet, be careful to not insert extra spaces or punctuationColumns 4 and 5 should be the same throughout the whole sheetIf you extracted and amplified 288 specimens, you should have 288 rows

8.2.
8.3.

Merge resulting Fastq files

8.4.

Run ONTBarcoder https://github.com/asrivathsan/ONTbarcoder using default parameters.

8.5.

View resulting CO1 sequences for further analyses.
推荐阅读

Nature Protocols
Protocols IO
Current Protocols
扫码咨询