Growth of Chitosan nano brushes using FMED as electropolymerization method
Eric S McLamore, Maria J Torres, Lidadi Agbomi
Disclaimer
Abstract
This protocol describes the electropolymerization of chitosan nanobrushes in the working electrode of a Laser-induced graphene (LIG) sensor. The process requires approximately 36 minutes (including baseline analysis). The electropolymerization times are not included in this protocol. A 2-channel function / arbitrary waveform generator (SINGLENT SDG 1032X) was used throughout this protocol.
This protocol uses the Microwave Synthesis of the low molecular weight deacylated chitosan protocol as an electropolymerization solution in the working electrode of an LIG. See the protocol below.
Microwave synthesis of low molecular weigth deacylated chitosan
Before start
Be sure to wear appropriate safety PPE throughout (lab coat, gloves, eyewear).* Electronic or physical lab notebook may be used throughout
- See experimental plan guide for tips on planning your work
Steps
SECTION 1) Preparation
Prepare a glass cell vial with lower molecular weight deacylated chitosan solution.
Previous microwave-assisted synthesis of lower molecular weight deacylated chitosan solution prepared is required required following the next protocol ( Link here) :
Microwave synthesis of low molecular weigth deacylated chitosan
Set up the work conditions in the SINGLET SDG1032X. 
- Turn on the SIGLET wave generator by pressing the "ON/OFF" button once and wait until the equipment turns on completely.
- Press the waveform button (See Fig. 1A ) to select the Sine waveform for the conditions using the same procedure mentioned in this note.
SECTION 2) Electropolymerization using FMED method
Conduct an electropolymerization
-
Add in a glass cell vial the
8000µLof the previous lower molecular weight deacylated chitosan solution.
Figure 2. A) Set up the clips for the wave signal generation. B) Connection to the Laser-Induced Graphene (LIG) sensor in the working electrode for the FMED of Chitosan nanobrushes. -
Introduce the three-electrode LIG sensor in the digital oscilloscope clip in the lower molecular weight deacylated chitosan solution (Fig. 2A).

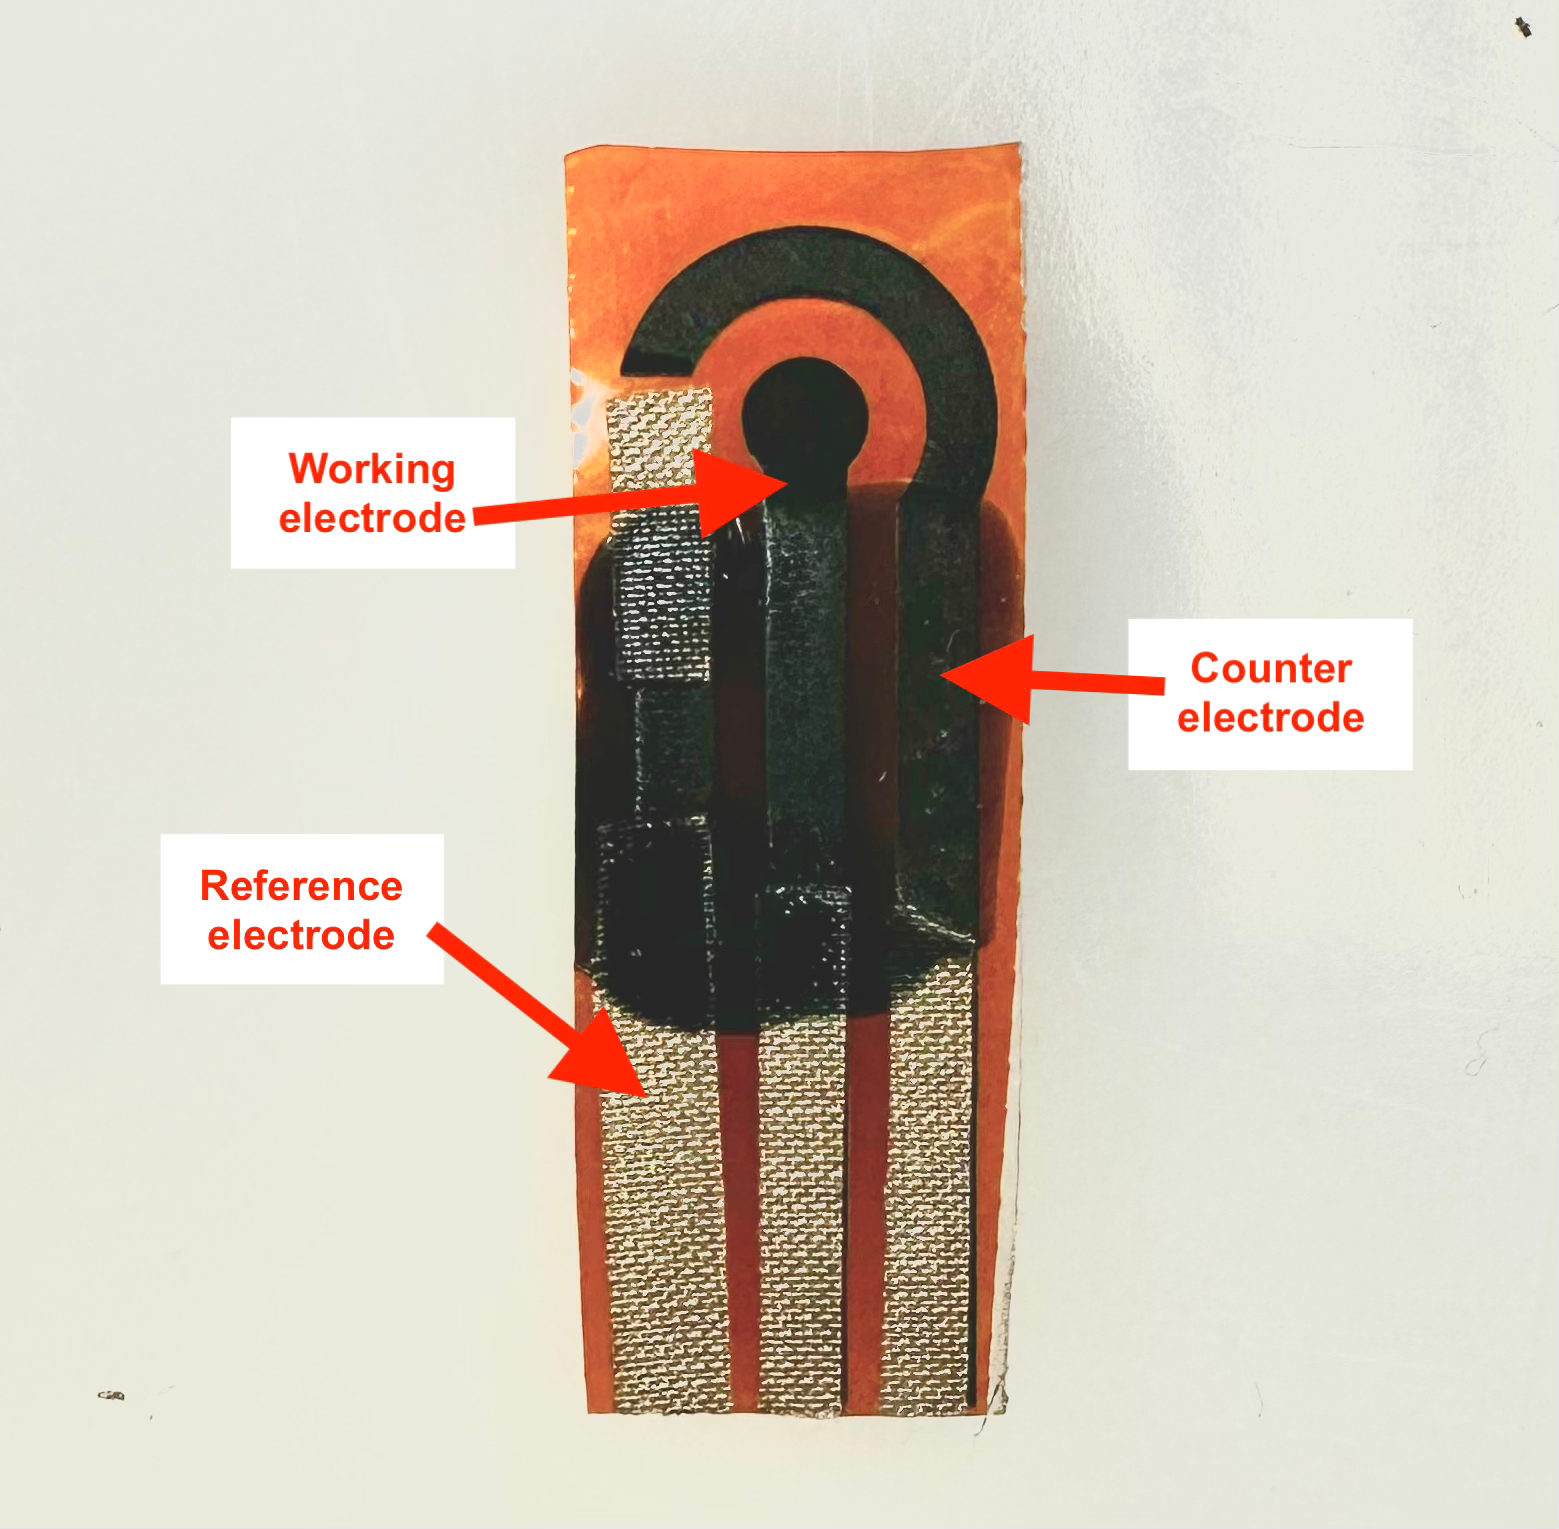
Figure 3. Laser-Induced Graphene (LIG) sensor, a three-electrode system (reference, working and counter electrode) -
Connect the alligator clip to the working electrode of the Laser-Induced Graphene (LIG) sensor. Ensure it is connected correctly in the middle of the metal tape of the working electrode.
-
Introduce the LIG sensor in the lower molecular weight deacylated chitosan solution.

- Set up the time with a timer for the FMED electropolymerization of lower molecular weight deacylated chitosan in the working electrode of the LIG sensor. Start the time and, at the same time , press the Output button ( Fig. 4 ). Be sure that the output button is ON (A green light indicates that it is already working).
SECTION 4) Stabilization and storage
Wash, dry and storage the sensor
-
Clean the LIG working electrode with DI/nano-pure water and dry the water carefully without touching the sensor electrodes. Dry from the sides with a kimitech wipe.
-
Let it dry for
0h 5m 0sin a paper towel and then storage the sensor in the fridge at4°C
SECTION 5) Clean up
Clean up space and dispose of waste
-
Turn off the SIGLENT Wave generator and unplug it from the power outlet.
-
Dispose of used chemicals according to the lab safety plan. Chitosan has a dedicated chemical disposal container.
- Wash all glass containers used in the experiment and let it dry.

