Reconditioning PCR for removal of PCR bubbles in Illumina librarys
Dominik Buchner
Abstract
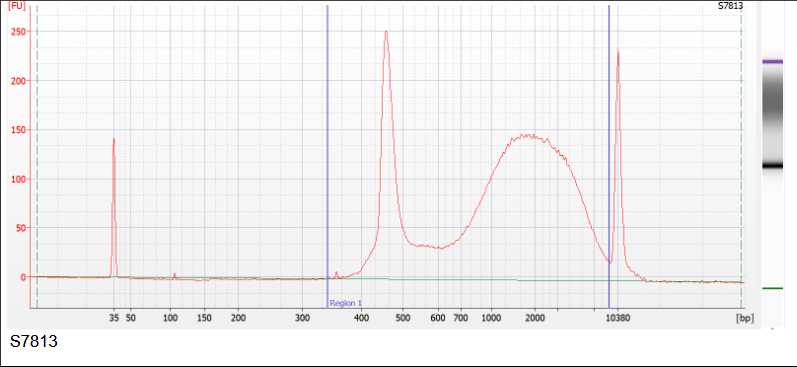
This protocol describes how to remove partly single-stranded PCR products ("PCR bubbles") from Illumina libraries. For more information about this phenomenon please see this explanation from Illumina. For metabarcoding libraries, it can be hard to estimate the optimal input template or the perfect amount of PCR cycles and therefore overamplification happens frequently. PCR bubbles cannot be quantified reliably with fluorometric-based methods and may look different on different capillary electrophoresis devices.
PCR bubbles can lead to failed sequencing runs due to over- or underloading the flowcell.
Steps
Quality control
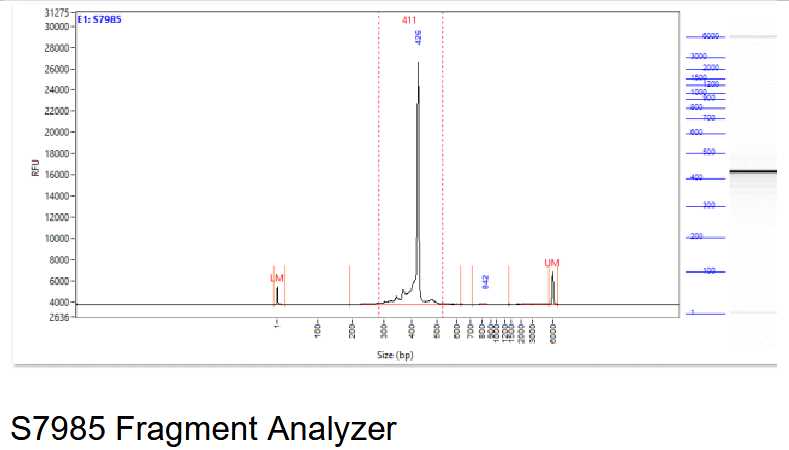
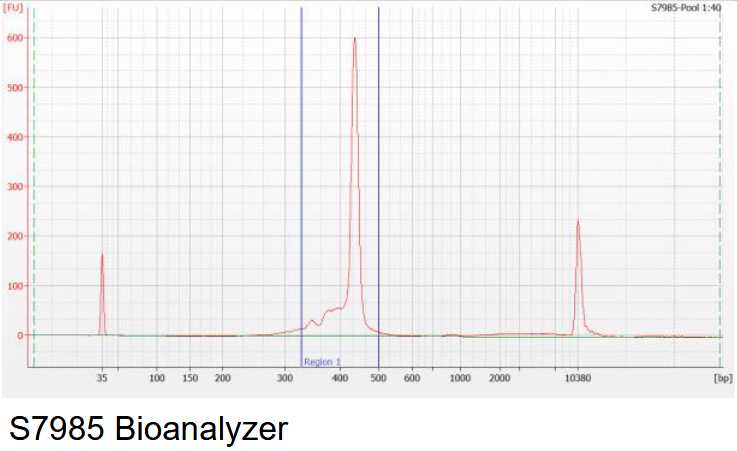
Perform a quality control of your library. PCR bubbles may look different depending on the method used for quality control. See below and example of the Fragment Analyzer, Bioanalyzer and an agarose gel.


Library concentration (optional)
Concentrate your library by reducing the volume down to 100µL . We usually do this with a spin-column based protocol, although this can be performed with magnetic beads as well.
Reconditioning PCR
Fill the concentration of your library and the project name into the Excel spreadsheet. The suggested master mix for the reconditioning PCR will be calculated accordingly. We usually go for 1250ng of template input, however, this can be adjusted if necessary. master mix
Perform the PCR with 4 reactions of 50µL .
PCR clean-up
Pool the 4 PCR reactions.
Perform a column-based PCR clean-up to exchange the buffer. This can also be done with magnetic beads. Elute the DNA in 100µL .
Guanidine-based DNA extraction with silica-coated beads or silica spin columns
Size-selection
Perform a size selection with a ratio of 0.7x to remove residual primer dimers. Elute the final library in 50µL .
Perform final quality control
Perform a final quality control. Quantify the library concentration with a fluorometric-based method and perform quality control via electrophoresis. The shoulder should be gone and the library should be good for sequencing.


